Showing posts with label ableton effects. Show all posts

Thursday, November 18, 2010

My 2010 Lessons for DJing - Less is More - by FroBot


Well...2010 will be finished here in about a month or so...and I have stopped DJing for the rest of the year. I have many things going on in my life like a video / audio company I am starting in Hawaii, and a vacation back to America. So I wanted to write a small piece about my biggest lesson of 2010 when it comes to DJing.

Now, before I go too far, I know tons of you avid ableton DJs are gonna rip me apart for this blog. Remember, this is an opinion, and doesnt necessarily mean its the best opinion...but its MY opinion.

Ok...so my biggest lesson of 2010 is "LESS IS MORE". This can be applicable in many ways...lets start with the most simple way...and I will build up from least important to the most important.

5. Less is more when it comes to your tracks content. I have noticed this year, that the tracks (in house and tech house) that have nice simple bass lines, nice steady swinging beats, and profound but simple lyrics, are ALWAYS getting the BEST response on the dance floor. Maybe its because the normal dance goer is not as musically inclined as the artist performing it, maybe its because from a technical stand point there is more room for certain frequencies to stand out and punch. But, what I THINK it is, is that producers, now in the days of digital releases, are looking to gain smash, and make their track the LOUDEST they possibly can. By making more simple grooves, this creates more room for compression, and ultimately more room for the final output level...letting you make a LOUDER track. I have noticed that most people dont notice all the great effects and envelope automation that I do...but rather, HOW LOUD the track is. The producers that can make these SUPER LOUD tracks, always seem to sound better than the LESS LOUD track that was on right before it. When the track is more simple, you can raise the overall levels pretty high (above industry standards and distorting )...and that in turn makes the BASS sound more bassy, and the kicks thump your chest more. This ultimately has the greatest effect on the crowd, rather than complex rhythms and melodies that make controlling the distortion over 0db rather difficult. So, when I get a new track, and toss it into ableton, I always check how loud it is compared to the other tracks. Even though I could control how loud the track is using the tracks individual gain...this is not CONTROLLED distortion as producers have done. They have spent countless hours raising the gain, and using mastering techniques to clean up the distortion....using their ears to decide HOW distorted it is. When you can keep the track at is normally produced level...yet its LOUDER...that is when you get a thumping track in the club. Even when I listen to a track at home on professional studio monitors, and as a producer, can hear the compression and distortion (especially in the crash cymbals), it never seems to be noticeable in the club...and definitely not noticeable to the dancers. So....back to simple, thumping, loud tracks! I know a from a purist stand point, its WRONG...but in the club...all that matters is making the peoples feet and bodies groove harder.

4. Less is more in terms of the amount of remixing you do. Again, I know tons of you DJs will disagree...but this is what I think. There is a BIG DIFFERENCE between scratch DJs and House DJs. In house...people want to hear tracks for a little longer so they can really groove on a track. This is not hip-hop, where you are playing vocally charged tracks that people know because they are remixes of TOP40 tracks. These are groovy, rhythmic tracks that people move to because of their dynamics and flow. Funky to the core. Remixing is a nice technique to do as a DJ, but use it sparingly. One reason is, most of the time, if you are a thoughtful, "searching for tracks" kinds of DJ...chances are...99% of the people at the club have never HEARD the song you are playing in the first place. So remixing it doesnt do much good because they dont know what it sounded like originally. It kind of defeats the point of live remixing unless they can realize you are remixing it. And another thing... What makes you think you can remix it BETTER than the original artist anyway. That artist spent COUNTLESS hours making their track, thinking about every little detail of how they wanted the track to sound. If you are remixing it live, you are only changing it to sound the way YOU wanted it to sound...not how the artist originally intended. By adding an accapella or something over it...you are now making the track into what YOU think is good, and not what THEY thought was good....and to be quite frank....99% of the time, the artist had it RIGHT in the first place....the DJ only ruined it. From a production stand point (which I will get into in my most important lesson)...and from a TASTE stand point. Usually, the reason we DJs remix a track is because we have heard the original so many times, that remixing it makes it sound FRESH to us. But FRESH does not mean BETTER. As DJs, we listen to TONS of songs. This creates a vicious "ADD style" chain reaction. The more tracks we listen to, the more we want to hear fresh new tracks. This makes us get sick of certain tracks more quickly...the more and more we listen to music. So, what do we do when we really like a track, but have heard it too many times...remix it. But again, this doesnt make it BETTER...it only makes it DIFFERENT. In the future, I will only use remixing techniques if I absolutely feel it enhances the track, neurally connects to the audience, and is worth the effort. I wont do it for the mere fact of remixing it.

3. Less is more in terms of the amount of effects I use. To be quite frank...its OVERDONE. All these filters, delays, flangers...blah blah blah...its old! Some DJs do it ALL THE TIME. It sounds fucking horrible. First off, your ruining the dynamics of the track by doing it. Since music notes have fundamental frequencies and harmonics...removing certain ones with bandpass filters ruins other parts of spectrum that your arent filtering. Low pass and high pass are SIMPLY overdone. They can be used NICELY...HERE AND THERE...on build ups...or artistically where beats are becoming stagnant. But, in the future I will do less. If you are an ableton DJ...you have INFINITE amount of OTHER ideas you can do to make an interesting mix using clip envelopes, and more thought out mixes....rather than just turning some bullshit knob for the mere fact that you are BORED. As a house DJ...its OK to rock out a tune...and ENJOY IT...listen to it in the way it was intended.

2. Less is more! Im going back to the basics. To me, the art of mixing is just that - MIXING! Focusing on the seams between tracks and making them SEAMLESS! That is what I want to do in my next year, and what I have been focusing on. So many DJs are up there turning tons of knobs, doing all these crazy DJ effects...but when it comes time to switch between one track and the next...its a horrible...noticeable change! Instead of going nuts on your gear...how about using your time up there to more thoughtfully think about your next track...or even better yet...when you practice at home...remember what works and what doesnt. Its ok to pre-plan a little bit, as long as you are able to change depending on the crowd. But, DJing is about making nice seamless transitions between ONE track and the next! With ableton live, you have no EXCUSE for bad mix points besides your own negligence to prepare, or ability to hear what goes with what. With tools liked mixed in key (for only 40 dollars), and abletons ability to warp and match timing of tracks...there is really NO EXCUSE. Sometimes, DJs seem to feel like if they are standing up there not doing anything...they are doing something wrong. But, your HANDS dont have to be doing anything...how about instead...your BRAIN! Ultimately, its what makes the people enjoy the music and dance...that is what matters. And for the most part...they dont know what your are doing anyway...but they WILL notice when you change between 2 tracks drastically. So, make those mix points seamless, and spend more time thinking about HOW to make them seamless using envelope automation or skills. And dont worry about those people looking your screen...or that club owner who knows a thing or 2 from past DJs to judge whether you are doing A LOT or too little. THEY DONT MATTER. What matters, is good, thumping beats coming out of the speakers...and not what that 1% of other DJs that happen to be in the club THINK about the complexity of mixing. They are most likely just jealous anyway thinking "why is it that this DJing is doing so much less than I do...is so much less talented than I am, but the people are grooving like its no tomorrow". Fuck em, because ultimetely...you are the smarter DJ...and not the one just showing off the capabilities of your computer and software.

1. Ok...now the the most important reason why LESS is MORE! Ok...start the hate speech..."FroBot...your an idiot...you are wrong...etc etc). Alright...here it is. Ok...so since the release to the APC40 and novation launchpad...I have seen a drastic excess of ableton DJs. I, just like them, when I got my launchpad and VCM-600, loved the fact that I could download shitloads of loop samples...play them all together....improv a set...and make a NEW track that no one has ever heard on the fly. It is cool, and really works neurally with the need to HEAR new sounds constantly. Its almost like a disease we computer DJs have. After realizing the capabilities of your software...you seem to want to exploit them by running 12 tracks at the same time...individual HH and kick samples...etc etc. It is really cool...and for a LIVE style performance...where you are playing with BANDS and improv musicians...it is truly great. I definitely enjoy it more than DJing, because I have more control over unique sounds, and it really fuels my creativity. But...DJing is not about this. Its about providing a thumping beat that is rhythmically stable and full of nice changes, build ups, and thought out construction. The Key here is - IMPROV ABLETON AUDIO IS NOT MASTERED AUDIO!!!!!!
This is key to remember here. There is a HUGE DIFFERENCE between a song made by a producer that has been compressed, balanced, and made to perfection - and running multiple audio tracks together, improv style. Mastering is a KEY element of making a dance track...and real producers know this. There are so many important elements that go into getting the THUMP out of your kick, the WARMTH out of our bass, and the frequency separation of all your elements. Steps involving compression, harmonic balancing, EQing, overall reverb, harmonic exciters...all very precise configurations depending on the frequencies being used. When you are playing with multiple samples, especially in improv style...you are taking this element out of the track making process...leaving...what producers consider...a track before the the mastering stage...or even worse...the mixing stage. Each sample that you play, is using certain frequencies in the spectrum. In order for things to sound right and powerful, is important to make way for each sound to stand out clearly...which means TIGHT EQing. Using notch filters to remove certain elements is CRUCIAL in making a thumping dance track. Especially in your kick and bass...most producers use sidechaining when producing to make sure that the kick and bass have nice equal room to stand out and shine...and that their high hats have nice placement, ALONE...to stand out. In an even more juvenile concept...how about even the KEY of the god damn sample. Tons of people arent even checking the keys of their samples...having a kick at say D, and bass at C. It just sounds terrible!!!! Without an understanding of your parametric EQ, spectrum analyzer, and the concept of detuning your samples...your cant even start to improv using your launchpad other midi controller. The overall result is a LESS powerful sounding set...and obviously sounds different to the DJs before and after you who are using vinyl, CDJs, or even a computer doing less complex mixing. I didnt even get into how HARD it is to do all this mixing correctly in the first place...and many of the people I see doing this style of DJing are NEW to DJing...and they can run 6-12 tracks at the same time without fucking up? That is a whole other point in itself. NOW I understand why many producers still DJ on CDJs...but are really good at understanding ableton. Because in the end...all that shit doesnt matter...its about a good, rocking beat. Even if you are just adding a few samples on top of an already mastered track... doing that...you are RUINING the final mastered sound of the track. When you add frequencies to a mix...it not only puts new frequencies in...but can change correlating harmonics of other sounds. Just look at your spectrum EQ...sit down with a professional...and prepare to cover yourself from the vomit that is certain to be in your lap.

Now, some of you proficient with ableton live know some workarounds for this. Some I have heard is using Ozone, and analog warmers...etc etc. Yes, these are all good ideas, and can help to clean up your sound...but none of them can even compare the the results of a nicely mastered track. There is a video where deadmau5 showed how he gets the final sound from his improv style sets. Here - http://www.youtube.com/watch?v=GTCqeWu094I It takes TONS of processing, and extreme knowledge of digital music before you can actually produce a live set in improv form that stands up to real mastered tracks. The fact that he already has a good background in music and digital production, also helps with this. He really isnt improvising...he knows what his sounds are doing, and mixes them QUICKLY....but is still thinking about the placement of certain frequencies. This is not the same as loading up a bunch of samples and playing them all at the same time. Save that for JAM SESSIONS, or LIVE EVENT gigs, where other artists at the event are ALSO using un-mastered audio samples...or live instruments. When playing these kinds of events, your final output sound is not intended to be CLUB THUMPING, but rather an artistic musical creation where value is placed on the art and not the power of the sound. I have YET to see a local ableton DJ that plays in this improv style in the clubs...even come close to getting the sounds of a mastered track. In the end, you are left with weaker dynamics, lower volume, and ultimately have to push the gain on the clubs mixer. That is the only option you are left with...but still will not compete.

1.2 - Oh...and less is more for one other very important reason! You can get DRUNK! When you are at the club...you wanna have a good time too! Dont forget to enjoy yourself...but sometimes, you dont have much of a choice. By keeping your setup simple...all the tequila shots and free beer wont affect your perfomance much even if you have a 4am set. Since its less complex, you should be able to it, blurry eyed and all!

Well, that concludes my "Lessons for DJing in 2010" rant. Please take it with a grain of salt. I am in no way condoning a lazy set...but I AM saying to THINK more than you DO. Use your brain a little more, hit the audio books and learn a little more, and watch your crowd carefully. Give them something to groove on, and realize you dont have to USE everything JUST because you have it. Do what sounds right, and not what sounds complex. The girls will thank you with a few extra hip swings and the guys with a few more "heads down" "in the groove" dance moves.

Peace!

FroBot

Monday, April 19, 2010

Reverb in Ableton - Understanding Each Parameter

Today, I am going to look at Ableton Live 8's built in reverb. This is not so much a tutorial, but a way for myself to look at it better. Like I mentioned last week, i'm hitting the books hard for the next few weeks, and I felt like I really didnt understand all of the reverb options. So, after reading a few books, and playing around with it a while...I wanted to note everything piece by piece to help me remember. I toss on a spectrum to give some visual feedback too.

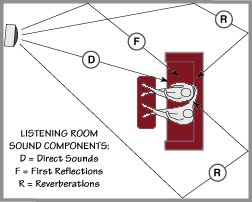
Reverberation is a natural occurrence that happens after a sound leaves a speaker, and before it reaches your ear. It is not something that occurs in synthesis, and therefor, if we want to create it...we must do it artificially. When sound leaves a source, some of the vibrations (if you are close to the source) will reach your ears directly. The other sounds will bounce off other surfaces like walls, the ground, buildings, people, your own body, etc...and then reach your ear. This is what causes reverb. Our brains are actually so used to this occurrence, that we are able to determine our location size (such as a room, or in a dense forest) without actually using our eyes or other senses. Our brains actual enjoy this sound, and can give the deception of distance to sound. These sounds bounce off other objects like echoes...but so close in time to each other that they cannot be heard distinctly themselves. As you were to go farther away from a large reflective surface, the time between echoes gets larger as the sound must travel further. Eventually, you will be able to hear distance echoes in a delay fashion, just like when you yell into a valley.


Now, what is even more interesting about reverb is how a wave reflects differently off of certain objects. Since a surface has a direct frequency response, depending on which frequencies the surface absorbs, it will reflect different frequencies. This is why you put padding on walls of a studio because the softer surface will absorb more of the high frequencies making less natural reverb in the room. If you were playing in a big church or something, it would be the opposite...whereas the hard walls reflect the high frequencies.

By using reverb correctly, you can trick the ears into perceiving audio as further away without actual lowering your volume fader. Half of music is the science, the other half is how our brain is tricked into perceiving it. We must understand both to understand reverb especially.

So lets begin. For the purpose of this tutorial, I have put in a snare hit so we can easily see the spectrum change with each snapshot I take.

Here we are with the snare sample running, with the reverb off. There is a nice little peak around 1khz. Its easier to see the dry wet I will show in a minute if we switch the spectrum to "bins" instead of "lines".

REFER TO THIS AS NORMAL
Now, when we put the reverb up to full blast on its normal settings (just drag and drop), you will see a db decrease, and also muddiness in the valleys of the frequencies. Also, if I were to show you a few snapshots of the same reverb in action, you would notice small, unpredictable changes in different frequencies of the waveform.

You notice the longer valleys in the high frequencies are mostly gone with the reverb up. That is what reverb is doing to the frequency spectrum.

Now, we have a lot of control however on what exactly it is doing to these frequencies. Lets go through all the presets on the reverb. (left to right)

First, the whole reverb comes through the filters. You have a high cut and low cut. You can shut them off to save CPU power. Below them are your normal frequency and bandwidth options that are on normal filters. This can be really important if you actually want to kinda of "tune" your 1st reverb reflection to match other elements, or the element that you are putting the reverb on. I usually never start without touching this with a spectrum first.

Heres one with the highs standing out -

Here is one with the lows sounding out -


(sorry, screenshot is hard to get the photos just right, but the top line is basically what you want to watch for)

I will shut off the filter for now.

Next is PREDELAY. Predelay is the time it takes from the initial sound to the first reflection that you hear. (kind of like how far away you are from the relective object) This is really important to get just right on a reverb. Sometimes, if your reverb predelay is set too quickly, it can muddy the attack sound of a certain instrument. However, if it is too long, it could interfere with an upcoming element in drum loop or a synth lead. You must use this with caution, and find the right distance for the first reflection. If you are just looking for a light reverb sound, a short predelay would be fine....but, you can make some GREAT sounding reverb effects with a long predelay. Also, if you have the dry/wet knob up the whole way while this is running, you will ONLY hear the first reflection, and not the initial sound...which will create a nice delay depending on the predelay time.

For the purpose of understanding this tutorial, you can set your predelay to a LONG setting so that you can hear the first reflection distinctly, and therefor understand what the reverb by itself sounds like. It will sound more like a delay, but it will be distinct.

Next we have the EARLY REFLECTIONS section. This helps sculpt the sonic properties of the first reflections that you hear. Lets start with SHAPE. You can read your ableton manual for the exact science of what it is doing...but from a users standpoint...with a lower setting...the reverb will be a little muddier and longer. With a higher setting, the first reflections are lower in db, softer, and faster. The long reverb does not seem to hang around as long.

SPIN - adds a little bit of modulation to the early reflections and is one of the less strong parameters in the reverb (in my opinion...I guess you could argue) You can control the modulation frequency and depth with the x - y axis.

GLOBAL SETTINGS - Eco, mid, high - These are performance settings. HIGH uses up more CPU, and the lower settings perform better when running tons of other things.

Size - Controls the rooms size. This is a really neat parameter. First of all, I think this makes it feel like there are pipes in the room or like, really metal type walls when set low. Very metallic sounding. With a higher setting, you get a more shifted reverb sound...a little more natural. One really cool thing about this is if you automate from RIGHT to LEFT...you can make almost a flange sounding reverb if done quickly on a stab or snare. This is a really creative part of the reverb. Also, depending on where you start the size and automate it LEFT TO RIGHT, you can create a new tones, and then SLIDE it into a washed out reverb. If you were to find the same (or harmony) pitch of the sound being reverberated, you can get a nice effect.

STEREO - This is pretty straight forward. All the way to the right, the left and right channels are giving a different stereo reverb sound (natural when in rooms because your ears hear different sounds reflected off of different objects depending on which side the reflection came from). All the way set to the left, the reverb is mono. This sounds very FAKE and unnatural...but can be useful in production.

DIFFUSION NETWORK - These settings connect also to the DIFFUSE knob on the right side (which controls in db, the volume of diffusion). The diffusion is the decay of the early reflections. There are low & high shelf filters which can help you set the frequency of your reverb. These are very important also when making a reverb sound nice. It helps to match the frequency with the actual frequency of the instrument....or, shut it off if you want it natural. There are frequency and bandwidth options on this also. This is also a nice parameter to automated on a stab or snare to get a nice FILTER within the diffusion. With both of the HIGH & LOW deselected, the filters are off.

Now, those filters are VERY MUCH affected by the DECAY TIME. This part is SO important to get just right. It is basically HOW LONG your reverb will last. By setting this to the left, you can get a nice, short, small, reverb to help polish up a stale sound...or, set it to the right...and get a loud, overlapping reverb sound that will definitely annoy the hell out of the neighbors. However, with the decay time set all the way to the right, and some automation within compose...some nice sweeps and other weird hits can be made if later modulated with an LFO, and given some volume automation.

You can see in this picture, that with the decay time set to the maximum, a constant sound is heard and doesnt really drop too far in db really. I know its hard to tell because mac snapshot doesnt react fast enough, but in this picture, where the DARK bars are sitting, is the lowest they are going without actually dropping away like the normal snare hit does.

Freeze - This will freeze the diffused reverb when captured. This can get really annoying too as the sound will stay frozen until deselected. This has some creative uses in dance music. The cut, when on, makes it so if the reverb is activated again while frozen, it does not ADD more sound the the frozen reverb. If it is off, it will add on top of that reverb again and again as the reverb is activated.

FLAT - This is a really neat little parameter. It works in conjunction with your diffusion filter. If the FLAT is deselected, whatever frequency you have being changed in your filter...while frozen, will slowly lose energy in those frequency bands. If you could see a video of the spectrum, you could actually watch the high frequencies move slowly as they fade away. (cool effect) If it is on, those frequencies will remain the same.

Density and Scale control the diffusion just a little bit more. Sometimes when you play with these parameters, you dont notice much of a change. But, if you go to the SIZE knob, and make your room size really small, put your density up, and then move the SCALE knob...you will notice a big change. You can even automat the scale knob with a small room size for a nice flanger style effect to your reverb on a short hit. But when moving the scale, you can also change the diffusions pitch a little, so when using this in its creative form while making a track, be sure to check the pitch of the scale setting, especially if your reverb room size is small.

CHORUS - This is pretty straight up. Adds chorus to the diffusion...basic modulation when 2 sounds are played a little bit out of phase. You can also control the db level and frequency...same as a regular chorus x - y axis.

All of these are then controlled by the 3 knobs on the right hand size - REFLECT, DIFFUSE, DRY/WET.

Reflect is the reflecting level in db. You can make it louder, or softer.

Diffuse is the diffusion level in db. You can make it louder, or softer.

Dry / Wet is how much of the source signal and how much of the effect signal is being heard. To the left, no effect...only source signal. To the right, only effected sound, no source sound.

Well, that just about covers everything. Hope this helped. Make sure to shout what you know about reverb here, and make it echo!

Peace!

FroBot

Monday, March 8, 2010

Compression & Side Chain Compression in Ableton Live


A producers secret weapon. Compression. Something that is very confusing to a lot of people, but if understood, can be the best tool in the bag. Today we are going to run through compression a little bit, and a bit of side-chain compression. We will talk a little bit about the parameters within ableton, and some tricks on how to use them.

Here is a picture of a compressor (actually being side-chained on my bass) within my track.


The most important thing to realize when you are dealing with a compressor is that you are dealing with VOLUME. Basically, you are telling it to lower the signal once a certain db level has been reached.

Lets talk about each part of abletons compressor.

First, and most importantly is the THRESHOLD. Threshold is the level (in db) in which must be reached before the compressor will kick in. In my picture, its -26.7db. So the compressor will not kick in unless that level has been reach. The lower you go, the easier it is for the compressor to take affect.

The output is your final output signal. (you can now raise it a bit since its been reduced)

The attack is how long it takes the compressor to fully kick in once the threshold has been reached. With the attack setting at its far left, it will attack very hard. For a softer attack, move the knob to the right.

The release is how long it stays activated. For a harder sound (quick release), keep it left...softer sound (longer release), to the right.

GR - The little meter the the right of the graph means GAIN reduction, and is how much gain is being reduced.

Ratio is how much the compressor will lower the volume once the threshold is exceeded. With a low ratio like 5:1, for every 5 decibels that pass the threshold level, only ONE will actually pass. So 10:1 would be even harder....letting only 1 pass for every 10. After this amount, you are basically using a LIMITER which is the same concept, much much more dramatic. Try lower ratios unless you are looking for a REALLY big change. I usually stay anywhere from 3-6.

PEAK & RMS - This is the behavior of the threshold.

Peak mode is used for drums and percussion, and reacts very quickly to sudden volume changes.

RMS mode calculates the average volume shifts and adapts accordingly. Good for pads, vocals, and if you are using it on a master mix.

Opto uses a non-linear release curve, and the release becomes slower as the gain gets close to 0. I dont use this much.

Knee - Having a hard knee (more looking like a hard angle) makes the compressor engage more quickly once the threshold is reached. A soft knee lets the compressor gradually kick in as its about to reach the threshold. I like a little bit of a softer knee, but again, it all depends on what sound you are going for. You would find a hard knee useful when compressing drums and percussion, so not to lose the attack sound of it.

Lookahead is letting ableton look ahead at your audio, to predetermine things before it comes in. I NEVER use this, I feel like its basically useless.

So whats all this shit mean! Just as confused as before. Here is a few nice tips for starting-

1. Drop your threshold down a bit. Lift the attack and release up a little bit. Put the ratio at 3:1 to 6:1.

2. Stay in RMS or PEAK MODE. Dont mess with anything else.

3. Move your threashold, output, release, & attack around until you get a nice sound.

The compressor can be deep in its math, but, its all about your ears. Those are the main parameters. Everything else is so technical, that it comes with experience. But, take the info I gave you and apply it to the sound you are looking for.


OK...NOW, the best part....SIDE CHAIN COMPRESSION! One of the best tricks of good producers. What you are doing with side-chain compression is having a different audio element active the compressor (like a kick drum). Side-chaining is mostly used for bass, but can be used on pads, melodies, or virtually anything to get a nice PUMPING SOUND.

First thing you wanna do is drop in a kick track, either an audio, or midi file. Loop it. Now, in this tutorial, we will side-chain the bass. So, make an 2nd audio track with a bass loop in it. Toss in a compressor, then click the little DOWN TRIANGLE next to the word compressor in the effects rack to open up the side-chain. Now, you need to select your input as your kick track like this -

I usually like to set my gain to 0 and my dry/wet all the way up to 100% to get the full effect. You can change these if you like, but to get full compression, set it to those settings.

If you want a certain frequency of the kick to activate the compression, us the EQ to determine that...but you are now getting deep into compression, and this is not really necessary unless your a crazy producer looking for some WAY particular sound. I never use it.


Now, if you play the 2 tracks together, (as long as you have the threshold down a bit) you should be able to hear the the BASS volume is cutting when the kick is kicking. This is nice because that means your kick drum will always get the priority in volume, and the 2nd sound (bass in this case) wont clash. Play around with the attack, release, & threshold to get a nice sound.

Another nice trick to get that NICE pumping sound to different sounds, is to toss this on other tracks in the mix...even when the kick is muted. Go ahead and leave the kick running, and mute the track. You can still hear the kick activating the compressor, but the kick is not there. This can make for a nice effect during build ups or breakdowns. If you want to get a REALLY REALLY strong pumping effect, drop that threashold ALL THE WAY DOWN. It will totally cut the volume when the kick KICKS...making the other sounds PUMP! Use your envelopes to turn on or off the kick track within compose view when composing. You can also use your envelopes to turn on or off the compressor when you dont want to use it either. This is handy when using it in tracks other than bass.

Side-chaining can be used in so many different ways...but remember the most important elements...in this order - threshold, ratio, attack, release...and finally, OUTPUT. Get that volume sounding nice within the mix with the output.

Well thats about it for compression. I would go into detail more, but I also need to learn more about compression. It is a deep and complicated effect that a producer must study to get that PERFECT pumping sound...especially out of club speakers.

Peace!

FroBot

Sunday, March 7, 2010

Understanding MIDI EFFECTS "Chord" + "Scale"

Chord and Scale effects within abletons effects can be SUPER useful tools when trying to come up with ideas. Many musically uneducated producers can sometimes feel like they LACK ideas when it comes to tracks. They may understand the specifics of effects and sequencing, but general musical skills just arent up to par with educated musicians. Understanding the MIDI CHORD & SCALE effects can turn you into a seemingly musically educated person in seconds. This is great for spawning great ideas, or finding that nice chord JAB you were looking for a in a nice techy track. Many producers who dont understand this effect tend to have many one note melodies going on, but if you understand this tool, you can be making chords in no time.

Lets start with the chord effect. First of all, drop in a new midi track. Then, put in an instrument of your liking, preferable something with less resonation for the purpose of understanding this tutorial. In the future, you can use nice long voilins or even pads to make spacy chorded sounds. After you have put in the sound, just before it in your rack, toss in a CHORD midi effect.

Now you will see options for up to 6 extra notes to create chords off of the one you are pressing on your midi keyboard. This is pretty simple to understand, and not very useful unless you have an understanding of chords. When you turn on one of the shift options, it adds another note depending on how far your shifted that note. A shift of +1 semi tones will add another note one half note above the one you are pressing (example white key to the nearest black key). You can play around within this to find some nice chords on your own. The little box below each shift button determines how loud you will hear that note when compared to the original note you are pressing, incase you want less dramatic chord. Also be sure to play around with the built in presets that come within this midi effect to find nicely made chords with excellent velocities already there for your disposal.

Now, lets go on to the next step. If you dont understand chords, this next step can be SO useful. Even if you do understand chords, it is impossible for you to know ALL of them, so you can build your knowledge chords by using this.

Start by SHUTTING OFF THE CHORD effect for now, we will get back to it.

Go into midi effects, and drop in a SCALE effect in between your CHORD & INSTRUMENT, like this -
It looks like a small sequencer right? Think of it a little bit like that, where as from left to right are keys within ONE OCTAVE of your midi keyboard (ex. C to C). For some reason there are 13 squares (not 12) up and down. I dont know why this is, but the top one does not get used.

Lets look at the options now within this. The BASE knob is for the BASE of your grid. It will not change sound, only the VIEW that you see the grid. If you are making a track in C, its good to leave it in C to see the whole range of C-C. The transpose will transpose the actual SOUND in semitones up or down based on how far you move it. If you have a midi keyboard, the range and lowest note options are not really useful.

Now, what you are telling your controller to do, is to CHANGE what note is actually being played. You can only have 1 square activated per vertical column. So now, if you were to select note C in column 1, 2, & 3...then press keys C, C sharp, & D....they will now all play C. This makes it so, if you were to build a chord, you cannot press a WRONG button. This can be nice for improv jamming.

Now the key to this feature is to use the built in presets that come with ableton. Just click the little arrow below the SCALE midi effect within your browser to see the options. You will see options like MAJORS, MINORS, PENTATONIC, etc etc. Just drag on of those on top of the scale effect within your effects rack, and it will be preset to that chord. Start touching all over your keyboard, and you will notice that ANY note you hit will be in that correct progression.

Now, go back to your chord effect and turn it on. Toss in a nice preset for the time being. Now play your midi keyboard. You will hear AMAZING chord sounds in a perfect chord progression based off of what your are playing on your keyboard.

Just play around with all the parameters until you get something you like! If you want, you can even put an arpeggio before all of this, but I will get more into detail about that in another blog.

Enjoy making chords & chord progressions!

Peace!

FroBot