Sunday, May 30, 2010
Symmetric Panning Automation in Ableton Live
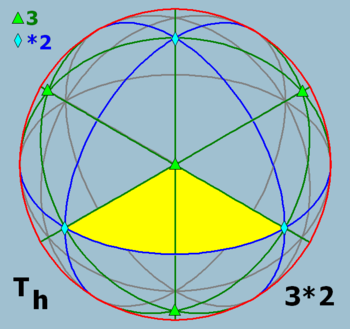
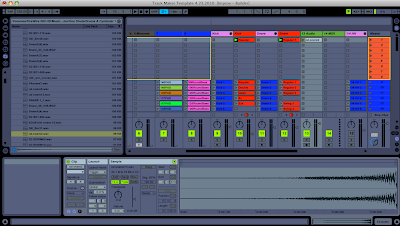
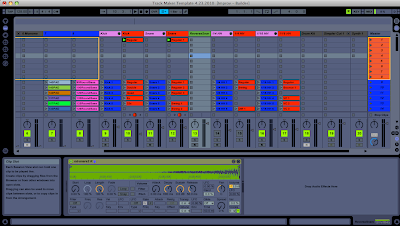
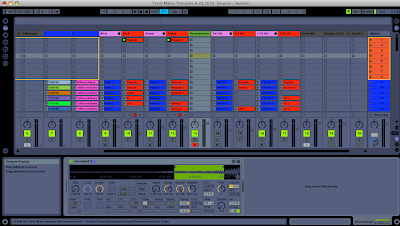
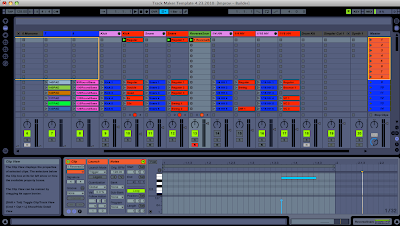
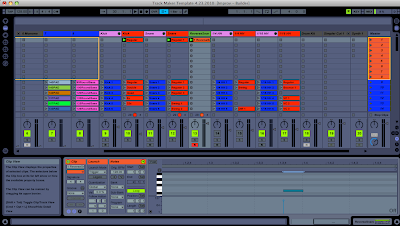
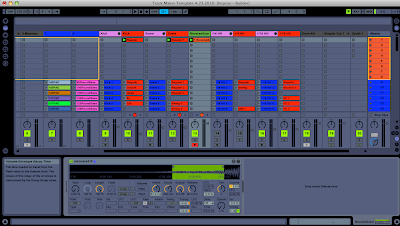
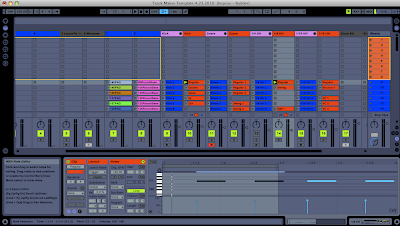
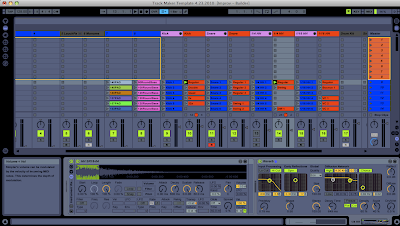
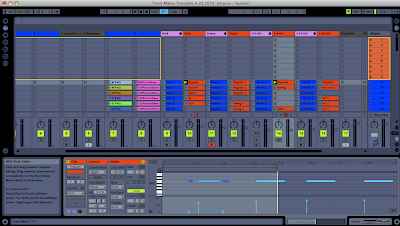
I love this picture. Because it really makes me think of my tracks in terms of panning and my automation. There are lines of symmetry all over this object, and I like to think of the panning plane in the same way. Some people might say its more of a 2D field, left to right, but...there is so much more to panning than just those 2 locations. There is also depth (z axis) (reverbs and anything adding distance to a sound). But what I am going to talk about mostly today is the symmetry of the panning. Where in fact you have your left and right sounds sitting, and how, if not looked at properly, will make your track lean to one side or another (which I dont usually desire, so I try to stay pretty symmetric. You can use it artistically of course).
For some sounds, staying straight up the middle is a good idea. Your kick & bass for instance are generally best sitting up the middle...especially in climactic parts. Its good to have the weight of the track distributed equally. Sometimes, its really good to throw a utility plug on your synth sound or bass sample, and choose either the right or left side only as the audio source. This will make sure the bass is in fact mono and evenly distributed. This does not mean that a stereo sounding bass wont work...because they can sometimes sound great...but, if you are using a rather sine wave sounding bass....its probably better just to use a mono source. You can add a little bit of your own stereo dynamics if you like, and make sure that it is evenly distributed over the left and right channels.
Now, where symmetric panning starts to become important is when you start throwing tons of stabby sounds around. Quick, low or no reverb, attacky sounding stabs especially, but anything can fall into this category really. When you start to make rhythmic variations to your stabs per left and right channel, its important to try to stay symmetric on your left to right bounces. It is especially import to figure out HOW MANY ACTUAL STABS are happening within a 4 or 8 bar measure, and try to make it symmetric from there. I will explain in a moment more in detail, but if you have an even number of stabs, its easier, but in times when you have an odd number of stabs, it might be good to reverse the automation for the next 4 bars so that it balance itself to 10 stabs over 8 bars, or something of the sort. Maybe I am getting ahead of myself, but lets look at some examples of my panning and why I did what I did.
These panning's are coming from my tracks.
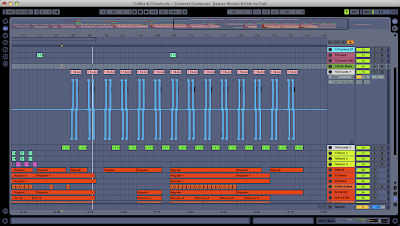
So, this is a wider screen of one of the stabs I am using.
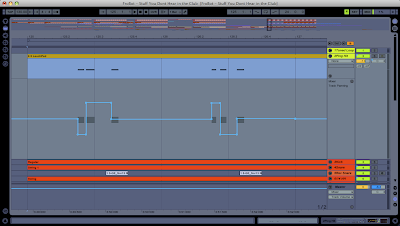
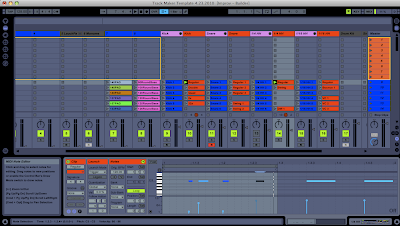
So if we zoom in on just 2 sets of those we get this.
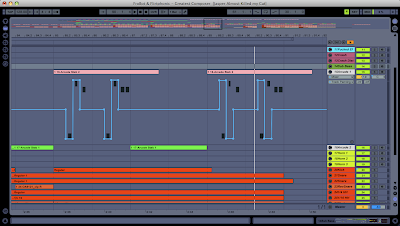
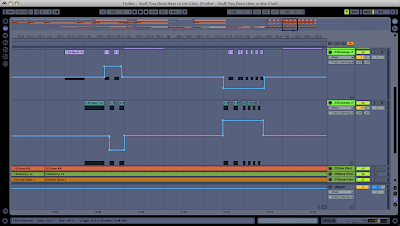
Now these are the little nintendo stab sounds at the end of this track.
They are little groups of 3. I know you see 7 notes per clip...but the last one is just a double hit. So look at the first midi clip. When working with 3, one of the main symmetric tricks to do is put ONE of them up the middle, and then another left, and another right. This is an EASY simple trick to make symmetric panning out of 3 sounds.
So in the picture, I do -
LEFT - RIGHT - CENTER, LEFT - RIGHT - CENTER
Now, this is a good start. But we are still left with a problem in our symmetric panning idea. Since you went in this order, you are ACTUALLY swinging the panning right a little bit. Because, if you look in my first clip, I did them BOTH LEFT-RIGHT-CENTER. So the swing still technically swings you FROM THE LEFT....(feel the motion) TO THE RIGHT....then SHARPLY back to center. So you still feel a RIGHT HAND SWING. So, the way you do this, is just REVERSE your automated panning on your next set of stabs, so it swings you the opposite way. Lets look at that same picture again now -
Look at the 2nd set of midi notes. Notice the panning is the opposite now. The 2nd set is
RIGHT, LEFT, CENTER, - RIGHT, LEFT CENTER
This will balance out the first one, and keep the mix symmetric.
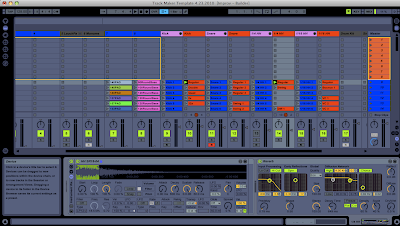
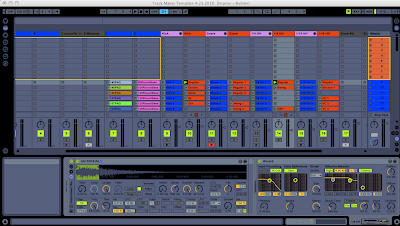
Also, since I made my last hit in both groups - CENTER, I can apply a stereo effect like PING PONG DELAY to the last hit, to make them bounce rhythmically in a fading out, panned delay fashion. As I did in this picture of the same part -
Just by THINKING in terms of symmetry, you can help to keep these stabs balanced. What is nice about MATH....is that anything x2 is an even number...so in MOST CASES with repetitive stabs, just doing the opposite thing on the next bar can help to keep it balanced.
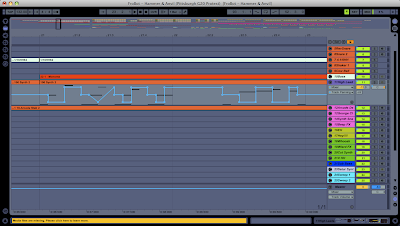
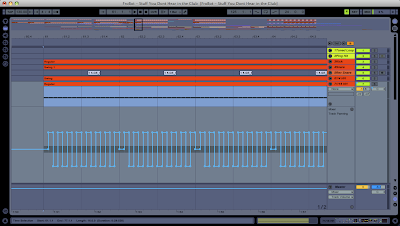
Here is another case where by just putting the first and last hits on center helped make the whole thing symmetric. Its not prettiest draw automation, but you get the point. This will then repeat after this -
Now it is also safe to say that ANOTHER GOOD reason to put the first hit CENTER, and then the others on left right....is if you are making any kind of DELAY effect when the volume is being lowered. It helps to keep that stab at the foreground, and then let it disappear in a stereo ping pong delay. In other situations where you are using AUTOPAN, it is also sometimes good to use the automation of it and make sure the very FIRST hit is not panned. It will help the stab stand out on its own, and then disappear with volume and autopan (or a delay effect). This is totally situational, and half the time it will be good this way, the other half, direct stereo panning of the first hit will be more artistic and sound better.
Next is an example of making sure your 1/16 note high hats "center panning" is on the kick, because I am SIDECHAINING my high hats with the kick...because I want it to compress the HHs when the kick hits so as not to ruin the dynamics of the powerful kick. But, we want to make sure that we arent just compressing the LEFT more than the RIGHT, or vice versa. So since I still want panning on my HHs, I just set the first one center (where your kick hits), then start panning it symmetrically until the kick hits again. I only did this on the FIRST kick, and not all of them, since the compressor will still compress rhythmically. I just want that first kick to be nice and even. See below -
Next is another example where the stabs were in sections of 3. So by using the opposite panning on the next section, it helped to balance them out -
This idea can be applied to ANYTHING that stabs in ODD numbers. Just double it, and now its even, and will balance your track out in the long run.
The next is an example where I was using 2 dubstep sounding wobble basses, and they were battling it out one after another. If you notice, I switch the automation between the 2 clips. This helped to balance the sound out also -
Anyway, I think those are enough examples. Its really not that hard of an idea to grasp, just check your panned sections, and listen specifically for symmetry. After you do it for a while, you will naturally do it. Also, I must note, in many situations, you may NOT WANT symmetry. It is an artistic choice 100%, just MY OPINION...is with that being said...many times you also WANT symmetry, and I find, more times than not, you will need to think about it. Especially for percussion items sitting in the background that are mostly creating rhythm. They typically should be symmetric...however, things in the foreground, like big builds, or quarky synth stabs....artistically, you can do with them however you please. Its part of the creative end of panning. You could be the Picasso of panning if you really wanted to make people uncomfortable in the club.
So, the examples I showed you may be hard to understand without audio...but, just take the concept and apply it. Interpretation is half the game in music....so just use the concept of symmetry, and apply it to your work. You may even be able to come up with your own results better than this!
Peace!
FroBot
Tuesday, May 25, 2010
Preparing your Distant Mastering Engineer
Lets start with some really basic things that seem to be the source of a lot of problems. I will be talking about ableton live, but these ideas can be applied to other DAWs.
Also, my mastering engineer doesnt JUST master...he also cleans up tracks a little one by one, and does some adjustments to the levels of bass, kick because I cannot turn my speakers up to club level where I live. This is important. So, I send tracks one by one when exporting....and let my engineer do a little bit more fancy work with the mastering. I am lucky to have a very hardworking and caring engineer. This is partly mixing and partly mastering.
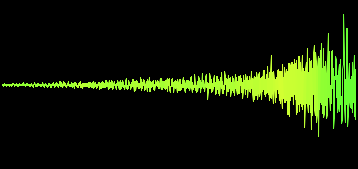
1. Bad samples. Get in a habit of checking your samples. Dont go too fast, and do it WHILE you are making the track. It takes one second to make sure the sample is not bad. I have noticed that some samples are already clipping in their original form...even important things such as kicks, etc. MAKE SURE its not clipping. If it is, DONT USE IT. Find a better sample. This is a shot of one of my kicks I made a mistake on. Im a dumb ass!
That was the kick on greatest composer. It was bad from the start.
2. Make sure YOU DONT CLIP the samples. Remember in ableton, just because your master is set to -WHATEVER, or 0...you can still be clipping your actual samples and synthesizers. Its important to put a spectrum RIGHT AFTER your samples (not at the end of an effects chain) and check out samples periodically as you make tracks. Sometimes, it might not be smart to get "OUT OF THE GROOVE" to do it, but when you are finished, just go back and check them out. Make sure within your simpler or sampler, your sample is running below 0db at least. Also make sure your wav samples are not clipping either by moving the fader in clip view. Look at the TOPS AND BOTTOMS of the samples as you move it to make sure it isnt already infact cut off (bad sample). You dont want to use those....
3. Make sure your levels were made to go to mastering in the first place. General rule of thumb...set your KICK at -12 db, and build from there. It is unlikely that you will go much higher than your kick. Then, you can leave your track with enough headroom (AT LEAST -6db) for your mastering engineer. Have your MASTER set to 0 also. Dont move it! This is not a volume control knob remember....it is your MASTER FADER. You are composing. If you have to change the volume...you should have something AFTER the master to do that.
4. Compressors on the master bus off! You can argue with me...but, master compressors are a no, no I think...especially with good mastering engineers. They have some great compressors, i let them handle that. All compressors doing side chaining or maybe working within your tracks can stay on if you like. If your engineer is going to apply them individually, then shut them off. But you can be inhibiting on artistic creations at this point...so its up to you.
5. Dont forget to export your tracks in the specifications of your mastering studio. Wav, AIF, 24bit, 16bit...hopefully its the highest possible...but ask.
5. Ok this is a long one. And will continue into 5 and 6 etc....and has more to do with the preparation of your tracks. Ok....NAMING AND GROUPING. First off, name your tracks something similar to the sound. It helps to remember things, and especially for the engineer who will be working with it. Now, since you will be sending your tracks as individual files....once its sent...and if being put into another program to work with...the order will be different from yours. This is why it is important to put NUMBERS beside that name, in the ORDER that you have them in YOUR TRACK. That way, it will be accepted into the other program in the same ORDER.
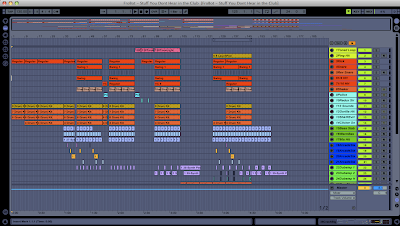
6. This brings me to Grouping & Color Coting. Now, if your engineer will be changing ANY LEVELS at all...this is important. In my case, since I cannot turn the speakers up to club level, my engineer must adjust the bass and kick in perspective to the REST of my track. Now this is dangerous because you may artistically have some things that need to be raised at the same time when other elements are being raised. Such as if you have a reverse snare with your snares that you dont want its perspective to the snare changed. Or if you have a 2 bass combination that are on separate tracks that need to be raised together. Tons of other reasons too. This is why, you GROUP your tracks and color cote them. Put things in color groups that may need raised accordingly if another element is being raised. Hopefully, you have a club music competent engineer, who should be able to notice this...but it really helps them understand your interpretation of the elements as groups. You will send off a screen shot of your track, which will then MATCH theirs, and they can even color cote them easily...looking at the numbers before the tracks, and making it easier for them. They will thank you for the headache gone. Some engineers might not care, but I have noticed ones that love having that...especially when communication is limited to skype and emails. One of the hardest things is feeling the musicians personality and style without meeting them and hearing them talk about their own tracks. Its not just FACTS that need worked with....your feeling and attitude must be perceived in the mix too. Its good to give as much OTHER information about your opinions of a track when these are limited.
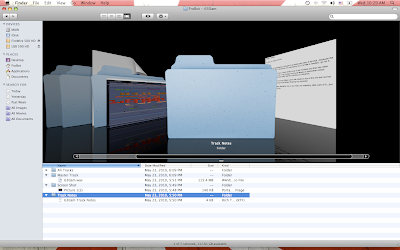
7. So, now you have the track all ready to go, now its time to get it in folders that are great for your engineer to stay organize. I make 4 folders. Put them all in a folder labeled "Composer Name" + "Track Name"
A. All Tracks (these are the individual track files) (PS Make sure to delete your return tracks that were automatically exported into this folder if you didnt use them. They will be easily found in your folder because they are not NUMBERED like your other files)
B. Track Notes (These are all track notes for the track. SOOOOOO important. Write the bpm here, and everything you might want the engineer to do. This is by far the most important part in helping your engineer understand what you want)
C. Master Track (Move the master track from the exported folder and put it into its own folder. Ask specifically that your engineer take a listen once or twice through (which they usually do anyway) before starting to work with it. Sometimes, when an engineer is busy and has like 7 or 10 tracks to do...they might speed through it. Hopefully, your engineer doesnt)
D. Screen Shots (Send screen shots of your track with the colors and numbers so they have something to look at. It helps to see what the composer was seeing)
8. Finally, zip those files, and then you will most likely be uploading them to a drop box.
Keep in mind, some engineers might ask for all the wav files to be converted into flac files before sending due to size. You may have to do this also...especially when doing tons of tracks at the same time.
Anyway, these are just a few things to keep in minding when sending your track to be worked on. Again, a lot of these things dont matter if you are using a master track to master it...like a lot of people do. But if you find yourself in the situation where your engineer will be working on individual tracks...these are important things to keep in mind. Remember, the more professional you come off as from a technical standpoint, the more likely the engineer will feel to work professionally on your track.
And I know everyone has had a their first experience when receiving their shitty track back from mastering...and have totally questioned their skills as a producers...and thinking they will SUCK FOREVER as a musician. Its not that, just take care of your tracks before mastering them, because you ultimately have the control over your track.
ADDED NOTE 5.27.2010 - Dont add symbols to your files names. Some other programs wont take them. I learned the hard way and had to upload twice.
Peace!
FroBot
Sunday, May 23, 2010
Reverse Snare in House Music Tutorial
Today, I will talk about something I have come to love when making house music, or any music with a nice forward swing. The reverse snare (or any resonating percussion sound really). This old fashioned technique has been applied to countless songs, and has become more or less a STANDARD rather than an effect. This application of the reverse snare pre-leading a snare or clap...can give your song the total groove you were looking for. It helps put an extra little punch in the groove, and lets to have some massive control over how you want your song to swing. Using this technique with other concepts of moving high hats, snares, percussion...forward and backward in time...can give your song a totally unique swing. You can spend hours upon hours just playing with these ideas, and watch your groove transform from a robotic drum machine, to the groove of heaven. Ha.
As you can see, I find these concepts very important. But again, today, we will just talk about the reverse snare.
Now, in house music, there are multiple places you can put a reverse snare within your drums. Lets talk about some key places...and how I feel about them.
1. (my favorite) On the 2nd snare sound of a 4 bar house loop. (just before 1.4). When making house music, you usually have your snares on the 2nd and 4th bars. Adding a reverse snare as a sort of small build up on the 2nd snare sound will help swing it more than the swing you already have applied to your snares.
2. Same concept as 1, but instead of being on the 2nd snare, you put it on the first.
3. Another cool option is to put it at the very end up the loop, so the reverse snare pre-leads the first kick in the loop. (Somewhere just before 1.4.4). This will give a swing at the very end as it comes around and hits the kick. Caution must be applied here so that your reverse snare length does not hit with the peak of the coming kick.
4. Same concept as 3, but on ANY kick within the loop.
5. Another weird one I hear recently, is right AFTER the 2nd snare. So it swells just after the snare. I dont know what the thinking is behind this, but it does add an interesting swing in the right conditions.
6. Also, adding a reverse snare on any stab element which is standing at the foreground of the song can really swing the stab without actually moving it in time.
Of course there are other reasons to use this...but the main reason is to give a MINI build up to one of your swinging percussion elements. It can be applied at high db levels, or low db levels, each having their own distinct effect on the groove of the track.
Lets begin with how to do it. First off, you are going to need....obviously....kick, snares or claps, an extra snare for reversing, and possibly other 1/16th note elements so you can feel a little more swing of the groove. Its hard to tell a swing with ONLY the elements you are making...and it is best to work on the swing once you really have your sounds chosen already for shakers, and other fast percussive elements. You will feel the TOTAL groove, and not just the groove of the kick, snare, and reverse HH.
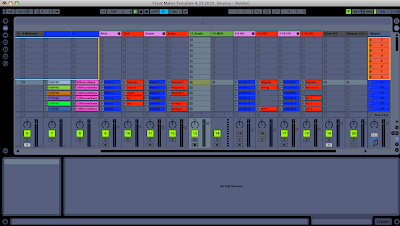
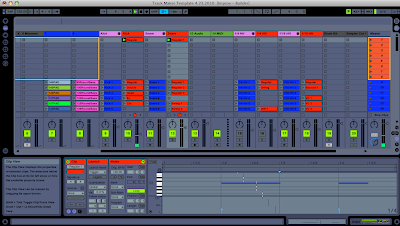
So, I am using my elements sections, but you can see, I have added an EXTRA AUDIO TRACK, and an EXTRA midi track (in green) beside my snare to do this reverse snare.
Now, for those of you who are familiar with my elements section, this wont look new. For all of you who dont know what this is, its basically all the pink and red tracks...which make up my drums section. I have other blogs about it. Basically, we will just be using the SIMPLERS within the RED tracks to launch my snares and kick.
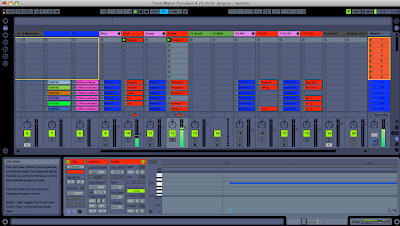
So now, pick out a snare and a kick to use. You can put a swing on the snare if you like to really get a nice house groove going. Here is what I got.
My snare is in clip view. If you look closely at the next picture, the snare is not ON the line, its a little forward in time. This is the swing I put on my snares.
Ok. Now that I have a kick and snare going, lets get the reverse snare going. I am going to do this example like my 1. explanation. Just before the 2nd snare sound. So what you will need to do is find a nice resonating snare sound. One that has a little bit of a reverb or at least length to its sound. When we reverse it, we want the sucking sound of that length. If it has a hard attack sound, that is fine too, we will be cutting it off.
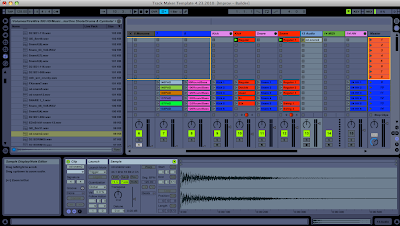
Now, take that sound and put it into your BLANK AUDIO TRACK like this.
Now what we want to do is reverse it. It is as easy as pushing the little REV button in the sample box beside the clip editor. This will reverse your sample.
Now. We dont want to use this in audio, we want a little more hands on control of the sound. So we will move it into a simpler, which is within my blank midi track. You can delete your audio track after this. I renamed my simpler midi track to REVERSE SNARE.
Now, you can either draw in a note, or play this with the keyboard or midi controller. Its nice to be able to change the transpose just by pushing buttons at this point so you can make sure your reverse snare and your actual snare are within the same key. Yes, they do have keys. You should even have to use the detune to get these just right. You can even toss on a spectrum to analyze the frequencies and move them closer together if you like...I usually use my ears.
Now, obviously, we just shorten the start point of this sample because of the silence at the beginning. We must also CHOP OFF the attack sound of the snare which is now at the end of the sample. This requires some playing around, but play with the start and stop points until you get a nice sound to work with. You will DEF be changing these in a minute once we put in the midi notes for it, because when heard in contrast with the kick and snare, it will need changed. For now, just get a nice short swooshing sound.
Something else to keep in mind. As you transpose a sample up by semitones, the sample will be played faster (normal science of pitch and speed). So, as you slow it down, the sample will be played back slower. So try whole octave differences even, even double octaves, then shorten the LENGTH of the start and end markers. There are infinite possibilities for swooshing sounds at this point.
Now its time to put a midi note in for you to adjust the timing of. You can either draw it within your midi editor in simpler or play it in. Mine looks like this -
Something else to keep in mind, c3 in the midi editor is the sample being unaffected by pitch...so my note is not in that spot because I played it in. If you DRAW it in, just draw it in at c3 and then use the transpose within the midi clip view to change it manually.
As you can see, it is JUST BEFORE the 1.4 marker because it will be leading into the 2nd snare. Now, we need to move that puppy around with the grid off to get the exact sound we are looking for. Shut your grid off and start moving it forward and backward in time until you hear it sound right. You can adjust the note length also at this point. It would be best to adjust it so it ENDS just as the snare hits....however, sometimes, other cool effects can be made by making it end BEFORE or even AFTER the snare transient hits.
After toying around with those parameters, I came up with this. It ends JUST after the 4th bar because my snares are already SWINGING a little forward in time, so I wanted it to end just as they hit to accentuate the snares swing.
Now, the last little thing is to play with the attack (or other parameters, but attack is important). Because you have jumped forward with your start marker in your reverse snare, there should be a small audio JUMP as it comes in. You want this swoosh to be as smooth as possible leading into your snare (unless artistically you dont, but its a good habit). So adjust your volume attack parameter within simpler. It also doesnt hurt trying your filters attack also if you had a rather "tin like" snare sound and would like to filter out some of the high end, or you had a really deep snare, and you would like to use a higher WHOOSH sound, use a HP to filter it out. You can even just filter it OUT OF THE the attack with the filter envelope. But for now, I will just use the volume attack envelope -
Now, you have a nice little swoosh leading into your snare. Finally, play with the volume. This is arguably the most important step. The volume in which that swoosh is applied, can drastically effect the groove, or more exactly...that little PUSH at the end of the loop. Even a very very small amount can add a lot to your loop. I find myself using this 90% of the time in very SMALL amounts. Even if you put it in some of your track, and then not in others, it can drastically change the groove in different parts of the track, without moving any elements in time. Its a trick on your brain....and to an untrained ear...it just makes their hips move more!
Hope this helped! Keep makin tunes!!!
FroBot
Wednesday, May 19, 2010
NOTES FOR 5.20.2010
(Todays Session Above)
When doing an explosion, a cool idea I had was to use a white noise and an explosion (side chained to the kick)...then...cut it really fast with the on/off track automation, and THEN hit the crash cymbal. Def sounds out of place...but in a good way. I even cut it at an odd beat for a more unique sound.
Side chaining your explosions can sound really cool. Even set the attack and delay a little late will sound fine.
Abrupt stops in any fashion can be really cool if, RIGHT when it stops, another stab element hits. Its almost like a lead in for the stab.
Using on off automation on ALL the tracks, and then throwing in a weird (even out of key) stab can be really cool...and can even be done rhythmically. I did that today at the end of the track.
This track is going to need MASSIVE EQing. I am going to plan about 12 hours I think for EQing this track. I am doing SO MUCH in the low frequencies...i have to separate them a little if I want this to sound ok in the club.
Its really important when using sweep or build up samples that are being cut by on/off automation...to use a utility volume and automate it a little bit some it comes in a little softer. I need to do that tomorrow. I was cutting up a build up sweep...but when it comes back in from the on/off automation, it was too loud because the sweep is naturally getting louder.
This track will also need massive panning because so much is going on. I might even use autopan to get some more unpredictable, out of phase pans.
Well thats it for today. Ears are fucked as usual. Gotta stop.
Peace!
FroBot
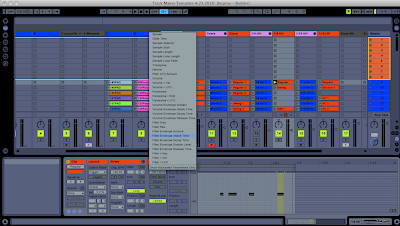
Off Hit High Hats & Ghost Notes in Ableton Live
As always, I am using my drum elements section to make my drum loops. Here we will look at the 1/4 note HHs on the off hit. I will also be running a kick in the background so I can feel the swing a little more. Open simpler. Place 2 or 4 midi notes to activate a HH sample (or any other off hit sample of your choice).
As you can see, I have 4 midi notes, but for the time being, I am only going to use 2 of them. When you play this back, it can sound really drum machine like. Sometimes this works, but for house, it almost never works. Now lets do some simple adjustments to make it swing a little. This may go without saying to a lot of people, but I know there are always new users who find this information useful.
Lets shut off your grid (right click and select OFF from fixed grid) (you can use shortcuts if you like too).
Now that the grid is off, select the notes and move them to the left or right. Usually, for your MAIN hard hits, its better to move them to the RIGHT as to make it swing a little slower. This will make the girls hips shake a little more in the club...and we all like that!
As you can see, I shifted both of them to the right a bit. The swing of the beat is really starting to show through. This is nice for getting your house beat made. Now, another key is to change your velocity a bit so it doesnt sound so robotic. This can be done using the little bars below the notes....and is really important once we get into ghost notes. Now, before you go any further, you want to make sure the velocity setting in your simpler is set up to a desired level. I use 100% most of the time...but if you want a less drastic change, you can change it to a setting you like. It is the button in the bottom right of your simpler.
Now go back into your midi note view, and change some of the note velocities. You will notice a definite change.
Now lets talk about ghost notes. These are notes with a very SMALL velocity setting that can barely be heard, but def add dynamics to your HHs. What I am going to do is draw a couple notes in front and back of my louder HH sounds. Its best to keep the grid off at this point because you usually dont want to put these in time (on the grid markers).
As you can see. I added 2 small notes just before and after my first note. The velocity is VERY small, but this really adds to the sound. It sounds more like a real drummer is playing it rather than a drum machine. These are key to getting right. Move them from left to right to get them to sound just right. Sometimes, you may even have to change these a little as the song progresses if you add other percussion elements to the track.
Something else I didnt mention is the LENGTH of your actually midi note. As you can see, mine are pretty long. I didnt clean them up yet. One even falls past the loop marker. You should clean those up. Depending on how long your sample is, they should be ending where you want them to.
Now, another way to get a totally different sound out of your high hats is to actually control the note length within simpler. I almost always do this, because I tend to like sharp sounding HHs. Just my preference, it all depends on the person. I know tons of people of like long resonating HHs, but I usually like sharp ones. As you can see in this picture, I moved my end marker and shortened up the HH.
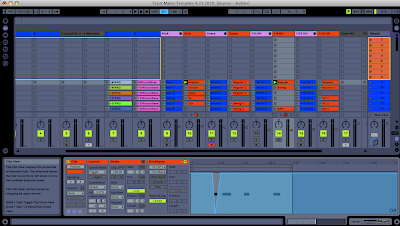
Now here is a little trick I dont hear to many people talking about, but I like to use. I like to use filter envelopes within my clip to change some of the filter parameters of 1 or 2 of the notes. The way you do this, first, you need to activate the filter button (turns yellow) and then also the other filter button in the bottom left (also turns yellow). Also, the ENV button in the bottom middle left should be turned up a little bit so that the envelope activates.
Now you need to go back into your midi notes editor, and click the envelopes button (little button in the bottom left that looks like an "e"). This will open up your envelopes. Then from your envelopes selector, your filter options should be within it since you turned on your filters in simpler. I am going to select the ATTACK parameter and change it a little bit.
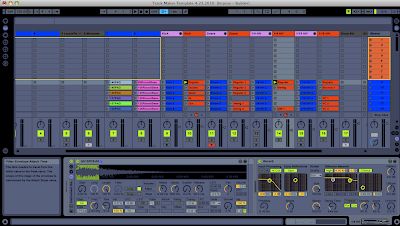
I drew in some automation of the attack over the first ghost note.
Now...no change should be taking effect because I did not change my filter setting. Go back to your simpler and set the filter to your liking. Also, keep in mind that the automation within clip view doesnt work the same as normal automation. You wont see the black the knob moving on the attack parameter like you would if you would have made changes in the compose view...but rather the little orange bar around the attack should be moving. Make sure you have the attack parameter set up if you want it to take place. It only takes place UP to where you have the BLACK line pointing on the parameter.
You can do this with other parameters within simpler too, and it gives you a lot of possibilities when changing up your HH sound. There are many unrealistic sounding things you can do too, like turning on an LFO, and then automating it to speed up VERY QUICKLY over one of the snare hits. Whatever your mind can come up with, it is all possible.
These are just a few of the ideas. Hopefully you can get your HHs sounding just the right way. Making sure your OFF HIT high hats are just right, will ultimately give your sound the groove you are looking for.
Keep makin tunes!
Peace!
FroBot
Tuesday, May 18, 2010
NOTES FOR 5.19.2010
(Todays Session Above)
Using 2 LFO modulated bass sounds at the same time can be great. Use all the parameters at your disposal...LFO speed, filter LFO, velocity, frequency cutoff, Q, all of it...to get awesome sounds. Change each parameter everytime the bass cuts in and out to make it sound unique.
This track, I am really playing with low frequencies, so I need to remember to really take care of them in the EQ process.
Also, its important when using multiple synths to check your DETUNE. Sometimes, you dont notice, but just moving the knob a smidge can get the sounds in tune a little better than they were.
Its really important to separate your stabs. You never know what you are going to want to do with them later effect wise. So separate each sound especially when they came from a drum rack. It makes things a lot easier later.
I learned recently to not delete my elements section with all my drum samples in it until later in the track process. Sometimes, you make a nice beat with a kick, and then...some sounds you add later just dont sound right with it. I am going to def have to change the kick sound to give it a little more punch now that this song got really crazy. Im glad I didnt delete it out of my template because it will be easy to change.
I really need to make more racks with shaker samples instead of HHs. I just dont have enough right now, and had to use a shaker loop for the time being...but I really dont like loops.
I made a vocal loop last night with my mic saying "Stuff you dont hear in the club". I need to cut the little pop from my lips touching. I will fix that up in the EQ process. This tracks EQing is going to be a lot harder than before because of the massive lower end in the track. I am running 4 bass tracks...which is hard to do.
This track is really getting up in the tracks. I am up to almost 40, and I havent even done sweeps, crashes, or the 2nd half of the song. Wow!
Thats it for today!
Peace!
FroBot
Monday, May 17, 2010
NOTES FOR 5.18.2010
(Todays Session Above)
When using 2 or 3 basses together, especially in the really low EQed tech house type, its important to make sure you arent using any of the same frequencies. I had to move the whole one bass up an octave just so it didnt sit with the bass sitting at 70Hz. It was really tough. I wanted this really busy low bass sound...but not very strong. Was really hard to do.
Sometimes, percussion in odd places can be just what you need. I was making some drum loops and accidentally made a mistake which turned out to be one of the main sounding parts in the song.
When making 2 different basses, its good to side chain compress them with separate attack and release parameters. It makes them stand out differently. Also, the compressor within ZEBRA vst....i dont really like much.
I need to get some weird effects on these melodies so they dont sound so boring. I will do that tomorrow.
Well, not many notes today. Ive been making tracks the last few days, but everything was to straight forward, it wasnt really worth noting.
Peace!
FroBot
Saturday, May 15, 2010
NOTES FOR 5.15.2010 (Evening)
(This Evenings Session)
Notes -
Pan Pan Pan! I cant believe how much cooler the track sounded when I started to pan everything. I always use track automation for panning. I love panning in unreal ways...ways that would never exist in the real world. Also, when panning, if you bounce a sound left to right....and then that sound loops, its good to be symmetric about your panning so the mix doesnt lean. Sometimes lets say you panned like this. X is sound L and R are left and right.
X X X X X
L R L R L
Lets say you panned like that and then you copied and pasted the panning automation like this.
X X X X X X X X X X
L R L R L L R L R L
You mix will lean then to left. So instead, do it like this -
X X X X X X X X X X
L R L R L R L R L R
Then do your copy and pasting. I have gotten into the habit of this. It really helps the mix from leaning to one side or another. Also, dont forget to use your utility tool to make a sound MONO if you are going to be doing less that FULL pans. It will also lean if the sample is already panned before you do your automated panning.
This song, I used gorilla and frog sounds, disguised. Sounded really funky!
I cant express enough how much I love BELL sounds. They can be so spacey. I have mentioned before I love Asian sounds, and bells in Asian keys are just the sweetest sounding thing.
This song is ALL about melody...unlike a lot of my other tracks. It has a CRAZY catchy jazz organ as the main part. It gets stuck in your head.
Be careful when using a synth sound as a 1/4 note HH. Something within you tells you to pan it...but you have to remember to have something sitting in the middle besides the snare and kick for a little more rhythm if you have panned everything else. I left it in the middle even though I felt like it should be panned. I have to remember what it will be like in the club, not just at home.
Adding an extra snappy snare sound or a slow snare sound ONCE every 4 bars adds a lot to the SWING if the sound. I did that today.
Well thats it for today. Ears are fucked. I will chill the rest of the night, and then EQ tomorrow. Amazing to get a track done in 2 days. Thats what happens when everything is organized well, and you are in the groove.
Peace!
FroBot
Friday, May 14, 2010
NOTES FOR 5.15.2010 (Morning)
(This Mornings Session)
Notes -
When duplicating your bassline using 2 octaves, sometimes its great if you delay one of them by 1/4 bar. Really sounded bouncy. Also, if your bassline is long, shorten it up during break downs.
Jazz organs sound sweet. I have 16 bar solos throughout the whole track. Who said melody doesnt work in clubs anymore. Fuck that shit.
Today, I used a synth sound for the 1/4 note HH instead of a HH. Sounded really cool and really electronic.
Today, I took some loops and sliced out one shots from them. I will delay them and use them as stabs instead of loops. I also dont want to forget to put a flange on that one element. I heard it, I just cant forget it.
Today, it was kind of weird because I usually only put a backbone to about half of a track (3 mins or so)...but today, by the time I was finished with my backbone, it was 7 minutes already. Shit. Looks like it doesnt need lengthening at all.
I used a lot more synth lines than stabs so far. Im wondering if stabs will ruin this jazzy electro song. Hmmmm.....
Also, im really finding my niche in style. I always seem to having a rolling melody style bass line.
Well thats it. Break time, then back to work!
FroBot
Mixdowns in Ableton Live
Mixdowns for Beginners
v1.03
by Tarekith
Before I get into the actual tutorial aspects of this guide, I need to briefly insert the usual disclaimers. Every time I write a guide, or a How To related to the music making process, I inevitably get emails from people disputing my ideas or the methods I propose. It's important to understand that I'm in no way saying that the ideas in this guide are the only way to approach a mixdown, nor are they necessarily the 'right' way to do things. I can only share with people my own experiences and the way I learned to do things. Certainly people should always keep an open mind and try any and all alternatives on their quest to create their own sound.
So then, what is a mixdown? In the simplest sense, it's combining all of the separate elements you created while writing your track. But I think it's more than that too. To me, it's about making the sum of all parts greater as a whole, about creating something really inspiring based on various unique combinations of parts capable in a mixdown. Anyone who's ever tried to redo a mix from scratch on one of their songs knows that you can get a vastly different sounding song each time, using the exact same parts. It's how they all interact together that really gives the song it's feel and emphasis.
How do we start then? Most likely, you already have. It's not uncommon for people to actual be crafting a rough mix of the song as they write. If one part is too loud and starting to get on your nerves or distract you as you work on others, you turn it down. If you can no longer hear the bassline for instance, you turned it up. A lot of people will not even approach the mixdown as a separate process, they shape it while they write, and when that phase is done, the song is done and they send it out for mastering. Certainly nothing wrong with this, many a good a tune has been written this way.
But I'm going to write this article assuming you want to learn how to mix a song from scratch. You listen to your song and while you can hear all the elements, it doesn't have the impact you want. Or maybe, it just sounds kind of dull and flat compared to other songs you admire, there's no depth and detail. Sometimes we can fix this just by tweaking a few parts of the rough mixdown you created while writing, other times we need to start totally over with a fresh canvas if you will. Hopefully the ideas below will help you with either method.
Preparation
Where you start can depend completely on what kind of song it is. I personally don't approach a mix this way, the process is largely the same for me regardless of what kind of song it is. But it can be important to start by recognizing what parts of the track are the focus, what is most important. In a pop tune this is largely the vocal, in a dance tune it's the kick and bassline, in an ambient song it could be the textures or pads. So take a second to think about, and to recognize what the focal point is in your song. I don't think you need to necessarily always pay more attention to this while mixing, but certainly you want to always make sure something else isn't over-shadowing it.
To begin with, I tend to follow the school of thought that you should not touch the master fader in your DAW (Digital Audio Workstation, i.e. sequencing/composing software) or your hardware mixer. I leave this set at 0dB, and adjust the individual track faders if the song starts to clip the master output. This is just my preference, but I think it forces you to work in a more consistent fashion, and after time, you can easily learn to avoid this happening as you mix or write.
I also believe in leaving approximately 6dB of headroom in my songs once everything is finally done in the mixdown. This means that once you're done with the mix, the loudest parts of the song will not be above -6dBFS on the master meter. Since we should always be rendering or exporting our mixdown as a 24bit file, this has no negative impact on the amount of detail we can capture in the song, and leaves plenty of room for the mastering engineer to do their work. Even if you're going to master your own song, I recommend this practice, if for no other reason than it ensures you are not unintentionally clipping your song anywhere. If it sounds quieter than you're used to, turn up your monitors or master volume knob on your soundcard some to compensate. For more details, see my mastering guide here:
Tarekith's Guide to Mastering For Beginners
Leaving 6dB of headroom is something you need to think about often while doing the mixdown, so keep an eye on your master level meter, and turn things down if you start seeing the signal go over this value (assuming you're following my recommendation that is!).
On that note, I personally think it's important to keep your monitors fairly quiet while doing a mixdown, for a couple of reasons. First of all, when things are louder, they always sound more exciting. This is a fundamental aspect of the way our ears work, the way we hear different frequencies in relation to others is dependent on the volume we hear them at. (Google Fletcher-Munson curves if you want more info on this phenomenon.) The simple result of this is that while things might sound great at louder volumes, they tend to sound very flat and dull at quieter volumes. However I've found that the reverse is NOT true. If you can make a song sound great at lower volumes, it will only sound that much better when turned up.
Secondly your ears begin to actually get tired when forced to listen to loud music for extended periods of time, something referred to as ear fatigue. After awhile you begin to lose the ability to make accurate decisions based on what you're hearing. Trying harder or forcing yourself to focus more will not help, your ears just will not convey the proper information to your brain anymore. The only way to fix this, is to take a long break from mixing (we're talking hours here, not minutes), and likely you don't want to stop just when things are going well. So keep the volume down for most of your mixing, and only turn it up once in awhile if you need to listen louder as a reference. You should be able to easily talk to another person without raising your voice if you have the volume set right. I'd bet money that in the end you get a better overall result, even if the process might not be as fun as you're used to.
Core Elements
Since most people reading this will largely be in the dance and electronic music crowd, I'll start my imaginary mixdown for this tutorial with the elements I'd say are 'usually' the most important; the kick, snare, bassline, and lead synth/vocal. Likely the first three are where most people start in any type of tune with a strong rhythm, so the same process might apply to other genres and forms of music as well.
The purpose of starting with these parts is two-fold. First, they are likely the core of the song, and what will impact people the most. They are the main elements that the song it built around, so we should focus on the important parts first. Second, there's a practical engineering aspect to this as well, in that these will probably be the loudest parts of the song. So by starting with these, we can make sure that our overall levels are set properly, and that we're not clipping and possibly ruining all of our hard work. I cover the details of proper level setting in my Leveling guide if you want more info:
Leveling for DJ use in Ableton Live
Back to the core elements. Let's start by muting or pulling down the channel faders for every single part in the song. If you have have any return channels you're using, you can leave those unmuted and at 0dB for now. Unmute the kick, snare and bassline, and raise those until you see the master meter hitting about -10 to -8dB's when they sound roughly balanced the way you want. Setting these parts to that level will usually leave us enough room to add the rest of the parts later on, and still achieve that final set point of -6dB on our master fader. These are the strongest parts of most tunes, or perhaps I should say they usually carry the most energy.
The hardest part of getting a good mixdown for most people is the low end, getting the kick and the bassline to not compete with each other, and to not drown out any other instruments. This is something best addressed while writing the track actually. If you know the bassline is really deep and has lots of subs, then likely you'll want to use a kick sound with more beater noise and less low end to keep from competing with the bassline. Likewise if the bassline is more distorted or uses a lot of lowpass filter tweaking to give it more bite (and thus is placed higher in the frequency range), you can get away with deeper kicks, 808 style and all that. But this isn't a hard and fast rule, there's other things we can do to get these two elements working together.
The first thing you should try is just using the volume faders of each to see how well you can blend the two via the simplest means. Sometimes this is all you need to do to get a really great sounding low end in your song. If your kick is still getting lost when the bassline is playing, you might try layering another kick drum sample over the original, this one with a brighter beater sound (that clicky aspect caused by the drum beater hitting the skin). Many times this can go a long way towards making your bass drum stand out more, and is something to think about when you're first writing your drums.
Side-chaining is another viable method, though one that's best used sparingly IMO. With side-chaining, you're triggering a compressor on the bassline line track to basically turn down the volume of the bassline briefly when the kick drum hits. It doesn't work with all basslines and kick drums, so I don't recommend it for all but a few cases. The specifics of side chaining depend largely on what plug ins and DAW you're using, so check the manuals of those for more info on how to do this.
Another option is to use EQ to help the two sit well together. I tend to cut frequencies below 30Hz in both my bass drum and bassline, this improves how much headroom I have in most cases, and helps clean up both sounds and make them less muddy sounding on loud club systems. This is really useful when you're using synthesized kicks and basses, which can have a lot of information down in the lower frequencies that no one will ever hear. Don't do this if you don't need to though, use a spectrum analyzer to actually see if there's something down there to cut in the first place. And you don't need to cut a lot many times, only 5-6dB can make all the difference, don't try and remove these freqs entirely.
What if the opposite is true though, and your bassline or kick lacks a lot of punch and low end? Well, layering a sine wave under the bassline can help this, even if used quietly it can add a lot of low end to the sound. The key is to not overpower the original bassline sound where all the texture and interest is, so keep the level low on this. Ditto on the kick drum, try layering a deeper kick underneath it to add more weight to it. Already we can see that some mixdown problems are really issues with the sounds we choose, and not best addressed in the mixdown!
You can use EQ to cut and boost certain frequencies in each part as well, to help give them their own sonic territory in the frequency spectrum. Maybe you cut a few dB at 80Hz on the bassline, while cutting some at 120Hz on the kick (for example). Follow your ears, there's no right answer, and for each song you'll often need to try a lot of things before you find the one that works the best. On that note, don't get too hung up focusing on any one part while doing a mixdown, it's a sure fire way to get distracted and lose sight of the overall picture. And besides, you could spend days getting these two elements right, and then when you add the rest of the parts of the song back in, realize you can't hear all that work anyway. Work fast, and keep the overall song in perspective while you do. You can always come back to these parts later on if they're not working well with the rest of the song.
Finally I tend to make my basslines and kicks in mono, especially if it's a tune for the dance floor. This way the core foundation for the song sounds the same out of both speakers, and gives the stereo imaging of the song a real center which you can play off of later on, when you add other parts. You don't always have to use a mono bassline, but I've rarely found a good use for stereo kicks.
The snare is the next sound I would approach, and often I'll be working on it the same time as the bass and kick. For rock and breaks music, typically the snare will be mixed a little louder than other forms of music using a 4/4 kick drum. It's more of a focal point, and helps tie together the various rhythm elements to a predictable pattern. If you're using samples of snare drums, then sometimes there's very little you actually need to do to a snare in the mix. I find that over-processing a snare often just takes away from the character that led me to choose that snare in the first place.
There are times that some EQ can solve some issues or improve things though. A dull snare can often be fixed by boosting some around 2kHz, though you have to be careful as this is the main frequency your lead is likely to sit at as well. Boosting around 8kHz and above can add a bit more "air" and openness to the sound. I'd use a low Q value and only a couple dB's of boost on this to keep it as smooth as possible. If the snare sounds flat, like a you're hitting a wet newspaper (i.e. no punch), then a gentle boost around 400Hz can often solve this. It brings out more of the drum sound of the snare, and less of the rattle. Again, don't take the frequency and gain recommendation here as gospel, play around and see what sounds best for each situation.
Sometimes I'll put snares in mono, not always though. If it was something I used a drum synth to make, then likely it was created in mono anyway and it makes no sense to put it in stereo. If it was a stereo sample, then likely I'll keep it that way. It doesn't hurt to try both options and see what you like best. Double check once more that you're master level is not above -6dB while you're at it.
The Lead
When I refer to the 'lead' in a song, it could be the vocal, or perhaps you have a synth that has the main focus in different parts of the song. But it could be just as likely that your song doesn't have a defined lead instrument as well, so don't feel the need to create one if there doesn't need to be one. Because there are literally millions of ways of creating a lead sound, and coming up with new ones is the goal of most producers, I won't go too much into specifics here.
Ideally you want to make sure that the lead is always able to be clearly heard, that it doesn't get buried by other elements of the mixdown. Usually this means that it's slightly louder in comparison (use your ears, not level meters here), but it could just be in it's own frequency range too. If we're talking about vocals, then it's important that people can understand every word. This can be tricky figuring out on your own if you wrote the lyrics or know what they are ahead of time, so maybe get someone else to take a listen when you're done and get a second opinion.
A lot of time I think it's the lead that seems to end up with the most effects in people's songs, at least that's how it seems to me. As with everything, make sure that you have a real need for each effect, overdoing it can often have the opposite effect of burying the lead or making it tiring to listen to. Sometimes a completely dry lead can have the most impact of all too! Remember less is more, especially with something like reverb or delay. Both of these can make a sound seem further away in the mix, like it's being played in the distance. This is one more thing that can make a lead sound dull or unimportant, so use these two effects minimally.
Typically a lead is panned dead center, it's the most important, so you want it coming from both speakers equally. That's not a hard and fast rule though, so experiment if you feel the need. Panning leads back and forth in the speakers can be an ear catching effect if done sparingly, too much and its annoying and can be distracting from other song elements.
By now you should have the main elements of the song working together, the core drums and bass providing a solid foundation, and the lead providing the focal point. Now it's time to add everything else that completes your tune, just remember you don't want to bury these main sounds!
Percussion
The role of the ancillary drum sounds is to support the main groove, so don't make these parts too loud in the mix. Especially hi hats, which I think most beginners tend to make too loud. Sometimes it can be helpful to roll off (gently cut) frequencies below 1kHz when dealing with cymbals, it can make them less intrusive and they sit better with the other drum sounds without getting in the way of any hand or ethnic percussion you might be using. Use your ears, it shouldn't drastically alter the character of the cymbals when you do this, if it does, then think twice about it. Only a few dB's of cut can be enough to make a large difference, so as with all things in mixing, follow the less is more principle. Boosting cymbals and hi hats should be done sparingly as well, it's very easy to make them harsh sounding this way.
Toms and hand percussion, like tablas and bongos, often work best when panned a little bit to each side. Try and split up the instruments so you have an equal number on each side of the stereo field to keep the mix sounding balanced, and not like one side of your drums is louder than the other. With low toms you might need to cut some of the lower frequencies out to keep from clashing with bass drum. With higher toms the opposite is true, except that we're trying to keep from clashing with the snare. I recommend very low Q values for this kind of work, it keeps things sounding more natural, gentle shaping is what we're usually after.
Pads, Chords, and Background Vocals
The main function of these elements is usually to support the harmonic or tonal aspects of the song. The key word being support, so you need to make sure that they do their job in the song, but don't overpower the main elements. These are usually the parts I get a bit more heavy handed with when it comes to EQ during the mix. Well, actually I tend to just create them with very narrow frequency ranges in the first place, but you can do the same thing after the fact with EQ.
In general I find that they need very little low end to do the job, and that way they don't clash or bury the main components of the lower end of things, namely the bassline and kick. So you might roll off everything below 600Hz, as well as maybe some top end too, unless it's a very 'airy' pad sound. Usually panning is the best way to make these fit in the song, though things like reverb and stereo delay can also be used to make them sit further back in the mix too. Panning delays are fun here, but as always don't overdo it to the point that it detracts from the main song elements.
Another trick is to double these tracks, or create a copy of the track in your DAW. Then delay one track by 4-5ms, and pan it all the way left, and the other one all the way right. This spreads them out to the far sides of the mix, and gives a neat detuning sort of effect. You can also do this with synth pads, but detune the left side by positive 3-7 cents, and the right side by negative 3-7 cents.
Once again, double check to make sure that you're not hitting that master meter above -6dBFS. If you are, the easiest way to fix this is to temporarily group all the tracks (if your DAW supports this) and lower the level of all the tracks at once. If you're DAW doesn't support track grouping *cough* Ableton Live *cough*, then you'll need to go and lower the faders of each track by the same amount. The easiest way is to do this numerically. Look at the dB value readout for each fader position, and type in a new number that's say 3dB less than this. The actual value will depend on your song and how high the master level meter was showing of course. Just be sure you subtract the same amount from each track.
Sound Effects and Ear Candy
Sometimes it's the little things that can make a song really fun to listen to, and that's what I'm referring to when I say ear candy. Those weird sound effects, fills, and transitional elements that add interest and variety to the song. Really not too much specific to do with these sounds, just remember to not have them so loud that they take away from the rest of the song.
This is especially important for sound effects you might use coming out of a drop or breakdown. When the song kicks back in, you want the song elements to have all that impact and focus, not the sound effect before them. So if the effects are too loud when the drums and bass come back, they might sound wimpy all of a sudden in comparison. EQ can really help with this, if you remove a lot of the lower frequencies, the effects can have a bit more volume, and the main elements of the song with still hit hard when they come back in.
In general I'd say that it's the sound effects and other small elements that can make a song hard to mixdown. If they clash with other areas of the songs in terms of frequencies, things can just sound messy and cluttered. So use EQ or synthesis to really shape each sound to have it's own space in the mix.
Putting It All Together
Hopefully by now your mixdown is 95% of the way there, and everything has it's own place. All your tracks should be unmuted and playing back together. I recommend taking a ten minute break and going outside for a bit. I find that being out in the 'open' sort of re-calibrates my ears if you will, and gives my listening a break from the 'sound of my room'. Vague concepts, I know, but your ears likely need a break and this is a good time to take it. Ideally you'd take an even longer break, overnight perhaps, but I know that won't happen so at least take ten minutes.
When you come back to listen to the mix, you'll probably notice one or two parts that sound too loud or quiet so adjust those as needed, so go ahead and do any little volume corrections you think the tune needs. Listen and make sure you can hear all the tracks in your song at the right times. If not, think about about if you really need them or not after all. Parts that don't really add much to the song just add to the clutter, so don't be afraid to remove them. It's not easy I know, especially if you've spent a lot of time on them. But you have to keep the SONG in your mind as the important part, not the individual parts. If nothing else, render out unneeded parts and save them for use in another song, that makes it easier to delete tracks in my experience.
Listen to the song all the way through a few times. Get up and move around your room as you listen, or maybe listen from the a hallway or another room nearby. Can you still hear the main parts of the song? Is there any part that sounds too loud everywhere but your studio? Try playing the mixdown back at different volumes, from really quiet to really loud (neighbors depending). Try listening on different headphones too. Likely a lot of people will be listening on iPod ear buds these days, so those are good to have to check things on too. Listen to it in your car, or if you're really lucky, at a club on a big sound system.
The goal of all this is to adjust the mixdown to obtain the best possible compromise for making your song sound good on as many sources as possible. With practice you will eventually know how what you hear on your studio monitors will translate elsewhere, and you can skip some of these steps. But for now, it's a good idea to listen in as many places as possible. I firmly believe that you should NEVER find yourself saying "well, it sounds ok, but I can fix that in mastering". No no no, now is the time to get your song sounding exactly the way you want, just a little quieter at this point compared to other songs (see my mastering link above for more on this).
Don't be discouraged if it still doesn't sound exactly the way you want, you're learning, and experience only comes by repeatedly doing the same thing over and over. Sometimes it takes more than one mixdown attempt to get it right. By going through and playing with EQ and spectrum analyzers while doing the first mix, you learn more about each part and how it fits with others in the song. Don't be afraid to remove all EQ, reset all levels to 0 and start over. Yes, it sucks sometimes, but most of the time doing this a second time works much better. I bet you end up needing to use a lot less EQ on the 2nd try, which can be a case of once again less being more.
Compression
Some of you will likely have noticed that I haven't mentioned compression yet when talking about mixdowns. That's because I personally feel that it's over-used these days, and that it's best to try and get the mix right without it first. Sometimes however, it can help situations, so if all else fails, don't be afraid to try it. The subject of compression is one I plan on covering in more detail in a later guide as it's a subject best discussed with audio examples to listen to, so I won't go into much detail here.
However there's a few quick tips I can pass on, such as the so called "New York Trick" for adding compression to drums. Basically you create a send or buss track in your DAW, and place your compressor on that with a very fast and hard setting. You're going to really squash things on this channel, but that's ok. You send a copy of all of the drum sounds to this compression channel, and really compress the life out of them, it's one time to go overboard with compression. The compressor helps merge all the seperate drum sounds into one huge drum sound, and you blend this compressed version of the drums in with the completely uncompressed version. You're basically doubling the drums, one uncompressed version that retains all it's transients, and quieter version of them all heavily squashed together underneath. It's a good way to give the drum more punch, without destroying all the transients. But again, sometimes it can ruin the drums too, so don't think this is something that always sounds better.
A quick and easy way to set up a compressor for other instruments is to set the attack to it's max amount, and the decay to the fastest setting. Set the ratio to 3 or 5, and lower the threshold until you're seeing about 3dB on the gain reduction meter on the plug in. Set the make up gain to auto if the compressor has this, or raise it to the same amount you see on the gain reduction meter if it doesn't. Now you can play with the attack and release settings to get the sound you're after. Lowering the attack setting will sort of dull the sound a bit, which might be good for say tweaky synth parts or basslines. Raising the release will give things like drums and percussion more 'oomph', just be careful not to go too high or you'll get the compressor pumping, which may not be a sound you're after.
Regardless, compression is one of those things that's entirely dependent on the sound you're feeding it, so it's pointless to discuss it in too much detail. It's best to teach yourself what all the controls do, and then spend time experimenting with each one on different source material.
Wrapping Up
Sometimes our ears just don't work right on some days, and nothing you do is going to help it. Or maybe they're just fatigued from being forced to listen critically in ways you've never done before. Don't stress over it, just save the project file and come back to it another day, or even a week later if you have the patience. The more you do this, the better you get, there's no shortcut to learning the art and skills of mixing, except to do it as much as you can! Look at it as practice, instead of a wasted day if that helps.
Just don't give up! When you're done with the mixdown, ideally the mastering engineer (or you) will have to do nothing but convert it from 24bit to 16bit, add dither, and raise the level a bit. That should be the goal of all producers, to produce a mixdown that doesn't need any other processing done to it!