I use the M-Audio Trigger Finger for my drums. I like it because the pads are pretty strong, the way I like it, and I also have 8 knobs & 4 faders for controlling other parameters (I want to put a frequency shifter on each row, but I need to think about the best way to do that....which will probably be tomorrow).
Now, I have personally re-mapped the internal midi mapping to the Trigger Finger to work best with the drum racks within ableton. I have dedicated the whole controller on channel 16 to avoid confusion with my Launchpad, VCM 600, & Microkontrol.
I have mapped out memory banks 1-8 (meaning 16pads x 8 banks). That is the same amount as the maximum that the drum racks can hold. (or 128 samples). So each of my racks will have 128 samples starting from C -2, to G8). I have mapped each bank in an exact progression of that scale from banks 1 - 8....meaning, if I click bank one...the bottom left note mapping would be C-2, each pad moving up in midi sequence. If I switch to bank 2, it would be E-1, (again matching the drum rack in ableton). This way, I can switch between 8 total different kits just by switching the memory bank on my controller. So 8 kits per rack (max).
I have also mapped all the midi knobs and faders to be the same values whether on bank 1, or bank 2, bank 3, etc. So, I can have the exact same effect controls on them. This is my preference.
Now, today, I made tons of new kits...just surfing samples and dropping them into audio tracks (like explained in my launchpad drum rack tutorial). But instead of labeling them by genre its like this -
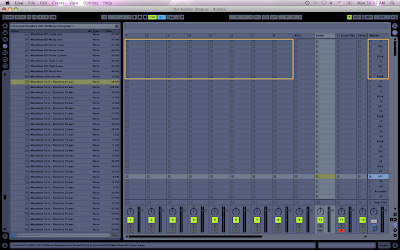
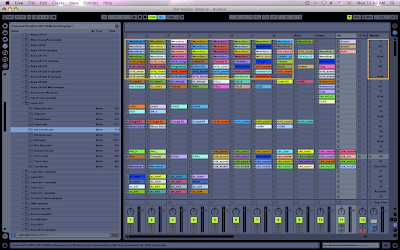
I made each 4x4 session clip spot match what I wanted on the drum pad.
Row 1 - Other Sounds
Row 2 - High Hats
Row 3 - Snares / Claps
Row 4 - Kicks
Of course some are different samples sounding like these elements, but I tried to stay in a rough template. I renamed the scenes to make it easier.

You can notice I messed up a little on the right with the names...but I went back and fixed it after I took the picture.
Start filling up your squares....dont be shy....add tons. You will have tons to choose from.
(I even had other tracks on the right side because I kept stumbling upon other samples I wanted in my launchpad racks, so mine looked like this) The first 8 rows are for drum kits.

So you've selected all your samples.
Now, just make a new midi track with a drum rack, and set the view down to c-2.
Here is the downfall to this method, which I learned today. Since when you drag from your audio clips into the pad, it puts whatever you have in scene 1, 2, 3, 4 in the bottom of the pad, and my kicks for instance, and horizontal through the tracks, you must select only kicks 1, 2, 3, 4, and then drag them into the drum rack. Then go back, select the snares, and drag them in. Again and Again.
After doing this, I realized, its probably much easier if I were to have named the scenes like this.
1- Kick
2 - Kick
3 - Kick
4 - Kick
5-Snare
6-Snare
7-Snare
8-Snare
9-HH
10-HH
11-HH
12-HH
13-Other
14-Other
15-Other
16-Other
If I would have made the drum racks I made vertically, I could just drag them by the whole GROUP into the drum pad. But, it really only took me and extra 7 minutes doing it my way....and I was easily able to visualize a pad when I was making it in the normal session view. So whichever way you like is fine. You can just drag into drum racks, but when surfing and finding certain elements in groups (like all snares, or all HH), the way the drum racks view works can be tricky because there are no labels to tell you what each row is. (ex. HH, Kicks, etc)
After that...click the little disk icon on your rack to save it...name it....and there you have 16x8 pads in one rack.
Now if you plan to improv with these kits, you will need to go in and adjust all the volumes (all in my launchpad drum rack tutorial).
Now, to make a new rack, just drag a new rack over your old one, and do it again until all your samples you chose are gone. I made 3 racks today...so about 384 drum samples.
Now, if I ever want to layer a drum sample, I can just use the overdub button, record within the midi track, and I have 128 samples to choose from. Nice options for building.
Now, time to figure out how to program effects based on the rows. I was thinking about separating the drum rack into 4 separate racks....containing only one row out of the 4x4 pad. Run them all together, and put the effects I want per row in each rack....but there has got to be a better way. I know I could throw them individually into each chain and then map them, but that will take fucking forever. Anyway, that will all be for tomorrow anyway.
Have fun making beats with your drum pad!
Peace!
FroBot


No comments:
Post a Comment