What we are going to talk about today is using the Launchpad in conjunction with the drum rack inside ableton to help you organize your samples and have them ready for use at any second during the production process.
When you make a track by intertwining abletons session view and compose view, it can be very handy in creating the backbone to a track. Launch loops in scenes, sequencing sweeps and melodies, etc etc. But, once you have put together a nice backbone, you are missing the some of the MOST important elements...the random stabs or other quick noted instruments. They are what take a track from sounding loopy and repetitive, to atmospheric and musical.
One other problem that faces many producers, is that, if you are like me, you have an addiction to sample collection and creating. You enjoy having as many as possible. I have over 500 gigs of one shot samples, and it can get really confusing as to which ones to choose, and where to find them (considering a lot have abstract names having nothing to do with the sample within).
By using the drum racks, and saving them for later use, you can save time, and have a lot more options right at your fingertips during production.
The Novation Launchpad at 64 buttons for one shots at your disposal. It may not be as trigger friendly when compared to a regular drum pad, but in production, you will most likely be quantizing and adding effects to your one shots anyway, so this is not a big deal.
Its also handy that all you have to do to use the launchpad as a drum pad, is click the USER1 button, and its already mapped out to C1 - Dsharp6.
Lets start with how to organize your samples.
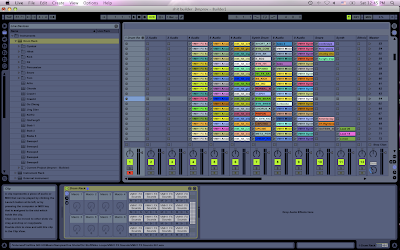
I like to set up a bunch of audio tracks within ableton at first, so I can drag my clips into them (you can just drag them into your drum rack, but i'll explain why I do this in a minute).
When surfing your samples, you will finds tons of different genres of samples you may like to use in production. Therefor, I name each audio track that I have created, based off a certain genre of sample. (ex. stabs, chords, guitars, ethnic hits, organic percussion, etc etc)
Then, just start surfing your samples, and dragging them into the appropriate audio track.

Another helpful tip for finding nice one shots amongst a mass amount of unorganized samples is to search by SIZE within the browser. Just right click the top of the title bar within the browser, and select the size option. Then, organize by the SMALLEST to Largest. This way, small one hit samples, anywhere from 4kb - 100kb, with show up first. These are smaller files and more likely to be one hits than longer samples.
Dont be afraid drag TONS of samples. You have 64 buttons to use in connection with the launchpad, so you can make tons of racks to be used later. (I made about 45 racks just today).
Once you have selected all your samples and moved them into audio tracks, the next little personal tip I will give you is to MIX THEM UP within the audio track. If you are using downloaded samples, there is a good reason for this. You may have put whole groups of samples from your browser into your audio track, and because they were all good and you MAY or MAY NOT want to use them...and you would rather have them then not, mixing them up really help to mix up sounds so the are not all totally similar within one rack. Randomization can be your best friend when making and electronic track, and the ability to record just by tapping on buttons can make for some nice combinations. Another good reason to do this, again, if you are using downloaded samples, is so that, if you do decide to use a few samples from one rack rhythmically, you arent using them all from the same maker. Mixing up different manufactures samples make it less possible that other producers will notice you using the same sample CD that they have.
I wouldnt go as far as to mix up different elements (like guitars with horns, or percussion with vocals)...but if there is a certain combination you would like to use, then by all means do it. This is just my preference. I usually have a sound I am going for, and then it gets changed a little bit by my choice of samples, but I still like to have a general genre of sample to look for. If you love just random making, mix it ALL up.
Now you have them just they way you want to put them into your drum rack. Your scene may get super high (mine were up to 500 scenes of samples within one track).
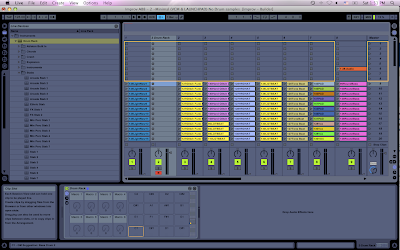
Now you need to make a midi track, and insert a blank drum rack. The bottom of the the rack view should conveniently already be at C1, which is the first note of your launchpad.
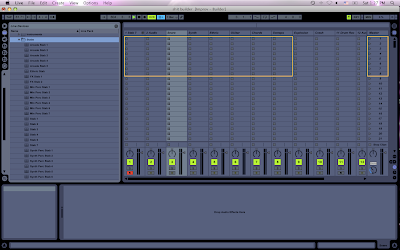
Go to your audio track that you want to move the samples from, and make sure it starts from scene one. Use the shift key, and select the samples within that track 1-64 (cause you have 64 buttons on your launchpad). Drag them over to your midi track, and put your mouse over C1. This will set all your 64 samples within your rack (C1 - Dsharp6). Now your samples are in your drum rack.

Now, you need to save it. Click the little icon in the drum racks top right corner that looks like a disc. This will prompt you to save it within your drum racks in your browser. Name it to your liking, and press enter. It is now saved for later use.
To repeat this process, just drag a blank drum rack over top of the old one, and it will be fresh again. Drag clips from your audio tracks into, name it, repeat.
It also helps to delete the samples from the audio track when you finish moving them just so you can remember things more easily. Also, it helps to then drag up the samples back to scene 1, unless you wanna do the division of 64, 128, etc, math every time. If you drag them back to the top, when you reselect them, you are always selection scenes 1-64. This can be a lot easier when making many racks at one time.
When you finish making your racks, make nice folders for them within your browser so you can find them easily later. Mine looks like this...so many racks!!!!

Now, anytime you want a certain sound when producing, just make a midi track, and drag your rack from the browser into the midi track...and WALAH, there is your rack. Much better than manually surfing through all your samples and testing them out like audio clips, and you can use your rhythmic side of drumming to sequence them.
By understanding chains and zones, you can even record a sequence of your rack, and apply certain effects to different samples you pressed. You can change the key of each, velocity, etc etc within the sample editor of each sample too.
A few tips about this method -
Samples will all have different volume levels. This is bad for improving, but not a big deal if you are producing because you can change the volume to suit the track, which you would be doing anyway. If you want to do a little bit of extra work, you can go within each sample in your drum track and change the volume of each so they are all the same. Just move the volume parameter on the right side of the sample, and watch the meter beside it. When its reaching around 0db, it should be fine.
Also, I dont usually like to put my highhats & snares into drum pads. There is a reason for this. I like to separate my elemental parts (kicks, snares, HH, etc) into a different section of my set. The reason for this, is 100% of the time, I need to change the frequency and tone to match the track I am making, so I like a frequency shifter (and usually an EQ8) to be sitting within the those particular tracks. You could however put one right after your rack, but I actually like to work with those samples via audio, not midi. Its nice when slicing them on the fly, or applying beat repeat. But this is just my preference, many producers loving using midi to make beats.
Also, when using one shots, its best to have all your samples on an external HD so you dont waste up space on your computer. When I make tracks, I always plug it in. When I go out to play, I manage my set and save the samples I want to use live to my computers HD. The reason for this is, I dont want to lug extra gear around...and also, if you are using a firewire 800 HD like I am, there are some issues when using a firewire sound card and a firewire HD at the same time since they are on the same bus. That is for another blog all together.
Well, thats it for drum racks. I can honestly say, the launchpad is my essential tool in the track making process. For finding samples, testing samples, and organizing samples. Its more than just a clip launcher. In conjunction the with VCM 600 for mixing...it doesnt get much better than this!
Have fun, and keep making them funky ass tracks!
Peace!
FroBot


4 comments:
very nice approach. It's something I "knew" to do, but you explain in a way that will save A BOATLOAD of time
Really good!
Thanks a lot !
Hello great post really appreciate your work ethic. I was wondering when triggering the samples in Launchpad how is Live set-up so that what you're triggering can be recorded into live. Been having a problem finding this out. Your help is greatly appreciated.
Um...its pretty simple really. Just have a drum rack, and then press record (top middle), then launch in what you want to play. As long as the track you want to record is armed (its red button is on), it will record those sounds into compose. If you press record on a new clip in session view, this will record a session view clip.
Post a Comment