Wednesday, March 31, 2010

NOTES FOR 4.1.2010


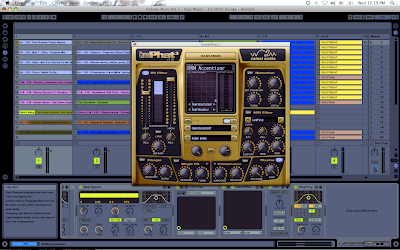
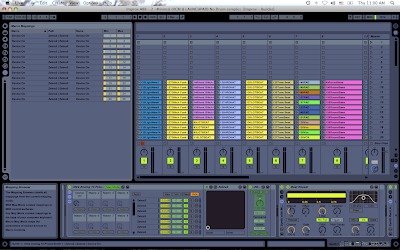
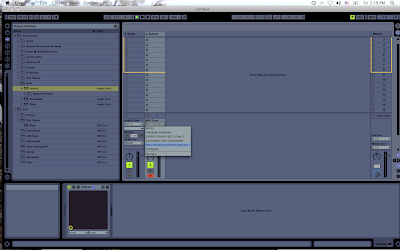
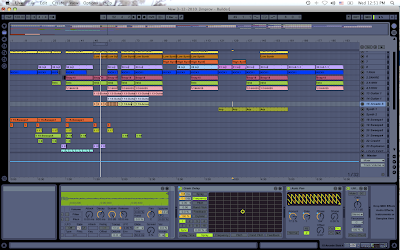
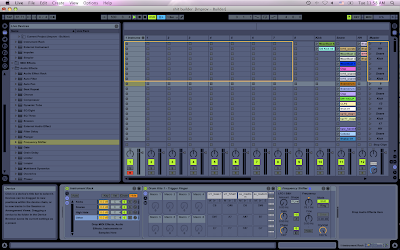
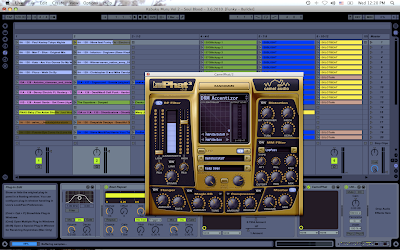
Todays Session Above

I started a brand new track today. I still have 2 sitting around that I havent finished, but I was in the mood for making something new today so I started. I did a few things different to my normal procedure to which are worth noting.

I have decide to save 2 separate ableton sets per song I do. One is my track compose set which has 8 audio tracks, and a few synth tracks....and everything else is added one by one as I go on. Like ive said before, I usually build a backbone to a track, and then build off of it. In the picture above, I havent even saved the backbone to the compose section, just setting up backbone scenes to record in.

Recently, I made a new ableton template set which is used for digital synthesis creation...so now, I am bouncing between the 2 sets to make my track. What I am doing, is starting within my creation set...making some nice fundemental loops with kicks, high hats, some drums, etc. Then, I copy those into my digital synthesis set. (just for background music purposes). Then, within my digital synthesis set, I just start recording TONS of samples using my monome, drum racks, and kits. I record midi loops, then audio loops, and save tons. Im not really sure which i am going to use, but by making 10 similar samples with the same midi notes, and effecting different parts of them...when I put them back into my compose section, I have a bundle to choose from. Its definitely making things sound more techy when playing with neat effects within a softsynth....ones that you wouldnt normaly play with. I was messing with a comb filter, waveshaper, and some other things today. Great techy sounds.

Also, today, I tried a different kind of bass sound. Almost sub bass, really tech house sound...but it still has a rolling melody to the bassline. Makes a nice cool sound. I used 1 hit bass samples rather than a softsynth to make the sound, and just transposed the samples and cut them up to make a nice melody. The whole track sounds different than the last ones...although there isnt much too it now, only a backbone...which I will record into compose tomorrow. (day off!)

Technical notes not to forget for tomorrow -

Filter the kick in the beginning with high pass or band pass. High Q.

Alternate track 3s delays throughout, but not sequentially.

Come in off a low pass for the synth lead...starting at 1 oclock or 12 oclock.

Add a new snare on top of the small one I have.

Make sure not to be to 4/4 bar changing. Add some off hits.

Another cool thing about this track is that I made a nice bass line in an OFF time...so I will actually change the time signature of this song half way....sounding really creative.

Well thats it for today!

FroBot
Tuesday, March 30, 2010

NOTES FOR 3.31.2010

Today, I finished up the track from 3.2.2010...and its called "American Dream". I am sending it off to my mastering engineer today. Got everything sounding just right. Here are my notes to the engineer.

Notes for FroBot - "American Dream"

This track is a deeper track than before....and even a little bit political. :) This should have a really deep "deep house" vibe. Key notes for this track

ALL TRACKS are NOT EQed at ALL! I had them on when I made it, but took them off after cause I like a pro to do it.

1. Chords must be sitting at nice deep house frequencies, each in their own, and very strong. They are SUPER important.

2. Horns need to have more power than they do now. Especially the LOWER sounding horns. They should also sit nice a strong in the track. Im not very good at understanding EQing on horns, so please use your expertise to make them sound full and nice...not weak like they are now. They should be sharp however, with not too much reverb.

3. Bass must be nicely EQed with kick and side chained. Feel free to EQ that kick too. I had a sidechain on when I made it, but took it off so you could get it just right. Very important to get that side chain JUST right...deep house tracks need really good sidechaining....very balanced side chaining.

4. Track called "LIGHT cymbols" should be nice and spacey and big sounding. There is not much of a BUILD UP sample in the beginning of the track, only at the end. So "Light cymbol" should be nice and full sounding.

5. Vocals come from the real "I have a dream" speech. They do have some audio clips in them due to 1960's style recording. Hopefully you can remove them with eqs. Please let those vocals sit nicely so they can be heard, without over powering the track. At the end of the track, I use 2 tracks to bounce between the vocals, so that the people are SCREAMING constantly in the background. I had no choice but to do this because I couldnt cut his WORD vocals out without having people screaming in parts of it, and if the screaming disappeared, it sounded terrible, so I just left it in. If there is anyway to minimize that, do it. If not, its fine, its the end of the track. Just dont let the peoples screams overtake the song.

5. Track called "bubbles 2" is almost like a lead part. Let it stand out nicely.

6. The WHITE NOISE should sit at a nice frequency too, like minimal music does. They have NO reverb on them (except one of them). I like it like this. Punchy white noise.

7. at 3:30, the vocals are chopped to be a melody. They should stand out nicely.

8. at 3:30 - track called "synth hit" little tiny synth POPS should be strong.

9. VERY IMPORTANT - at 4:00 tracked called "bubbles" starts. It is sitting at a MUCH TOO LOW frequency. EQ it higher (in the mids) and nicely. It interferes with the bass. Try to make this sit nicely.

10. 5:27 - OK, this point is all crazy. Please use your musical ear to make this buildup sound nice. Its really weird, and full of distortion (on purpose). Also, when it comes back it, I did my best to make it as PUNCHY with the disappearing audio into the gunshot. If you know a trick to make this sound even punchier, please try it...dont add samples, but, something....not sure how to get it to sound more punchier. Its a nice little effect where the audio all disappears and then a gunshot hits really fast. I tried so many things here, but its the best I could get it. I like it, but if you have an idea to make it punch harder, try it.

11. Anything that needs panned so there is no masking, go for it.

12. Oh yea, goes without saying, but make sure that snare sounds beautiful.


Well...thats it for today! Should have this track back in a week or so!

DJ Mixing with Filters (instead of EQ) w/ Camel Phat 3 in Ableton Live

Today we will be talking about mixing in regards to DJing with ableton live. Specifically, we will be talking about using filters instead of EQs to make nice sounding mixes between 2 tracks. Most DJs like to mix in the traditional sense where they will cut either the lows, mids, or highs, and then mix the next track in using that method. While that is a good method for mixing, and is pretty standard, I tend to not like computer EQs, and use a different style of mixing 90% of the time. This involves using a combination of low pass and high pass filters.

When using filters in ableton live, I prefer to use Camel Phat 3 rather than ableton's built in filters. Abletons filters are more like production filters, and also seem to have a small audible difference even when left on (without actually filtering). Camel phat filter can sit ON within a track without actually changing the audio at all. So I like to use this.

Now, in order for this to work, you must be using a controller that allows you to have 2 knobs (one for low pass, and one for high pass) on each track that you are mixing. I have them mapped out to my VCM 600 where normal "send 1" and "send b" are....because I use them so much...and dont use sends too much when DJing.

SOMETHING TO KEEP IN MIND WHEN USING CAMEL PHAT 3. For some stupid reason, within the VST....the LOW is high pass and HIGH is low pass. Dont ask me why. So when mapping them to a controller...take this into consideration.

Also, I like my low pass and high pass to both activate when moving the knob from the LEFT to the RIGHT. (unlike what it is actually doing on the EQ spectrum). So you will need to inverse one of them (in map mode) to make them both go the same way if you want to do it this way. For the purpose of understanding this tutorial, think of the knobs as being OFF when in the LEFT position, and fully activated when in the RIGHT position. (for both high and low pass)

Also, please make note of these 2 important numbers "11 oclock" & "2 oclock".

We will refer to the knobs on the controller as if they were a CLOCK, and the position being the TIME on the clock.

1. OK......so lets talk about a filter OUT of a track first. Lets say, you are getting ready to mix track A and track B. Normally, someone would cut the lows out of the old track, (and possibly the new track) and then mix the beats together. Since I usually mix during ambient parts (because everything is warped and this is possible), it is not necessary to cut lows really...because there are no beats overlapping. So, a nice trick to filter out track A (rather than using volume & EQ)

To filter out, just start turning your low pass or high pass out as the new track is coming in. This is a simple technique, that really does not need much explaining. You can make the whole track disappear by filtering it out the whole way.

2. Now, lets talk about a filter IN of a new track. This is where "11oclock" and "2oclock" come in handy. Since the range of the BASS end of the spectrum is much smaller than the HIGH end, yet a knob must be able to go through ALL the spectrum in less than 360 degrees, LOW is much more sensitive to your knob then the HIGHS are. In other words, when you start to use a LOW PASS FILTER, the beginning of the low pass will react more quickly than the high pass. The opposite is true to the high pass. The beginning will react much less drastically than the ending of it. So, if you are going to FADE in with a filter....its good to start with either your LOW PASS at 11 oclock, or your HIGH PASS at 2 oclock. (this is just from experience with this method)

On Camel Phat, Low pass looks like this -


High pass looks like this -


Now, if you are fading in a track with a high pass...set it at 2 oclock. Then, as that track starts, slowly start moving it to the left until the track is unfiltered. This will make a nice high pass fade in effect. On the other hand, you may want a more muffled low pass sound. So, set your low pass at 11 oclock, and move it to the left until it is unfiltered. This is a great effect for bringing in a KICK drum from out of the lower frequencies. I tend to think bringing in high hats sounds good with a high pass, and kicks with a low pass. But it can sound good both ways.

Now remember, you could use other placement than 11 oclock, and 2 oclock, but on club speakers...using a high pass starting in at a higher value than 2 oclock tends to sound VERY loud and TOO HIGH when mixing. Low pass sitting at anything higher than 11oclock tends to not even be heard. Just some hints, but sometimes it may work using other clock positions.

Now, once youve tried this, its time to really get into understanding mixing with filters. When you do this, you are playing with mostly low and high frequencies. But, when mixing, I think its best to mix within the mids because it is the cleanest sound to the ear. But by using the 2 together, you can in a band pass filter style, which sounds the best, and what I do most of the time.

3. Lets talk about FADING OUT A TRACK again. Instead of using just one low pass or high pass, lets use them both together. Lets not forget the sensitivity range of both. When a track is being filtered out into disappearing....use both together. Remember to move the HIGH PASS a little MORE than the low pass. This will make the filter out within the mid range rather than the LOW or high, and sounds MUCH CLEANER for mixing.

4. Now lets talk about using a LOW pass on one track, and a high pass on the other. Lets say your mix point is coming up....and you want to bring in track B with a high pass filter, then filter out track A with a low pass. Set track Bs high pass filter to 2 oclock. Then, start the mix. Start bringing in that high pass filter, and at the same time start using the low pass on track A. Filter out track A with a low pass until it disappears, and remove that high pass on track B until it is unfiltered. It makes for a nice mix. You could also do this with a HIGH PASS and a HIGH PASS or a LOW PASS and a LOW PASS. They both sound nice. If you are good at turning 3 knobs at the same time...like shiva...you could apply all these techniques, and for instance...bring in track B (high pass at 2 oclock), and at the same time, filter out track A with a low pass AND a high pass. This makes track A disappear in the mid frequencies, and then track 2 comes in from the mid frequencies until it is unfiltered, and then playing at its normal sound. ALSO, you can get really crazy, and use 4 knobs at the same time. Bring in track B using both, and fitler out track A using both. This is the best....because you can mix out in the exact frequency you are looking for.

Remember that when using filters, the way it sounds at home, is a lot different than how it sounds in the club. For some reason, it seems to sound MORE SENSITIVE on the high frequencies on your home speakers than in the club...usually because you are using mixing monitors rather than club speakers. So it usually sounds even better and softer in the club than it does at home...which is nice. Also remember, when in the club, what you are hearing in your booth monitors in NOT what people are hearing. So, I would sound check your set up, and have someone move your filters while you listen out on the normal speakers so you know exactly what the people are hearing when you mix this way.

I almost always use this technique, because I am totally removing frequencies in a fading fashion rather than changing the frequency db of each. I like the way it sounds, and I like mixing within fading frequencies.

Anyway, give it a shot. If you dont like it, go back to EQing. Its pretty simple however. You could try mixing with an EQ 8 to get a better sounding mix too, but that is for another blog.

Peace!

FroBot

Monday, March 29, 2010

NOTES FOR 3.30.2010


(Todays Session Above)

Well, i've been making music for the past week, just not blogging about it...been kinda caught up in it and running out of time. Also, I have been doing some art lately, so I havent had a lot of time to blog. Anyway, im about finished with this track. Its the track I started on 3.2.2010. Ive only got a little bit of EQing to do, clean up of some reverbs and delays, and one little explosion at the end to clean up. This track is really cool cause I sampled "I have a dream" all through it....FroBot getting all political...haha. Anyway, notes for today.

Make sure explosions (even small ones) are in the right key. Explosions can range between different tones, so its important to make sure the FIRST general tone is the same as the key of the track (or within a nice harmony). Its easy to forget about this, and its hard to notice sometimes. I need to pick up a vst that tells me the KEY of a sample...i dont really wanna have to run it through MIXED IN KEY...I would just like a plugin that could tell me. Wonder where I could find one....

Today I used the erosion effect for the first time. I used envelopes on the frequency and amount. Made a nice distorted buildup. I chopped it up in 1/8 notes, then applied the rolling erosion effect. Sounded really dirty, and i bet club speakers will just sound destroyed on it! Very cool.

Ive said this many times, but ill say it again, CHECK WHERE YOUR REVERBS and DELAYS end....gotta get them JUST RIGHT.

When using an autofilter really quickly on a sample, its nice to use a spectrum to check what frequencies are sitting strongly in those points, and then, make the filter end within those same frequencies. Makes the mix of a buildup with an autofilter sound really nice.

I was trying to make a REALLY cool ALL AUDIO CUT AWAY effect with a bullet shot sound, then the audio comes back it. Tough as hell! You gotta get a nice QUICK explosion on the come back....but, in my case it couldnt be so long or it sounded bad. I also needed a quick explosion before the audio cut, but it kind or defies the point of the audio cut cause you still hear the explosion. If you cut the explosion, it just sounds too drastic....so I used the volume envelope and a reverb envelope to let the explosion sit (for .3 second) over the audio cut, and it sounded ok. Im still not satisfied with it, but that will be for tomorrow.

Taking a midi sample, and then routing it and recording it as an audio sample gives you a lot better control of the transpose envelope. You can use envelopes on a sample coming from a drum rack (within the sample), but it is tough coming from a softsynth. So, just make an audio sample and play with it that way. Its also nice to CHOP your samples in 1/4, 1/8, 1/16, 1/32 pieces...which is not able to be done as easily with midi. You can use audio envelopes within the midi sequence, but it takes more time, and sometimes you want to do more than the midi can do. So just make an audio sample out of it, and play with it from there. If all is recorded at 0db, it should sound identical.

If you have vocals during a lot of the track, and then all of a sudden, for a long part, you do not, sometimes it can sound awkward because those vocals are sitting at such a distinct frequency, that something sounds missing. A nice little trick I did with the "I have a dream" sample, is took a small audio clip and cut it into a HIGH HAT melody. That way, that frequency is still there when the vocal stops, and sounds really creative. Most people will not notice that it is part of the vocal sample, but they wont feel anything missing because those strong vocal frequencies are still being used. This is important around 1K.

I need to clean up my track mutes. Its important to get them EXACTLY on the right beat (i mean EXACTLY) to get the disappearing effect to sound just right. Thats for tomorrow too.

Well, thats it for today.

FroBot

Wednesday, March 24, 2010

Mapping VST Sound Presets to Knobs on your Controller

Todays tutorial may be common sense to a lot of people, but for a lot of beginners, one very frustrating thing is the inability to change softsynth sounds without using your mouse or entering into the plug-in's interface. This is especially annoying for people who are coming from real synthesizers that had the ability to change the sound right at their fingertips. This is especially good for live performances when you want to switch between different synth sounds (or even different soft synth programs) on the fly and without going to your computer. Today, we will be mapping a knob on a midi controller to change through different synth banks.

The first thing we want to do is make a new midi track and insert in a blank instrument rack. After that, we want to open the device chain window via the little button the the left of the instrument rack that looks like 3 lines. Now you have the device chain window open for dropping in instruments. Now, just drop in as many instruments (softsynths, ableton sounds, etc) as you like. In mine, I have 13 ZEBRA soft synths (but you can use different ones if you like) -

Remember to not go TOO crazy within a chain because it does take a lot of CPU load if you have 20 or 30 synths up. Once you have all the synths put in that you want, you need to click the other 2 icons on the left side of the instrument rack so you can see your macros and also your softsynth box. (like the picture above)

Now, what we are going to be doing, is mapping the on/off buttons for each of the softsynths, to macro 1. To do this, follow these instructions -

1. Click the little map mode button above your macros. (everything will be green)
2. Click the on/off button of the 1st softsynth (to the left of the synth name)
3. Click MAP under Macro 1.
(Go to synth 2,3,4,etc... and repeat this process for all of your softsynths)

Now, what we have done is mapped the on and off to macro 1. (which we will later map to a knob on the controller)

Now, the key to this is changing the midi min/max of each of the on/off buttons so it works best with your controller.

Remember, with midi, you have 1 - 127 values on any given knob. I am using a microkontrol which happens to have tiny little CLICKS every time I move it. Its just how they made the controller...you can actually feel little clicks when you move the knob. Every click is one midi value UP or DOWN. So, in my example, my midi min/max are very close because I can feel 1 click, 2 clicks, etc. If you are using a really analog feeling knob, you may be better to make your mapping increments bigger. Mine is like this -

My min and max are only 1 apart, for easy clicking on the midi controller. You may be better off doing something like this -

Min 1 Max 10
Min 11 Max 20
Min 21 Max 30

This is if your controller knob does not have the CLICKING feel that mine does. I happen to like the fact that it clicks, because I can easily tell how many midi values I am going up or down....so my min & max values are very low.

Now, you have a nice macro that will switch between all of your synths in that device chain. Last thing you need to do is go into your NORMAL mapping mode (top right of the ableton screen) and map that new macro to a knob on your controller like this -

Now, you can easily toggle between all of your synths in the device chain just by moving one knob on your controller. What is also nice about this, is that you can go into any one of those softsynths and change the sounds to what you are looking for, and if will automatically save them to that set as long as you click SAVE within your ableton set.

Another nice thing, is that you can add effects (especially volume utility) to each individual chain to make sure each volume is exactly the same no matter which sound you switch too. This can be very important when playing live and switching through sounds in the middle of a jam. If you want your volumes to stay the same, either change the master volume within the softsynth, or, add a utility to the end of the chain. You can also add other effects to the chain if you would like that effect to always be on a certain row in your device chain. This can be nice if you make the SAME synth sound on a few of the devices, but have different effects on each so it sounds a little different throughout a certain jam. Very handy when you want to use a different effect than the ones you have mapped out to your controller already....and makes it easy to get rid of it when you are finished with it (just go to another synth in the chain that does not have it).

I really like this because it lets me switch through sounds that I have pre-made, and really like (just like save banks on a regular synth).

Anyway, thats it for mapping vst sound presets. Have fun improving!

Tuesday, March 23, 2010

Audio Dropouts When Changing Track View in Ableton 8 - Organizing Outputs

A new (at least to me) problem has started occurring for many ableton live 8 users that didnt seem to happen in the past. People are recently complaining about audio dropouts, clipping, and general buffer problems. This can be such a rough process to figure because there are so many variables in the equation. One specific problem some users are having (and I had) is when changing track views from one track to another, it would make audio dropouts. (especially with the Launchpad)

First, I will get to the a very possible solution to that problem, and then mention a few other things worth checking.

A simple fix for the audio dropouts while switching tracks can be by simply cleaning up your inputs and outputs. (this totally fixed my problem) When you start using other stand alone programs, midi pipe or other midi routing, and IAC Bus drivers, or Network Sessions, you can really start to confuse your ableton ports. You will start getting huge lists of ins, outs, & sync. Even if you have a great understanding of your ins & outs, it can sometimes can get confusing if not documented. One big recommendation is (assuming you understand ins, outs)...to one by one go through and clean up your ins and outs and make sure everything that CAN be OFF, is OFF. Leaving inputs and outputs activated...(that dont need to be on) seems to be one of the major factors in track view clipping. I dont know why, but as it jumps from one tracks ins and outs (within your view), to the another, there tends to be small audio dropouts (without being a large jump in CPU usage). So, go through and clean up your ins and outs, and then document them. I use my blog outlet to keep my notes daily, so here are mine from today.


Understanding Ports -

WITH MIDIPIPE on VCM

Synth -microKONTROL (Port A) - Track & Remote (this is the keys) - So audio FROM within a track comes from (PORT A)

Synth - microKONTROL (Port B) - Track & Remote (this is the knobs) - This must be on for knobs to work.

Outputs can be off totally for synth.

Launchpad Input/Output - Track/Remote (no sync)

IAC Driver (Monome Bus I Made) Output - Sync Only

Network Session - (Out SYNC on if master, IN sync if slave)

Midipipe Output - Track & Remote

Trigger Finger Input - Track & Remote

from nonome-launchpad-poly-osx1 Input - Track & Remote

VCM OUTPUT - Should turn this on when not using midi pipe. (Track & Remote)


I just took small notes of my ins and outs that I use with midipipe, and a few notes about when I would NOT be using it.

Even if a lot of this is common sense, its just nice to take notes because you always seem to find yourself in different set situations where you will be changing these for some reason, and its good to have something to look back on....(even a screenshot would be useful)

Now after I did this, my dropouts totally disappeared. I had a few things activated that shouldnt have been....but now it sounds great.

A few other things to take into consideration when dealing with dropouts is your buffer size, and the effects that are within a track.

With buffer size, its best to play around in multiples of 64, 128, 256, 512, 1024, etc. Its also good to restart your soundcard after changing the buffer size (and even restarting ableton as I have noticed live 8 will sometimes shut down after changing soundcard settings....mine being the FA-66, but I have also seen it with some other soundcards).

Another thing is, and I cant say this for sure (only hearing from other users), is that certain effects will make dropouts. I heard that live 8's new frequency shifter has been known to make dropouts. I have heard that having a compressor can sometimes do it. I dont know how true these are, but they are things to at least think about. Users on forums sometimes have an even better understanding of the program than the makers because they really get deep into small features within the program.

Also, goes without saying, but shut down other programs running when using live. This can help with CPU load, and is just generally a good idea.

Thats it on dropouts. Lets weed those little fuckers out of ableton. Any other ideas on this topic are greatly appreciated.

FroBot

Saturday, March 20, 2010

FroBot - Digital Synthesis Ableton Set - VIDEO

This is a 2 part video explaining my digital synthesis set up that I use for making tons of noise. This is for sample creation, not track making or DJing. In-depth look at my set.

Part 1 -


Part 2 -


Enjoy!

FroBot

Thursday, March 18, 2010

Novation Launchpad as a Monome Tutorial

Today, I figured out how to use my launchpad like a monome for free. This tutorial may not be the best because I wrote it as I was slowly figuring it all out....but, follow these steps, and it should all work. You should download these 4 programs to get this all to work properly, but in the end, I only use program number 3 when using the monome. Basically, I just made the connection with MAX RUNTIME once, and it worked after that.

4 programs -

1 "MAX Runtime"

2. "Polygome"

3. "Polygome OSX (special)" (click the download Polygome OSX link)

4. "Nonome Manual"


Now to be totally honest, I didnt 100% understand this process...but I know after doing it it worked. Basically, install everything. I dont understand exactly why I need to have MAX runtime running at the same time, but after I did it all ONCE, it worked without running programs 1, and 2. I only use Polygome OSX (program 3) from here on.

Please read the manual for set up. I wont go over that part. (also, in the manual, skip part 6, 7 about routing via MAX). It was useless for me.

Also, after reading the manual...it doesnt clearly state which file you should open with MAX. It is in the folder polygome_v0.98/polygome64v98/_polygome64.maxpat

(again, I only loaded this once, and then shut it down after that)

What I recomend is shutting down both programs now that you have them set up, and only open up the file "nonome-launchpad-poly-osx". The monome works fine for me after this step.

Now to first set up your routing. Lets do 2 things here. Lets start by getting into ableton and make sure your ins and outs are set up right. Lets look at the one input called "from nonome launchpad poly osx 1" Turn on track and remote.

This now enables you to output your monome to it.


Now, lets go back to the nonome program and set the destination output to that same input. In the top right corner where it says MIDI OUTPUT, SELECT that same Poly Osx 1 output (same as you just did in ableton to the inputs). Like this -


Now, if all that is set up well, you should have a connection. Now go within your ableton session view, and toss in a new midi track with an instrument you like. Go into the track routing section and select that SAME poly Osx 1 as your input like this -


Now, as long as your NONOME PROGRAM has its clock sync set to INTERNAL, and the little box is clicked...you should be getting sounds out of your launchpad in USER 2 mode. (remember to push user 2 mode 2ce to get the other options as described in the manual)

Also remember that the top row of buttons (top of the 8x8 grid buttons, not the preset buttons) lets you change the different sequence of the monome. So if you are wondering why nothing is changing, just push one of those 8 buttons, and it will change the sequence.

Now, this is all good, but we have one more problem. We need to SYNC the time in ableton to match the monome, instead of using the internal source....after all, we want the tempo to match ableton.

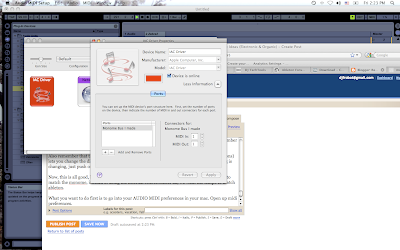
What you want to do first is to go into your AUDIO MIDI preferences in your mac. Open up midi preferences. Double click the IAC button to make a new midi bus. Name it. Mine is called "Monome Bus I made". Make sure to click the little box that says "Device is online". Now you have a midi bus to send your clock source out on.


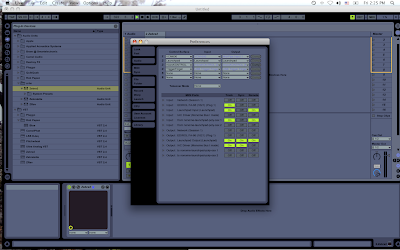
Next, we need to go into ableton to enable that source. Go to the midi sync tab in ableton preferences and you will now see that bus you just created in the INPUT/OUTPUT section. Click the SYNC button next to the new IAC Bus you made (under OUTPUT). (you may also click TRACK like I did, but you dont have to, this is for another reason).


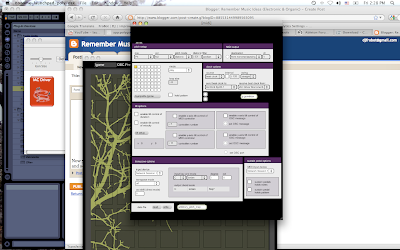
Now you have a bus that is sending out your clock time. Now, you must get back into nonome program and set the settings to receive that clock time. Under source, select BEAT CLOCK. Unclick the little box beside it that says "internal". Now, in the drop box that says "receive beat clock from", select that same IAC Bus you just created. Now you are connected.


******REMEMBER. No clock source will be detected unless you press PLAY within ableton...because there is no clock source to go by if its is on! So go into ableton and press play on the top bar.**********

Now you have a monome working with whatever sound you want, and in time with abletons tempo. Like I said, I just figured this all out today, so once I play around with it for a bit, I will give a whole new tutorial on how to use it. Right now, I simply dont know. I just wrote this blog mostly so I dont forget what I did today. It was really confusing to figure this shit out on my own...but I love the challenge.

A few tips I did realize today. Within nonome, in the PITCH SETUP part at the top, play with those paramenters to get different sounds.

In the mode section helps define velocity and different modes of use.

Anyway, when I understand it, ill blog it.

Peace!

FroBot

Using all 5 senses when making music (via ableton)


When we make music, we are mostly using our sense of hearing. When one thinks of music scientifically, they probably think of waves, ear drums, and things they learned in 7th grade biology diagrams mixed with 11th grade physics videos. Sure, one can argue that a music listener is mostly using their sense of hearing to utilize music...but this can not go as far to describe the artist making it. A good artist knows how to understand all of their senses when making music, to help trigger inspiration, create a schedule, or just set themselves at ease. Finding ones creative balance is obviously different for each person, but you should not be afraid to explore your other senses while making music. Here, we will talk specifically about finding that peace within yourself & your home studio while making tracks (and a little bit about ableton live).

Lets break the 5 senses down and talk about each of their roles in the track making process. Remember that the importance of each is how it reflects on your brain....triggering the creativity.

1. Hearing - Obviously important, so important that I will not go into to much detail about it. You are totally stimulating this sense during the track making process. Depending on your preference, great audio quality via headphones or monitors can make a difference in how your ears feel. Other than that, your ears are being pretty selfish and getting most of the enjoyment over your other senses while making tracks.

2. Sight- When sitting at your computer and working within a sequencer, you are limiting your visual senses to the same (repetitive) stimulation. Sure you can change between different programs within your DAW, and look at different effects....but these are not nearly the things that maximize your eyes excitement. 1st off, obviously situational, but set up your studio near a window, or somewhere you can get a view of the real world should you choose to. Letting your eyes be treated to normal, everyday stimulation can help your brain get out of that sequential zombie mode you can sometimes fall into. That can be a good thing, but especially when moments are feeling not so "creative"...just a minute looking into the real world can really change your perspective on the track. If you dont have this luxury to be near a window, making your work station as visually friendly as possible will really help. If you are like me, tons of art around your studio can help to spawn ideas. Since my wife is an artist, I love to put her mandalas around me, tapestries, posters, whatever. If you are more of the "clean" type, having a perfectly clean station with all chords taken care of can be just the visual stimulation you need to help your creativity though the process. After all, having a nice workstation while working is one of the most important parts of getting in a musical routine. Dont forget, candles can make the mood JUST perfect sometimes. Lighting can also be very important.

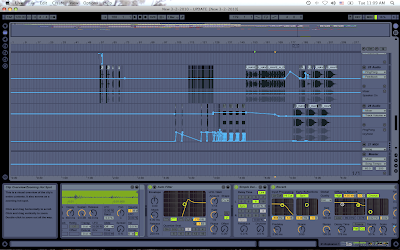
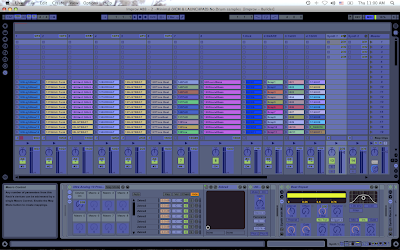
Now, on a tech note, dont ever forget the importance of abletons color and screen size changing options. Our brain are very responsive to colors, so changing the feel of live can help your visual brain trigger ideas differently per color. I specifically like the midnight setting like this -

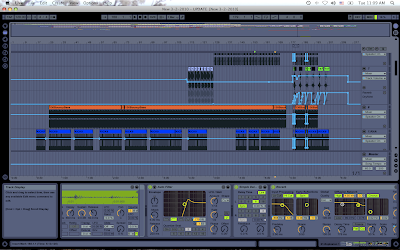
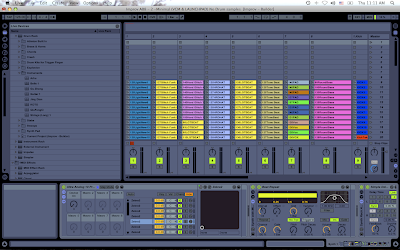
Also, dont forget that you also can change the size options...which can serve more like a tool sometimes than a creative thing, but it can make a difference. You know how sometimes if you go to someone elses house to make music on their computer, and it feels totally different...and therefor you make different music....well, it can work like that. Here are some views of it bigger and smaller -


Totally different feel. Anyway, play around and find something that is nice for you. When it gets dull, change it. I find the midnight one gives me a nice darker feel, and makes me feel a little more serious about my art. I also love the frosty one on a winters day. But anyway, its always fun to change.

Also, sometimes, just a quick walk away from the computer for a minute or two can really clear your eyes up. After all, we all know that staring at a computer screen for hours on end is not a healthy thing. Take care of your eyes, and maybe it will reflect in your music.

3. Touch - Another important element to your creativity. Simple things really. Be comfortable. Have the heat or AC (or nice window breeze) just how you like it. Make sure you are sitting the way you want to be sitting. (in my case, i sit on a block because I constantly stand up and start dancing a little while making a track, then get back down and be serious for a few minutes, and then do it again. If there was a time lapse of me track making, I would look fucking crazy) Also, have some comfortable clothes on. I hate anything tugging at my balls....pajamas and Thai pants are my style. Also, back to dancing...dont be afraid to let that body shake when its feeling it. Sometimes, to really get the feel of how a track is going to be, you need to get up and move like you would in the club. This is natural, but on a more technical side, it can help you find nice swing timings for your snares and high hats. Just get into ableton, and use the swing buttons (or find your own groove). When you shake your hips, you can really tell the swing of a track. Also, making your hearts rate go up can help you feel more energy, which will show within your track. Play with your sense of touch while track making, because in the real world, it is one of your most important senses.

4. Smell - Now, this one may seem a little bit odd...but hear me out. I think, your sense of smell is one of stronger (if not, THE STRONGEST) sense of them all. Its amazing how well your brain can remember certain smells from a certain point in your life. Sometimes a certain smells lets you know what time of day it is, or what is about to happen to you. This sense, scientifically, is hardwired to the brain like no other sense. So why ignore it when track making. Something as simple as opening a window can let a breeze of fresh air into your studio and spawn new ideas. Maybe tobacco is your thing, and the smell of a nice lit cigarette just gets you in the mood for music. Rock it! In my case, im an incense guy. I love the smell of Nag Champa. Once that smell kicks into my brain, I think "MUSIC TIME". I never start a session without lighting one. Also, thanks to my friend Sam, I have gotten into oils in the past year. Essential oils are amazing for setting your bodys creative tone. I love the smell of hard peppermint...just makes me totally relax and helps re-center myself. Play around with your nose, and it will have great effect on your music.

5. - Taste - Most would say this doesnt apply much, but I beg to differ. Everyday, when I start my session (around 8:00am...yes, im a morning person)...I always start with a coffee. As soon as that coffee is finished brewing, I pour a cup, and turn on ableton live. Every weekday, no matter what. Now, not only does it help put my morning in perspective, but it also helped me to make a routine out of my somewhat procrastinating habits. Now, dont let it go too far like I did when I drink like 2 pots a day sometimes when making music...but it is really nice to start a session with. Helps clear your throat, and works with your sense of touch in making your body feel comfortable. Taste and touch are interrelated in my opinion. If coffee isnt your thing, having a drink beside you when making tracks so you can easily quench your thirst without leaving can help you from "losing the groove". And, this goes without saying, but a few beers, a glass of wine, baileys & coffee, a shot of whiskey....all of these can be nice additions to the creative process. After all, your brain is like a stretch armstrong doll....you can stretch the fuck out of it....but it always comes back....well, unless you really fuck it up or something.

By utilizing all of your senses during the track making process, you can help to assure that you are doing everything in your power to set the creative stage. If you try to use your other senses besides hearing, you will find your self saying "I just dont feel creative"....LESS! This can be the bottom line of all producing, "Just not feeling it". But, the best producers have found ways to overcome this...because they know deep down, that they love MUSIC more than anything in the world...and there is nothing that will come between them, and making that music everyday. Its what gives you passion, what gives you satisfaction, challenges, and pure enjoyment. If there is anyway to cure the "day to day life" disease, such as using all your senses to overcome these uncreative moments....well, you should at least give it a try...if you love music.

FroBot

Wednesday, March 17, 2010

NOTES FOR 3.18.2010


Todays Session Above

Well, good 4 hour session today. Got interrupted by my landlord coming to the door and saying that some repair guy needs to check my ceiling. The scary thing is, my wife has glass blowing shit in the dining room...we have a cat (not allowed cats here), and the place is a disaster. I was like (hold on a sec) while I cleaned up, and then came back to the door and he said "Oh, whoops, its the neighbors house". Phew! Scary thing is, he had keys, so he was going to come in either way. Wake up call....shit.

Anyway, progressed a little in that same track I was working on. I came up with some good ideas today.

A nice breakdown is to just delete EVERYTHING in a break, and toss in a sub bass. Then come in with anything you want. Its a really surprising hit if you start from halfway in a bar or something like that. I have 4 of the same style hit throughout the song. Sounds really cool.

I love asian sounds...specifically Chinese. Using midi effects like chord and scale make it really easy to make nice Chinese melodies. Without using them, its usually all black keys on the keyboard....but, if you want the whole thing in a different key, using those tools are really nice incase you cant remember the chords. I double layered a synth melody, and makes a great chinese beat.

Also, when something sounds just a little bit dull, or sharp....chorus can take care of that. It really makes a nice sound when used in just the right amounts. I did it on the melody like this -


Lately, when I have been making the backbone of the song using session view, I have been switching between basses within the same track. Thats easy for ableton to do, but not easy for a mixing engineer to EQ each one separately. When you send off tracks to someone, they are all audio files, so without looking at the waveform, or knowing the song, its hard to know where all the basses change especially if they change very subtly. When I finish with this track, I will separate my basses into different tracks. Just make sure the sidechain is on all of them when you do it.

Crash cymbals are a bitch to get just right. I always feel like they stand out awkwardly. I need to make some new racks of all cymbals so I have like 200 crash cymbals to choose from. Because the head of an actual crash cymbal is so big, there can be different tones within them. So getting one tuned just right to match the song can be tricky.

I made a pretty cool sound with a crash cymbol today, using a drum rack and crash sample. Then I put of the LFO and modulated the rate faster and faster. Also put a low pass filter that has a modulated LFO at the backwards rate of the sample LFO. Sounded rad.

I was recording my synth melody, and for some reason, the whole thing changed keys. I looked within it, and nothing was changed. I cant figure out why its doing that. I looked at all my envelopes too, nothing was on. I wonder what thats about.

All of my tracks seem so different from other peoples tracks. Besides the first one I finished, they all seem like a story...each with little tiny parts of different elements. Other people seem to be more smooth and maintain the same sound throughout. Maybe it comes with being ADD....and the way I DJ songs more quickly than a lot of DJs like to do....so I figure, make the tracks the way I would want to DJ them. If I want to play a 6 minute track I made....at least it really switches up and doesnt seem the same.

Thats it for today.

Peace!

FroBot

Tuesday, March 16, 2010

NOTES FOR 3.17.2010


Todays Session Above

Today started out with a nice regular session, working on a track from last week. Then, I got files from my mastering guy w/ some tech problems. So 2 things happened today.

Lets start with the things I learned mastering. Bad...but good came out of it.

I had put an nice low pass filter effect with alternating LFO speeds and a vocal starting in a breakdown. All these effects were on the master track...stupid me, but what I didnt realize is that when you export each individual track....those master effects wont take place. So I had to go back, and put the same effect in each track, and make sure the envelopes were ok!

BUT, a nice new trick I learned while doing that....if you make an effects rack out of the effects you used on your master track....then click the effects rack. Press COPY (Apple C). Then go to the tracks you want them on and just press paste. (you are pasting the whole rack into the track) Then, the envelopes you have for that effects rack are already put into the track. So each were copied into each track automatically based on the rack. That saved a hell of a lot of time. All I had to do then was change the envelopes for the ON/OFF of that effects rack...and my effects were in there! Nice.

I just just have to remember to be careful as to where it starts and ends, because I cant forget that if its blending the next part, to let the effects rack stay on until the envelopes for the effects are totally finished. I need to look at the longer lasting envelopes from the effects, and then shut off the effects chain then. I made some mistakes, but then realized this. Its hard when you have like 10 envelopes running on the master track, its hard to remember which one is longest without searching all of them. Especially after a week of not working on that track.

Well anyway, exporting now...sending off this afternoon. My stupid error, cost me time and money....gotta be careful in the future.

WELL aside from that, notes on my track making today -

Quick breaks have always been a problem for me....some kind of creative 4 bars before an explosion or new beat hits. Its very easy just to remove some kicks, and put on a crash cymbol or something, but thinking of cool switches can be tough. Found a new technique today....randomness at start. Just decide where you want an off beat change to come in, and delete everything or few things during those bars. Start just copy and pasting snares, or kicks on weird places...and feel something out. Get into your stabs rack, throw in some unique stabs, and then let it explode. It can sound really creative. So, to make a quick break before a new part, when the creative brain cant think of something, just be random, and your creative brain will feel something out of that.

Today I used a nice sub bass hit on 2.3 beats....totally off hit, but sounds super cool to bring it back in with snare rolls.

Using autopan, and using envolopes to control the "off set" can make for some really cool sounds. No one will ever notice unless they have headphones on, but adds some real creativity to your pans. I used it on a commodore 64 sample and sounded totally rad.

Dont be lazy, everytime you put in a sample...think of how you can make it better....with at least 1 or 2 envelopes. Do it on the spot....because once you listen to a track too many times a certain way, your brain starts to want it to be that way. So make your envelope changes ASAP... so you come to like the more unique, artistic sound....UNLESS of course it IS how you want it....but then again, dont be lazy either. Sometimes, a small stab is an opportunity to try out one of the effects you havent been using so much so you can better understand it....

Today, I did that with the grain delay effect. I was using that commodore 64 sample, already enveloping the pans offset....then I used a grain delay to slice it all up using the spray & frequency of it. Turns a rather boring, low bit sound into one of the main artistic parts of a breakdown. Grain delay is a fun little tool with low bit samples. The slices are so clean if you dont have any reverbs or anything on it. Can really crush a sound.


By the way....I FUCKING LOVE all my new racks I made all this week. I have thousands of unique sounds at my disposal right now....and its always a surprise to where the track is going to go when I open up a 8x8 stab rack full of all my favorite sounds...and I have like 50 racks to choose from. I start looking for a sound, and always find something else. That is all the bottom part of my sequence today...so many stabs!

Well thats it for today. Its already Wednesday! Nice!

Peace!

FroBot

Monday, March 15, 2010

Using Instrument Racks w/ Drum Racks To Have Effects Per Row Using Chains

So, yesterday, I was putting together huge drum kits....8 kits per rack...all made for my Trigger Finger. (see yesterdays blog for more info). The thing I really wanted to do was to be able to control effects based off of rows of my trigger finger. I want to be able to use the knobs on the trigger finger for effects, but without them effecting the whole group of samples. Specifically, since these drum pads are mostly for production, I really only want my tools on there so I dont have to waste time with that. Effects, well, im never really sure what I am going to want. I only have 2 knobs per row...one definitely being a frequency shifter. The other, I really want something to transpose the samples note up and down (+6, - 6) like I do with my samples...but that requires either using an audio pitch vst (which I dont really like), or, individually mapping each samples transpose to the same knob....LAME, and will take forever. So I need to think about this.

Another problem with the frequency shifter is that I need to to have a large range, but but also be able to get back to the 0 point easily...because some samples sound like shit if they are even just a few frequencies off....so I might have to use midimap to split a knob into 2 knobs, one going from (on the shifter) 0 and up, and the other knob going 0 and down. That way by putting the knob ALL THE WAY to one side or the other, it will be at 0....instead of trying to find it in the middle of the knob. In that case, I will use up both buttons...so shit....looks like I cant get exactly what I want without tons of mapping work.

ANYWAY....all that aside, lets get into how to make instrument racks w/ drum racks, so you can put different effects per row (or column if you like).

Ok, so what I have done is created a blank instrument rack in a new midi track.

Then, what I want to do is open up the chains of that rack. Now, I will take one of the drum kits I made yesterday (8 kits on 1 rack). Drag that into the device chain 4 times (for all 4 rows) like this -
You can see the exact same drum rack 4 times. Now, what you want to do is go to chain 1 (which is my case are the kicks). You need to delete every sample within that chain that is not a kick.

Then you need to go to chain 2, and delete every sample that is not in row 2 (or column 2 if you are doing columns). In my case, they are snares.

Again for 3, and 4. Also, rename your chains so its easier. Mine now looks like this -


You can see on my grid on the right side of my drum rack, now in rows instead of taking up every square.

Now you have individual chains to put your effects into. I went ahead and put in my frequency shifter to try it out. Click the chain you want, and put the effect after the chain, like this -


Now, any mapping you do to your controller for the effect, will not save when you save this instrument rack. But it is there. Considering I only have 8 knobs, its not a big deal just to map it when I want to use it. Its a lot better than manually putting it in, and I really need a rack that has per row effect options. REMEMBER, CLICK SAVE!

Now, it did take a lot of time to delete out all the samples I didnt want in each rack. If you want, you could just MAKE it right the first time. But, I also like to have copies of JUST my drum racks, in case I am doing improv and my friends want to use my racks their own way. So I put a little extra time into making both. It is a little bit time consuming considering the slow action of deletion of samples within a drum rack.

Also, one little thing I hate about drum racks, is how when you go to view the next 4x4 square within the grid view, it only jumps up 3 rows, not all 4....makes deleting confusing sometime. Maybe a fix for Live 9....please!

Well, now you have an instrument rack that have effects per row on your drum pad. Hopefully you can get the sound you are looking for even faster now.

Peace!

FroBot

Sunday, March 14, 2010

Drum Racks w/ Your Drum Pad - Normal Kit 4x4 Creation

Well, the other day I went over how to use the Novation Launchpad to find stabs, instruments, & other things during the production process. Today, I am going to talk about using your drum pad for elements that definitely need a nice rhythmic response from your pads...such as normal 4x4 drum kits. Having many of these ready to go can really help during the beat making & sample making processes. You can by all means use a tool like the Launchpad for this, but, for drumming, its nice to have really responsive pads in case you do not want to quantize after and are looking for a more natural (human) sound.

I use the M-Audio Trigger Finger for my drums. I like it because the pads are pretty strong, the way I like it, and I also have 8 knobs & 4 faders for controlling other parameters (I want to put a frequency shifter on each row, but I need to think about the best way to do that....which will probably be tomorrow).

Now, I have personally re-mapped the internal midi mapping to the Trigger Finger to work best with the drum racks within ableton. I have dedicated the whole controller on channel 16 to avoid confusion with my Launchpad, VCM 600, & Microkontrol.

I have mapped out memory banks 1-8 (meaning 16pads x 8 banks). That is the same amount as the maximum that the drum racks can hold. (or 128 samples). So each of my racks will have 128 samples starting from C -2, to G8). I have mapped each bank in an exact progression of that scale from banks 1 - 8....meaning, if I click bank one...the bottom left note mapping would be C-2, each pad moving up in midi sequence. If I switch to bank 2, it would be E-1, (again matching the drum rack in ableton). This way, I can switch between 8 total different kits just by switching the memory bank on my controller. So 8 kits per rack (max).

I have also mapped all the midi knobs and faders to be the same values whether on bank 1, or bank 2, bank 3, etc. So, I can have the exact same effect controls on them. This is my preference.

Now, today, I made tons of new kits...just surfing samples and dropping them into audio tracks (like explained in my launchpad drum rack tutorial). But instead of labeling them by genre its like this -

I made each 4x4 session clip spot match what I wanted on the drum pad.

Row 1 - Other Sounds
Row 2 - High Hats
Row 3 - Snares / Claps
Row 4 - Kicks

Of course some are different samples sounding like these elements, but I tried to stay in a rough template. I renamed the scenes to make it easier.


You can notice I messed up a little on the right with the names...but I went back and fixed it after I took the picture.

Start filling up your squares....dont be shy....add tons. You will have tons to choose from.

(I even had other tracks on the right side because I kept stumbling upon other samples I wanted in my launchpad racks, so mine looked like this) The first 8 rows are for drum kits.


So you've selected all your samples.

Now, just make a new midi track with a drum rack, and set the view down to c-2.

Here is the downfall to this method, which I learned today. Since when you drag from your audio clips into the pad, it puts whatever you have in scene 1, 2, 3, 4 in the bottom of the pad, and my kicks for instance, and horizontal through the tracks, you must select only kicks 1, 2, 3, 4, and then drag them into the drum rack. Then go back, select the snares, and drag them in. Again and Again.

After doing this, I realized, its probably much easier if I were to have named the scenes like this.

1- Kick
2 - Kick
3 - Kick
4 - Kick
5-Snare
6-Snare
7-Snare
8-Snare
9-HH
10-HH
11-HH
12-HH
13-Other
14-Other
15-Other
16-Other

If I would have made the drum racks I made vertically, I could just drag them by the whole GROUP into the drum pad. But, it really only took me and extra 7 minutes doing it my way....and I was easily able to visualize a pad when I was making it in the normal session view. So whichever way you like is fine. You can just drag into drum racks, but when surfing and finding certain elements in groups (like all snares, or all HH), the way the drum racks view works can be tricky because there are no labels to tell you what each row is. (ex. HH, Kicks, etc)

After that...click the little disk icon on your rack to save it...name it....and there you have 16x8 pads in one rack.

Now if you plan to improv with these kits, you will need to go in and adjust all the volumes (all in my launchpad drum rack tutorial).

Now, to make a new rack, just drag a new rack over your old one, and do it again until all your samples you chose are gone. I made 3 racks today...so about 384 drum samples.

Now, if I ever want to layer a drum sample, I can just use the overdub button, record within the midi track, and I have 128 samples to choose from. Nice options for building.

Now, time to figure out how to program effects based on the rows. I was thinking about separating the drum rack into 4 separate racks....containing only one row out of the 4x4 pad. Run them all together, and put the effects I want per row in each rack....but there has got to be a better way. I know I could throw them individually into each chain and then map them, but that will take fucking forever. Anyway, that will all be for tomorrow anyway.

Have fun making beats with your drum pad!

Peace!

FroBot

Ideas After Listening - Notes 3.14.2010

Just idea notes. Means nothing to most.

3 bars instead of 4.

Build up, explode on 2 early...surprise it 2 bars early.

Regular Piano and Strings

Use a vocal instead of a crash on a hit into something new.

Side chain white noisy pad with kick. Filter up and down.

Use a nice funky deep jazz bassy sound, solo that fucker.

Explode and then do sweep down, instead of always up.

End of a bar, uses nice key sound and roll down on the last part of bar 4 only, or 8.

Make a track with hard warm tech house bass same time as kick. Hand drums cut up. The off will be another drum SWING!

Chop vocals up during a build up 1/4 maybe nice.

Try some different kicks besides electronic. Do a sample slicing track from hand drums, and tones and delays.

Harmonica is nice too.

Jazz Style - 6 bars, 7 bars...or some shit like that....switching.

Crazy idea. Bring the frequencies up on the track...and make a white noise at a super high frequency, no reverb, then slam back into the track.

Dont just filter a kick to sound low. Cut its release with either a compressor or something...make it really thin too. Maybe Q on an EQ.

Also, when filtering, try a band pass with a high Q.

Sorry im not so useful today.