Tuesday, April 27, 2010

Letter to my Mother about Music

Recently, my mother sent me a long email asking me "Why, when you spend so much time making and studying music, dont you go to college so you can someday get a job in the music field". This was my response. I love my mom!


Dear Mom,

Thanks mom. You are right. I am wrong...in a traditional sense. But, there are some people in life who go about things in a different way than the norm...and thats what makes them different from the norm. This is very true when it comes to art. Receiving all your information from a teacher...especially in music...(a person who obviously failed as a musician, or had a different drive to become a teacher rather than a striving artist) has its down falls. These people (in my mind) obviously failed somewhere along the lines...because musicians have one love and one love only....music. Thats it. We do music, study music, play music, because we LOVE IT. Thats it. And in music, creativity and breaking barriers is the key. If my goal was to settle down and record bands for some job my whole life, then yes, it would be a great idea....but I have one dream in life....to make music, and maybe make a living doing it...on my own terms. I want to push the envelope of sound through the 21st century...and enjoy it the whole way through. As long as I have food, shelter, and love....I can live...but even more importantly, I need music.

So many people who do this...plan to be rock stars. They have already lossed...in the music world. Music is deeper than this, it is a fuel that runs in your blood. Sound in its basic form triggers my senses and heightens my thinking. Just thinking of a reverb coming off of a wall as a car passes, or the attack and decay sound of a pencil dropping, or the distance it takes and echo to hit a wall and return to me....these are the things I love and think about....and try to apply them to my understanding of sound. I want to be able to harness these natural phenomenons and reuse them in music. This is why I have been working in dance music, because the boundaries are way past that of rock or pop (guitars, drums, etc)...I work with synthesis, logarithms to control sound dynamics, and music theory to piece it all together.

This may sound sick and twisted...but I would rather be dead...than not pursue my dream. This is why I always say I dont want children, and also why I put every penny into my studio and in having the right tools and books I need to do it.

College would only slow down my progress with pointless essays and wasted hours. As it is, I get 6-8 hours of studio time in everyday....go to work....and then I get to study for another 2 hours when I come home. This has been the same cycle for the last year....and its getting heavier and heavier the deeper I get into it.

There are many people who say they do music, think they do music....but mom... I DO MUSIC. Period. This is not some teenage dream of becoming famous or something.

Im glad you care, and you are doing what a good mother should do to make sure that her son has a successful life in this normal world....but your son is not normal...and maybe is a little bit crazy....and definitely crazy about sound.

I have gotten the nickname as FroBot mad scientist...because whenever anyone has a question about music or sound, I can usually answer it. My blog is receiving SO many emails daily...and I try to help as many other people as I can to spread the knowledge. Again, none of this other stuff matters at all....as all I want to do is push technology to its limits, and understand sound. Oh yea, and enjoy listening to it.

I was given this gift from dad, from a young age....and he created a monster. Sorry, but there is no turning back....and even if there was...I wouldnt!

But I love you for caring!

Sunday, April 25, 2010

INSIDE DEVO'S STUDIO

I came across this video of Devo talking about music and their studio. They show some cool toys and talk about circuit bending! Enjoy!


Hum Your Idea into Midi - (or play it in via instrument)


Today, we are going to talk about how to hum your midi track in, or play it in via an instrument using abletons groove feature. Sometimes, you have a great idea for a bass track, or a melody...that you can easily reproduce with your mouth, but maybe...you cant get it in via your midi controller. Or, you are guitar player with a great idea for a lead part...and guitar is your best option for making it (but you dont want the guitar sound). With this method, you can easily record in ANYTHING and convert it to midi...and its really simple.

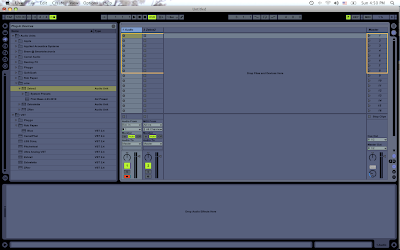
First off, we need an audio track and a midi track. The audio tracks input should be set to whatever input you plan to use. In this case, I am just using my studio mic to lay it in with my mouth and my flute. In your midi track, just put whatever instrument you want to use to make the sound. Pretty straight forward -
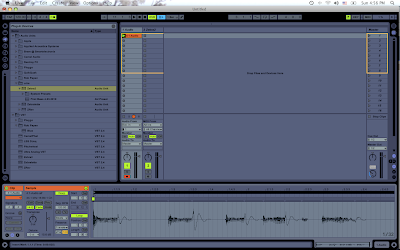
Now, I just wanna toss on my metronome (or you could use your drum loop) so I can hum my loop in sync with the tempo. This goes without saying, but you need to use headphones when doing this so as not to record the sound coming out of the speakers.

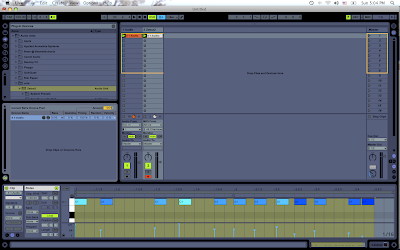
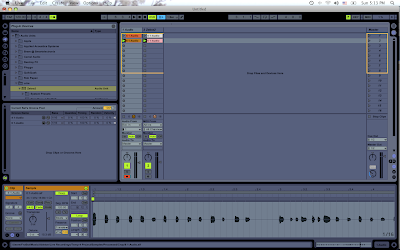
After recording it, I got a nice little sample looking like this -
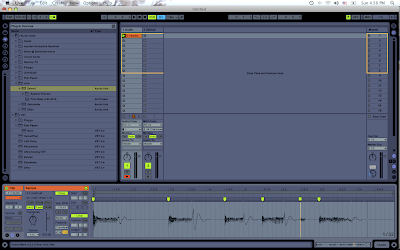
It needed a little bit of warping because of the smidge amount of latency I have with my mic, so I warped it and cleaned up the transients -
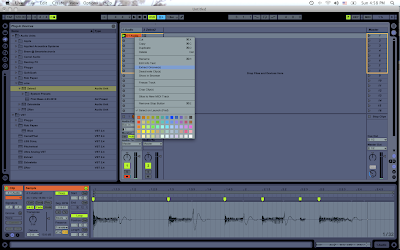
Now, we want to go up to the audio clip, and right click it. Then select "Extract Groove(s)" -

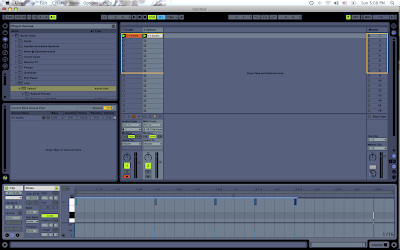
Now the cool thing about your GROOVES pool, is that you can just drag the groove into a midi track to see the velocity and timing of it. Just drag your new groove into your midi track to see the midi clip -
Now, I made this audio clip poorly on purpose to show you the ONE downside to doing this method...since the microphone is picking up MORE audio than just the main notes I created with my mouth, it will create extra midi notes where you dont want them. You have 2 options at fixing this.

1. Just delete the midi notes that you dont want.

2. Try to hum in your sounds a little more quickly and with less length to the sound. You are just triggering the midi notes, and will be changing the note length anyway to suite your sound.

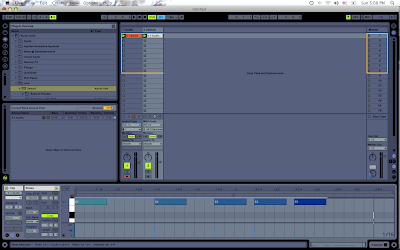
In the next 2 pictures, I removed the wrong notes, and also extended the length for a nice bass sound.


In the next photo, I used my flute to trigger the sounds instead of my mouth, which turned out much better because I could play them in very quickly for better results -


Actually, these results were perfect. Now you can just move the notes around to suit your liking...or the thought that was in your head.

Now, I know some of you will say "just use a audio to midi converter"...but, this is just an easy way to do it with the tools already built into ableton!

Keep hummin away your tunes!

Peace!

FroBot

Saturday, April 24, 2010

NOTES FOR 4.25.2010


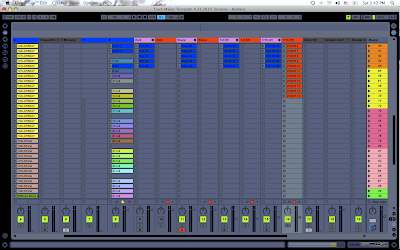
(Todays Mixing Session Above)

What a great day! Its so nice out, and im not even going out. Just soaking up the cool breeze into the studio...and havin an old fashion mixin session. Im so stoked to have my new studio monitors, I can finally mix again...and with all the things I picked up on EQing over the last month...it was a fucking blast. Before, I had a broken tweeter and didnt even know it (just thought the speakers sucked). Anyway, a few notes for today -

Using the EQ 8 and automating the placement markers is better than filters for 2 reasons. One, the spectrum is bigger and easier to see than the small filters. Also, I always have an EQ 8 and a spectrum on each track anyway, so I am saving CPU.

Another note on that...when building sweeps on top of each other, since they are moving across the spectrum, its nice to apply an automated filter to cut out the unneeded frequencies of each so they dont clash at all. This way, the peaks of each sweep are at different points of the spectrum at the same time. It really cleaned them up....I was really surprised.

DONT EVER. EVER... put 2 different guitar tracks within the same track. I was using sample based guitar hits, and had separate parts going on at different points in the song, but within the same track. The EQing will be separate depending on the other parts of the music...so separate them into tracks when making them. Just makes it easier when you get to the mixing stage.

Clear out all unused effects you may have had in the template. Saves a lot of CPU.

Use UTILITY and not the MIXER volume when automating volume. Its too hard to mix tracks later. I need to have full control over all my track volume faders later after EQing because certain elements really start to cut through the mix without actually applying volume. Its better to use the utility. I knew this, but I havent been doing it. From now on, I will.

I need to put spectrum and EQ 8 in each track for my template. Will save time later.

Pay close attention to high frequencies sitting on real instrument samples. There is always a lot of noise on them. Apply a noise gate, or roll the frequencies off if not needed. I try to leave my HIGHEST frequency open for 1 or 2 instruments that really need to sparkle through, and then cut all the other sounds that dont really need it.

Be careful when applying abletons built in reverb. You will notice high frequency noise sounds sometimes. Use the filter on the reverb (low pass) to make them disappear. You really only notice when you solo the track, but cleaner is better.

I had a problem today when using a sub bass audio file. I had made an audio file out of a synth I made, and had chopped it up. I wanted to transpose it down 5 semi tones, but when I did that, since the wave is slowing down so much, it almost sounded as if the groove had changed. It took me forever to realise that it was just the transposition in BEATS mode warping. I switched it to tones, and it was ok, however it sounded a little detuned. In the future, I want to stick with midi on the bass tracks if I am going to be transposing them, because at least then I will have better control over envelopes and prevent this from happening.

Also, once you start mixing your high frequencies...and they really start standing out on their own...you will start to notice stale repetitive loops that just dont sound so good. It is a good chance to dig into your delay bucket and apply a few delays on different parts of them to change up that loopy feel.

Well, thats it for mixing today. I had a good session with some guitar players last night....good mixing session today...I think I will eat some lunch, and then do some synthesis tonight. Even though the weather is nice, I dont feel like going out there!

Peace!

FroBot

10 Newbie Mistakes When Writing in Ableton Live


I dont usually repost other blogs, but this one seemed REALLY good, and worth re-posting. It comes from a guy named Jason Timothy and he runs a website called Musicsoftwaretraining.com The original blog is here - http://www.musicsoftwaretraining.com/blog/?tag=top-ten-ableton-mistakes


10 Newbie mistakes in Ableton

Here are some common newbie mistakes people make when writing in Ableton. This isn’t all Ableton specific as some tips apply to music production in general. It also isn’t in any specific order and doesn’t necessarily assume to be the Top 10 of newbie mistakes. These are just some mistakes I’ve seen people make over the years and are certainly some mistakes I have made as well. If you are new to Ableton or cumputer music production, these should be of some assistance.

1. Assuming Ableton’s auto-warping will warp your songs perfectly :

This is a fairly common but huge mistake when working with Ableton. Although Ableton is excellent at warping loops without much trouble (as long as the loop is already seamless), a full song is a different animal altogether.

I suppose it can be pretty misleading to see an option called “Auto-warp” and wonder why your songs aren’t syncing up to tempo perfectly. While the auto-warp function does do a lot of the work for you, it’s your job to fine tune it so that every thing is 100% on. Learning this process is the single most important thing you need to master if you want to unleash 95% of Ableton’s true capabilities.

Here’s are a few videos to get you started.

For Ableton 8:

http://www.youtube.com/watch?v=waLeq8-2UBo

For previous versions of Ableton:

http://www.youtube.com/watch?v=JddbTkyKVTE

http://www.youtube.com/watch?v=7AbfMe5Tklo

2. Recording parts on the same track in both arrange and session window:

A common mistake for people who are new to Ableton is assuming that the session window (the window with all the boxes for clips and scenes. Also home to the mixer) and the arrangement window (the window the most resembles other audio recording software) are separate entities.

For example you will have a clip on audio 1 in your session window but audio 1 in your arrange window is empty. If you are new to Ableton it is easy to assume that it’s fine to record on that track in the arrange window but that would be a big mistake. You will quickly find that one of your parts is no longer playing.This is simply because you have put 2 parts on the same track at the same time.

Once you understand how the session and arrange windows are intertwined, it will make complete sense what is happening. The simple rule to follow is:

1 instrument per track.

Think of each clip in a track (audio or midi) as representing what 1 instrument will be doing in different sections of your song. For example, one clip might be for the intro, the next for the verses, another for your bridge and another still for a chorus.

If you have ever programmed a drum machine, clips are similar to patterns on your drum machine. When you want to chain those patterns together to make your complete song, you would do that in the arrange window.

If you are recording something start to finish (like a full vocal take), you would also want to record in the arrange window. The important thing to remember is that at the end of the day, everything will need to go into the arrange window before you mixdown (render) your song. If you are arranging your instruments from loops or recording separate parts of your song to arrange later (like with drums) you would most benefit from starting in the session window and then chaining those parts together in the arrange window.

*As a sidenote, some would argue that you can do everything in the arrange window, and I wouldn’t disagree, but i’d suggest you learn the basics of both windows and then decide what works best for you.

Here is a video that might make the concept a little easier for you:

http://www.youtube.com/watch?v=IZBVeNGU6_U

3. Too many loops or parts fighting for the same frequencies:

If you are building your songs with loops and samples, a common mistake is to think that the more loops you add, the more full and complex your song will sound. You are only half right though. It’s true that more layers can give your song more complexity and depth, but the downside is it can easily make your composition sound muddy, off pitch or just plain not right. Keep an eye on your fighting frequencies when choosing your loops. A good way to finding these conflicting frequencies is to use a spectrum analyser. Ableton 8 has one built right in, but if you are using an older version of Ableton, you can use one of this free plugin.

BS - Spectrum Vst

4. Not removing needless frequencies - Keeping on the subject of your EQ’s and frequencies, it’s really important to keep in mind what is the most important part of a an instrument and cut out the frequencies that aren’t needed. You won’t want 2 or 3 parts all playing a deep, heavy kick drum. You’ll need to choose which one has the best lows, and remove the low end from the other loops. Same with your hi frequencies. You’ll want to make sure your hihats are coming through clean by removing the highs from your othertracks. For snare and percussion in your mid frequencies, you may need to attenuate certain frequencies so that each part has it’s own space and doesn’t sound muddy. In most cases, you’ll find that popular music doesn’t have too much going on in any given frequency. Everything is balanced and that is what you want. The goal of this blog isn’t to tell you exactly how to dial in all of your EQ’s but rather to point you to where you should look if your songs aren’t sounding as good as you had hoped.

This video might give you the basic idea:

http://www.youtube.com/watch?v=AGFzYh_C7to

You can also read this Blog

5. Not arranging your songs in multiples of 4 :

Now I know that there are many other time signatures than 4/4 time but I just want to give some basic tips here for people struggling with producing songs. If you are struggling, it’s probably best that you learn to write in 4/4 timing before getting into complex time signatures.

That said, it’s very important in popular music and club music that you create your parts on multiple of 4 bars. For example, if you have a verse that goes 7 bars instead of 8 and then you jump into a chorus, it’s most likely going to sound all wrong. This multiple of 4 predictability in music seems very natural. Don’t try to get too tricky until you’ve successfully got this down. Once you know how things are “supposed” to sound, you can tweak the timing to create more tension successfully.

6. Doing your songwriting and sound design in the same session:

I’ve written a whole blog on this subject if you want to get deeper into this, but basically, you don’t want to be fumbling around trying to get THAT sound when you have a melody or bassline in your head. In the time it takes to create this amazing sound in your head, you will likely have lost the original idea that inspired you. It’s best to work fast with a template of sounds or presets that you have found to work for you and touch things up after the rough idea is saved.

7. Adding parts to compensate for bad sounding parts:

Each part in your song should be able to stand on it’s own. It shouldn’t sound crappy when you solo it. Of course I know that sometimes it takes a couple layers to get that certain Bass sound. It’s totally ok and even encouraged to layer your sounds but at the end of the day those sounds need to all stand together as 1 Bass or 1 Stab sound or whatever.

If you find yourself adding melody on top of melody in an attempt to make something sound “right”, you might be better off redoing your melody.

Make sure your drums, bass, pads, melodies and vocals all sound great on their own. You aren’t going to make good tracks by burying so-so parts deep in your mix. If you can break your song down to 6-8 elements, it will keep you focused on if you are adding too much stuff. You may end up with 40+ tracks in your song, but you definitely don’t want all those elements playing at the same time.

If you have 3 different melodies, you should only have one out front at any given time. Even complex songs should come across sounding fairly simple and there should be empty space between the parts. Put on a CD and listen to how many elements are going on at any given time. Notice how each sound has it’s space to come across clearly.

The less you have going on in your song, the bigger each sound is able to be. That’s why with a 3 piece band like Nirvana, each instrument can sound so big.

Regardless of the style of music, we are all limited to a certain frequency range. When you have parts fighting for the same frequency, both parts are bound to have to sacrifice something in order to fit into the mix.

Another way to look at building a song is to ask “What frequency am I going to fill in now?”, then you want to use a spectrum analyzer to find what works in that range. If you have 2 parts you like but they are taking up the same frequencies, perhaps you can take one up or down and octave so it has it’s own range. Once you have filled up your full spectrum you can see how strong each element is before adding any extra layers.

8. Too many options:

Having too many choices with instruments and plugin’s without having made yourself a “go to” collection can become a huge time and energy waster. It’s far better to have a few “go to” plugin’s and instruments that you know really well than it is to have 100’s that you aren’t familiar with. Using unfamiliar software can really slow you down and give you below par results.

Find 4 or 5 synths (or even less), 2 compressors, 2 or 3 reverbs, a couple delays etc.. Then take some time to find out what each one is really good at and build some “go to” presets. This will make things much easy and you’ll be getting the sound you are looking for much more quickly.

It’s fine to have lots of plugins in your arsenal but it’s best to find out what each one does before you start your songwriting process. Believe me when I say that I am writing this for myself as much as for you!

Before the days of free plugin’s and fast computers, we pretty much had to make due with whatever equipment we had. Given those limitations, it’s easiest to get to the process of making music instead of trying to fiddle with every toy in the toy store.

Another thing that you’ll find is that when you get comfortable using certain equipment, those limitations become your sound and gives you some consistency. Get your “go to” collection started asap.

9. Not making a template:

Templates are a saving grace when it comes to songwriting. When you have a setup that works with your favorite effects settings or your send/returns, drumkits, synths etc take the time to save it as a template songfile or to drag it to your presets for later use. This will save you loads of time trying to figure out how to get that certain sound you had before.

Fumbling through presets and setup takes time and can easily distract you from your goal: To get your ideas down while you are inspired.

Templates give you a basic setup with all your “go to” stuff included. You can even make different templates for different styles of music. Having several options will allow you to be ready to go regardless of what creative mood you are in.

10. Using low quality samples:

Using low quality samples with the intention to “fix it in the mix” is another big mistake. Now I’m all for lo-if and I’ve been known to use less than optimal quality sounds to great effect, but you need to make sure it works for your track and that you aren’t building your track off a bunch of lo quality sounds.

If you have to doctor it up with tons of effects and eq to make it sound decent, you should probably use a higher quality sound that has most of the tone you are looking for from the get go. For example, a kick drum that doesn’t have good low end from the start is never going to sound deep,punchy and professional.

Using a lower quality sound might not seem like it will make a noticeable difference, but just wait until you have a whole song full of these sounds and the overall quality will become pretty apparent to you.

Using mp3 quality is something I wouldn’t recommend. Generally speaking 16bit 44.1 should be the minimum you accept. If your computer can handle 24 bit recording at 96kbps you will likely hear a difference, just keep an eye on your hard drive usage. I personally stick to 16bit for most of my work and I get good results.

I hope this has been helpful for you. Feel free to email me your newbie mistakes and I’ll consider updating this Blog to perhaps 15 newbie mistakes.

Happy music making,

Jason

Friday, April 23, 2010

Drum Elements Section Update

This is in reference to yesterdays blog about making the drum elements section. I finally made all my presets that I wanted, and a bunch of new drum racks to just drop into them. If you dont understand this, see my post from yesterday. A few notes worth noting while doing this.

1. Be really careful when making your 1-64 preview clips. If you miss one of the midi notes, you will go insane trying to figure out why the wrong sample is playing or why it sound weird if they are similar samples. Just be careful!

2. Within your simpler, use COMMAND G on the simpler to make it into an instrument rack. This is nice so you can make a chain of simpler to add more dynamics. This is especially good for snares and kicks.

3. If you forget to put the velocity up on a set of samples that you made, an easy fix is to put the velocity UP on one of the samples within the drum rack...then right click, and select "Copy Value to Siblings". Easy fix.

4. Its nice to toss on a small reverb that is ready to be used on each track. Usually, it will need a small amount of reverb, especially coming out of the simpler (if its cutting off any of the sample). For a preset, use a reverb with small predelay, and small decay time. I mapped out the dry/wet knob above each volume knob on my VCM.

5. Check your samples in your drum rack before saving. Some samples, if you drag in large groups, and not set to start on the transient. Set it on the transient, and then CROP the sample so it will start right where you want.

6. On 1/16 HH's, just a small change of one or two velocities within the HH's can make a totally different sound. So make tons of HH midi tracks with just small amounts of change. You will be very surprised at the difference.

7. Color coating helps here!

8. Save some presets with the SWING changed...especially your snares. Its nice to just switch between 2 sounds with the swing different. Makes a huge difference for house music.

9. DONT UNDERESTIMATE your simpler. Just by moving the length of sample (shortening it) can make HH's sound so much better. Toss on some reverb after to make it sound less sharp.

Thats about it. Here are a few more screen shots scrolling down of this elements section.


Well thats it for today. I got improv guitar players and a DJ coming over for a session here tonight! Gotta prepare my set a little more. Hopefully get the latency problem fixed with the monome.

Peace!

FroBot

Thursday, April 22, 2010

Drum Elements Section for Track Making Efficiency (Launchpad Option Too)

Last night, I had a great idea right before falling asleep, so I had to put it into action this morning. This is regarding your drum, snare, & HH tracks when making a track in ableton live.

Now, when making tracks, part of being a successful track maker, is having all the tools you need accessible and swappable at any time. Ableton does have a nice hotswap option that you can use to dig into your browser, but this is not fast enough for me, so I like to use my novation launchpad as a preview type tool, and mixed with a simpler, it can be great for preparing a template for your drum tracks making ableton template. I called this my "ELEMENTS SECTION".

In every track, you will have a KICK, high hats, and snares. So it makes sense to prepare your template with these in place since you will be using them 100% of the time. But you never know which one, and you may also want to have some control over the attack, release, pitch, lfo modulation, etc.

In my previous ableton track making template, I mentioned about having an ELEMENTS section. Since I primarily make house music, I wanted to have 4 tracks (dedicated to my VCM 600 right side) that controlled KICKS, SNARE, 1/4 HH, and 1/16 HH. These are basic elements that I need almost ALWAYS in a track. What I had before was pretty simple. Just 4 audio tracks, with the samples I wanted within them. Kicks on the 1, 2, 3, 4, - Snares on the 2, 4, - 1/4 HH on the 1.2, 2.2, 3.2, 4.2, - & 1/16 HH on all 16th notes (with changing velocity). This was nice, but I want to have more control and more options. Before, my elements section looked pretty simple, with some frequency shifters in each.

GOAL - Drum Racks with tons of samples. Make midi clips represent a standard use for each clip in the drum rack. Copy and paste to simpler. Many preset midi clips made in the simpler track. Full control over envelopes, filters, & modulation....QUICKLY!

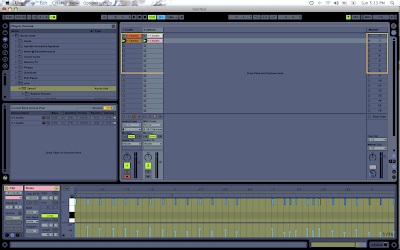
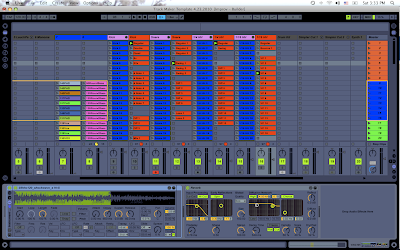
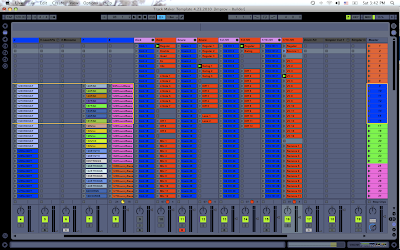
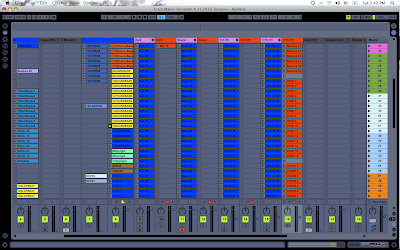
My new idea is to do this. Instead of using 4 audio tracks...each element will be given a DRUM RACK, and a SIMPLER (beside eachother). If you look at the next photo, I have put a drum rack and simpler beside each audio track that was in my elements section (I will delete the original audio file track when finished, leaving 8 midi tracks -

The tracks labelled in green are my past audio elements tracks.

Now, the idea here, is to be able to make drum racks full of each element, like kicks, snare, etc...and then be able to drop them into the drum rack from my browser. I could make TONS of racks (more options). I will only use 64 squares in the drum rack, because that will match my launchpad, and I will be able to preview them or even tap them in outside of 4/4 if I like. But since most of the time a kick will be 4/4, I want to prepare midi clips that will trigger each of those particular samples within the drum rack, effectively using a different sample within the drum pad each time. The reason I am adding a SIMPLER beside it, I will explain in a minute. Lets talk about each of these elements separately, and I will walk you through the ideas I had for each.

KICKS - So the first thing you are going to want to do is create a midi clip to trigger the first sample in your drum rack. Add a midi clip to your kick drum rack, and draw in a note where you the first kick is. Since I will use the launchpad to trigger these sometimes, my first note is C1. It looks like this -

Now, make sure you dont draw in the note too short, or it will cut off any kick sample that happens to have a TAIL on it. Since I do house, there wont be any samples longer than my chosen size.

Next, we need to make copies of this midi clip, but instead of them being at C1, you need to make one to match EACH sample in your drum rack. I am making 64 of them for my launchpad, so I end on Dsharp6 (64 different midi clips). This is a little bit time consuming...copy, paste, transpose up, copy paste, transpose up (64 times). After this, rename your files and save. Mine looks like this -

Now, what you will want to do (I am going to do this later this afternoon because of my huge sample collection), is select many good kicks to put into your drum racks. You should SAVE these drum racks for later use...because they will be just drag and drop later. Fill your drum rack full of 64 drum samples, and now as you click any one of your midi clips, it will make a nice loop out of that sample...effectively auditioning tons of kicks right at your finger tips.

Now the reason we put a simpler in there is because sometimes, it will be nice to transpose the note of that sample. This is not so important with a kick because you can easily just transpose it within the drum rack sample...but in a minute, when we talk about High hats and snares, it will make more sense.

SNARE - Now, we need to do the same with the snares, but on the off hits (like in house music). Now in this case, I am going to enter 2 notes instead of one. The reason I am doing this, is because it is common in house music to have 2 of the same snares, but one with a quick release, and one with a long release to make a more bouncy sound. By adding 2 notes, I can later edit the clips envelope, and make one of the snares SHORT and one LONG, or any other effect I want to do between 2 snares. If you think you would need 4 instead of 2, go for it. I dont usually see the need to have 4 notes, just 2. Be sure to make your midi notes as long as possible because sometimes a snare sample can have a long reverb after it, and you dont want your midi note to shut off and cut the end of the snare sample. My first one looks like this -

Now we need to do that same copy and paste thing 64 times for each pad in the drum rack.

COMMAND A is your friend here to SELECT ALL and do this more quickly each time. This can be really tedious, but its for a template, remember you will be reusing this ALL the time for making tracks. My snares now look like this -


I saved them and named them. Again, the coolest part if this is using the simpler after this, but I will explain this after explaining all the drum racks first.

1/4 HH - These are place on 1.1.3, 1.2.4, 1.3.3, 1.4.3. Again, must be long enough to not cut off long high hats sound. Here is mine -
Now we need to do the same thing as we did with the kick and the snare, and make 64 of these matching the drum rack samples. Looks like this -


1/16 HH - Now this is the hardest of them all. Before I go too far, lets realize that we will NOT be using this drum rack (for any of the elements), but rather the simpler...so what you are hearing in the drum rack does not matter so much as being able to audition tons of samples quickly, and find what you want. So you pretty much need to be able to hear different types of sounds before they will go into your simpler track. The only problem with 1/16 HH's is that, when all played at the same velocity, it will sound like shit...even while previewing. So, for the purpose of them NOT sounding like shit, I decided to go with a house standard on my velocity of (LOUD, SOFT, SOFT, SOFT). This just makes it sound nicer while previewing. I will be changing it all around anyway in a minute, but for the purpose of the drum rack, lets do that. I decided on my velocity to be 96, 64, 64, 64. I know this may sound like shit, but again, we will be making presets in simpler for nice sounding ones. This is just to audition a 1/16 HH at anything but straight same velocity -
Now we need to make copies of this 64 times just like the previous ones. Here is mine -

Now you must keep in mind that your midi velocity will not take effect within your drum rack unless you have the velocity bar up to 100%. So, in the future, when you make your 1/16 note HH drum racks for previewing, you will need to move the velocity bar up to 100% on each of them when you make it, so you dont have to do it every time. DONT FORGET THIS...or else you will be preview flat, shitty sounding HHs. It is this little bar by the way (see the velocity of simpler in the bottom right corner) -
Just edit that parameter of each drum rack pad before SAVING it, and it will be set each time.

NOW LETS GET TO THE FUN PART!!!! Now that we have our drum racks made for previewing each sample, we can now make clip templates within each simpler to change the way a certain sample that you choose will sound. Since your samples are originally in a drum rack, selecting a different note on a midi controller will start a different sample. What we want to be able to do is use that SAME sample, but be able to change the pitch of each. There are certain combinations for each element that will sound good, like using a harmonic of a sound, or an octave up....different velocities....MILLIONS of combinations. I will only show you a few because I will be spending about 5 hours or so on this section to make TONS of clip that will be different from eachother.

Now, I might be getting ahead of myself. Lets re-explain in more detail what we are doing here.

Since you now are able to hear different samples that are within your drum rack...looping with your music...this will help you choose the sound you want. Once you have selected a sound that you want, you will want to open up the drum rack pad of choice, and view the sample. Then, click the box around the sample, and click COPY. Then go into your simpler that is sitting beside that drum rack, and PASTE that sample into your simpler. (make sure the velocity bar is up to 100% on that simpler too, or else your veloctity presets you make in a minute will not take action.)

COPY -
PASTE -
Now your sample that chose from your drum rack is within your simpler. Now its time to make some clips to activate that differently, but pre-decided. The kick is probably the most boring, but easiest to understand. Velocity is not so important (although it can be for an experienced producer making kick rolls). But for now, the kick, we will just be making some different kick styles.

Lets now go back and create some clips in our simpler. Remember that C3 plays the sample in its original form...so we will draw in notes in C3. I also like to change the midi input of the simper to my midi keyboard rather than the launchpad because I can play sounds based off notes, but you can use anything you want really as long is its mapped in normal piano progression.

If my set is looking confusing to you, I am working within the track TO THE RIGHT of the BLUE LIST that says DRUM RACK. That is my simpler. In the first midi clip, i made a regular 4/4 kick on C3 and renamed the file "REGULAR" -
In the next midi clip...I made it double speed and renamed the file to DOUBLE -
In the next, I made it double the speed of that and called it QUAD -
You should note that when making rolls like this, it is probably nice to change the velocity of some of the drum hits so it doesnt sound so stale ....or even edit the attack parameter in the clip envelope so they dont all sound the same.

Now, the possibilities are endless with this. You can remove a few kicks to make a more BREAK sounding kick, make super fast rolls, whatever you like. Edit the envelope to make it more dynamic too if you like. Make tons of clip presets that are ready to be used at any time if you like. You will never have to draw them in.

Its also worth noting that you can now DELETE your original DRUM RACK when making track because you will no longer need it if you have decided on a certain kick. JUST DONT DELETE it in your template....only on your NEWLY named file you are using for your particular track.

Now the kicks are pretty easy. You can apply the same concepts to the SNARES or the 1/4 HH. The only other one I want to talk about here is the 1/16 HH. They have MANY MANY options for different sounds...by using notes, velocity, and timing.

This is the main reason we are moving these into a simpler. Some of the best HH tracks can be made by using ONE HH sample at one pitch, and another one at another pitch. There are so many combinations for this...and you can make as many preset midi clips as you like.

Lets start with one that is the SAME as the one in our drum rack - I called this one REGULAR...even though the velocity is HARD, SOFT, SOFT, SOFT. That is what I consider to be regular in my production case -
Now, we have 3 main options when playing with this one (not including what we can do in simpler).

1. Change the Velocity
2. Change the number of hits.
3. Change the Note.

Lets start with #1. The next file, I will make the same as the last, but just change some velocities of each note. In this photo, I changed it so it is HARD, SOFT, HARD, SOFT. I also renamed the file to VC1 (velocity change 1) -
Now I will make many more of these. But lets move on to #2. Lets just remove some of those notes to get a different sound. I renamed it it R1 (removed 1) -
That is a nice little change to the high hat sound to make it sound less boring for sure. You can make MANY MANY of these, each with different velocities too.

Last #3, and the coolest one of these. Now, since we are using a single simpler within its own track rather than within a drum rack, changing the note within the midi clip transposes the note up or down...so you can make it sound like someone is playing 2 different high hats at the same time. I renamed this NC1 (note change 1) -
Now by mixing these 3 possibilies, you can make thousands of combinations of HHs. Make ones that you like, and then they can be played quickly depending on which sample you want to put in. GREAT huh!

Now, I forgot to mention one of the BEST parts about this. The fact that your sample is now within a simpler, gives you MANY more possibilites to change that sample (that impulse doesnt have). You can now change the attack, decay, sustain, & release of the sample. Also change the LFO, filters...basically ANYTHING within simpler. This gives you A LOT more control over the sound for sure! Make it sharper, longer, filtered...anything you want really! The possibilites are endless.

Now, just make tons of drum racks FULL of kicks, snares, & HHs...and your good to go! This is great for people with HUGE sample collections of kicks, snares, HH...you can just DRAG in a drum rack full of 64 different kicks....try each one, choose one, then choose a preset you made. You wont have to draw anything in (unless you want to change an old midi clip preset).

The best thing about this method is the speed that you can audition, test, and change different kinds of drum samples...on the fly. You can make tons of different midi clip options, and then apply them to different samples. It is really nice because certain styles of music (like house in my case) have certain elemental things within the drums. So you can make those elements in midi clip presets, and just change between them all on the fly. So many times, you will find yourself SATISFIED with a certain drum loop, without really trying it other ways. This way, you can try tons of possibilities (pre-decided), and then choose the best for the song you are making. You can always go in and edit one of the midi clips to get it EXACTLY the way you want.

Well I hope this helped. I just wrote everything down while I did it...so I will work out the bugs and maybe blog about it later! Enjoy!

Peace!

FroBot

Wednesday, April 21, 2010

Studio Makeover


So yesterday was one of the luckiest days for me ever! My JBL speakers (which sucked majorly) have had a broken tweeter for the last 2 months. It has made making music impossible. They always sounded terrible, and it was the last final piece of the puzzle for my studio to get new studio monitors. I had originally wanted a set of Rockit 5's because my house is small and I cant be too terribly loud here. After realizing that it was going to be like 600 bucks at least after shipping from overseas....and, I really didnt want to wait much longer, I had decided to go out and buy a different set of monitors yesterday...maybe fostex or something like that. So I woke up early, did a little reading on some models, and then headed out to shinsaibashi. I arrive in shinsaibashi before 10am...made my way to softmap....but it wasnt open yet. So I decided to make a hike (I needed the exercise anyway) up to shinsaibashi and check out miki gakki and maybe the yamaha store. Went up there, all of them are not open. So, I went to triangle park, smoked a couple cigs, and waited until 11 for the DJ store at BIG STEP to open. At 11, I went there, and noticed they had a pair of rockit 5's (I thought I couldnt find them in Japan). They were 600 bucks...100 bucks more than I had planned to spend, but I had the money on me, so I was like...damn, get them. Well, turned out, they didnt have any new ones left, and I didnt want the ones on the shelf...so, the guy working there mentioned that they may have them at the other miki gakki location just down the street. I decided to go down there...but for some STUPID reason, I couldnt find the place. I have been there a million times, but I dunno, I missed it. I ended up walking the whole way back to Namba...a nice little hike. I thought to myself...shit, the other miki gakki probably doesnt have them, fuck it, ill just go back to softmap and get the fostex ones....better than nothing, and I need some god damn monitors. So I went all the way back there...they are STILL closed. There is no sign outside the door either saying when they will open. So im like shit...is this karma or something, telling me to find that other miki gakki and buy the rockit 5's if they have them. Damn. I will go all the way back to shinsaibashi. So, another long hike the whole way back to shinsaibashi...my legs are getting tired by this point, and I have smoked a half pack of cigarettes in like 2 hours....just bored and wanting to find some fucking monitors. Well, finally, I end up finding the other miki gakki, and I go in to check to see if they have the rockit 5's. There are none on the shelves, only the fostex ones, and a few other yamaha ones...so I assumed I was going to have to get one of those for 600 bucks or so. I went up to the clerk and asked them if they had any rockit 5's, and he went and got another guy, who went and got another guy. They said "yea, we have ONE pair left in the back". I was like "SHIT ILL TAKE EM!!!!". I was stoked, out 600 bucks that I dont really have to be spending right now, but still stoked. So, the guy brings them out, new in the box, wraps them up while I make small talk with him. Turns out hes a house producer, so we had a bunch of stuff to talk about. I finally get to the check out and he says "31,000 yen" (which is less that 300 bucks....which is less than the price of one). I said kindly "you only rang up one of them, there must be a mistake". He said "no, whenever its the last one of a model, and the new models for the new year are coming out, you get 2 for the price of one!" I felt like a little kid in a candy store! "NO SHIT!" I said. He said, "Just to make sure its what you want, lets compare the new specs and the old specs to see whats different". So we did, turns out, the new ones dont even go as low in Hz as the old ones....maybe there could be some improvements....but not enough to change a pair of rockit 5's for less than 300 bucks!!!! I left the store, called my wife in excitement immediately...and looked like a fucking idiot grinning ear to ear the whole way home on the train.

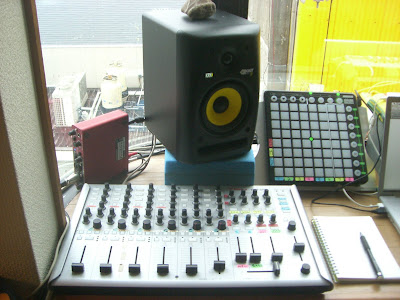
Anyway, I got home...checked to make sure they sounded ok...sounded fucking GREAT! So, I decided to totally remodel my studio and move a bunch of things around to make it feel different AND sound different. Hopefully it will inspire me a little more. I took a bunch of photos after I finished cleaning everything, which took about 4 hours yesterday night and this morning. Here are some photos -


Well, since I am still hitting the books hard for the next few weeks, I probably wont make any music, but rather study my soft synths that I like, and see what the brings. This week, im studying sound design and how to make each separate part of dance music from scratch. By setting my keyboard controller to the side, I can play it more like a real piano instead of having to reach over shit to play it.

Anyway, thats it for today! Time to rock out!

Peace!

FroBot

Monday, April 19, 2010

Reverb in Ableton - Understanding Each Parameter

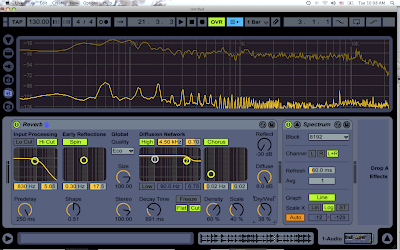
Today, I am going to look at Ableton Live 8's built in reverb. This is not so much a tutorial, but a way for myself to look at it better. Like I mentioned last week, i'm hitting the books hard for the next few weeks, and I felt like I really didnt understand all of the reverb options. So, after reading a few books, and playing around with it a while...I wanted to note everything piece by piece to help me remember. I toss on a spectrum to give some visual feedback too.

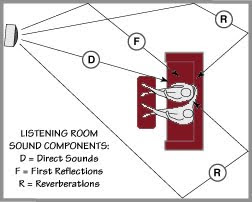
Reverberation is a natural occurrence that happens after a sound leaves a speaker, and before it reaches your ear. It is not something that occurs in synthesis, and therefor, if we want to create it...we must do it artificially. When sound leaves a source, some of the vibrations (if you are close to the source) will reach your ears directly. The other sounds will bounce off other surfaces like walls, the ground, buildings, people, your own body, etc...and then reach your ear. This is what causes reverb. Our brains are actually so used to this occurrence, that we are able to determine our location size (such as a room, or in a dense forest) without actually using our eyes or other senses. Our brains actual enjoy this sound, and can give the deception of distance to sound. These sounds bounce off other objects like echoes...but so close in time to each other that they cannot be heard distinctly themselves. As you were to go farther away from a large reflective surface, the time between echoes gets larger as the sound must travel further. Eventually, you will be able to hear distance echoes in a delay fashion, just like when you yell into a valley.


Now, what is even more interesting about reverb is how a wave reflects differently off of certain objects. Since a surface has a direct frequency response, depending on which frequencies the surface absorbs, it will reflect different frequencies. This is why you put padding on walls of a studio because the softer surface will absorb more of the high frequencies making less natural reverb in the room. If you were playing in a big church or something, it would be the opposite...whereas the hard walls reflect the high frequencies.

By using reverb correctly, you can trick the ears into perceiving audio as further away without actual lowering your volume fader. Half of music is the science, the other half is how our brain is tricked into perceiving it. We must understand both to understand reverb especially.

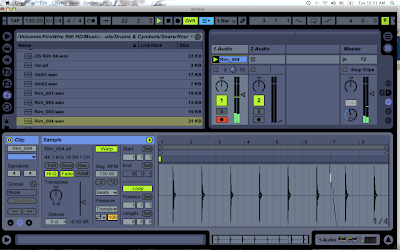
So lets begin. For the purpose of this tutorial, I have put in a snare hit so we can easily see the spectrum change with each snapshot I take.

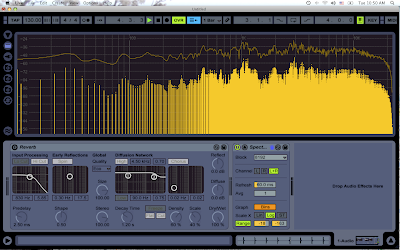
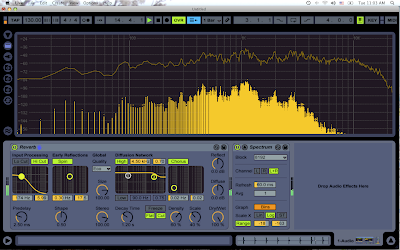
Here we are with the snare sample running, with the reverb off. There is a nice little peak around 1khz. Its easier to see the dry wet I will show in a minute if we switch the spectrum to "bins" instead of "lines".

REFER TO THIS AS NORMAL
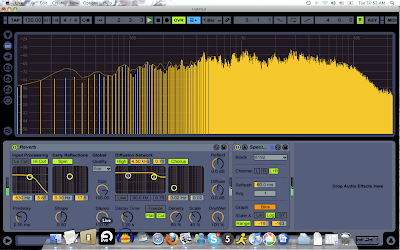
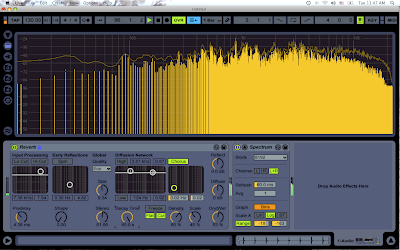
Now, when we put the reverb up to full blast on its normal settings (just drag and drop), you will see a db decrease, and also muddiness in the valleys of the frequencies. Also, if I were to show you a few snapshots of the same reverb in action, you would notice small, unpredictable changes in different frequencies of the waveform.

You notice the longer valleys in the high frequencies are mostly gone with the reverb up. That is what reverb is doing to the frequency spectrum.

Now, we have a lot of control however on what exactly it is doing to these frequencies. Lets go through all the presets on the reverb. (left to right)

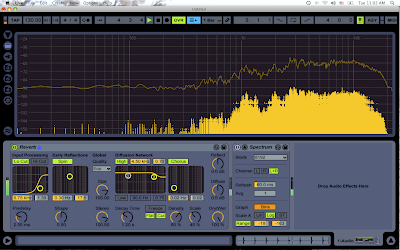
First, the whole reverb comes through the filters. You have a high cut and low cut. You can shut them off to save CPU power. Below them are your normal frequency and bandwidth options that are on normal filters. This can be really important if you actually want to kinda of "tune" your 1st reverb reflection to match other elements, or the element that you are putting the reverb on. I usually never start without touching this with a spectrum first.

Heres one with the highs standing out -

Here is one with the lows sounding out -


(sorry, screenshot is hard to get the photos just right, but the top line is basically what you want to watch for)

I will shut off the filter for now.

Next is PREDELAY. Predelay is the time it takes from the initial sound to the first reflection that you hear. (kind of like how far away you are from the relective object) This is really important to get just right on a reverb. Sometimes, if your reverb predelay is set too quickly, it can muddy the attack sound of a certain instrument. However, if it is too long, it could interfere with an upcoming element in drum loop or a synth lead. You must use this with caution, and find the right distance for the first reflection. If you are just looking for a light reverb sound, a short predelay would be fine....but, you can make some GREAT sounding reverb effects with a long predelay. Also, if you have the dry/wet knob up the whole way while this is running, you will ONLY hear the first reflection, and not the initial sound...which will create a nice delay depending on the predelay time.

For the purpose of understanding this tutorial, you can set your predelay to a LONG setting so that you can hear the first reflection distinctly, and therefor understand what the reverb by itself sounds like. It will sound more like a delay, but it will be distinct.

Next we have the EARLY REFLECTIONS section. This helps sculpt the sonic properties of the first reflections that you hear. Lets start with SHAPE. You can read your ableton manual for the exact science of what it is doing...but from a users standpoint...with a lower setting...the reverb will be a little muddier and longer. With a higher setting, the first reflections are lower in db, softer, and faster. The long reverb does not seem to hang around as long.

SPIN - adds a little bit of modulation to the early reflections and is one of the less strong parameters in the reverb (in my opinion...I guess you could argue) You can control the modulation frequency and depth with the x - y axis.

GLOBAL SETTINGS - Eco, mid, high - These are performance settings. HIGH uses up more CPU, and the lower settings perform better when running tons of other things.

Size - Controls the rooms size. This is a really neat parameter. First of all, I think this makes it feel like there are pipes in the room or like, really metal type walls when set low. Very metallic sounding. With a higher setting, you get a more shifted reverb sound...a little more natural. One really cool thing about this is if you automate from RIGHT to LEFT...you can make almost a flange sounding reverb if done quickly on a stab or snare. This is a really creative part of the reverb. Also, depending on where you start the size and automate it LEFT TO RIGHT, you can create a new tones, and then SLIDE it into a washed out reverb. If you were to find the same (or harmony) pitch of the sound being reverberated, you can get a nice effect.

STEREO - This is pretty straight forward. All the way to the right, the left and right channels are giving a different stereo reverb sound (natural when in rooms because your ears hear different sounds reflected off of different objects depending on which side the reflection came from). All the way set to the left, the reverb is mono. This sounds very FAKE and unnatural...but can be useful in production.

DIFFUSION NETWORK - These settings connect also to the DIFFUSE knob on the right side (which controls in db, the volume of diffusion). The diffusion is the decay of the early reflections. There are low & high shelf filters which can help you set the frequency of your reverb. These are very important also when making a reverb sound nice. It helps to match the frequency with the actual frequency of the instrument....or, shut it off if you want it natural. There are frequency and bandwidth options on this also. This is also a nice parameter to automated on a stab or snare to get a nice FILTER within the diffusion. With both of the HIGH & LOW deselected, the filters are off.

Now, those filters are VERY MUCH affected by the DECAY TIME. This part is SO important to get just right. It is basically HOW LONG your reverb will last. By setting this to the left, you can get a nice, short, small, reverb to help polish up a stale sound...or, set it to the right...and get a loud, overlapping reverb sound that will definitely annoy the hell out of the neighbors. However, with the decay time set all the way to the right, and some automation within compose...some nice sweeps and other weird hits can be made if later modulated with an LFO, and given some volume automation.

You can see in this picture, that with the decay time set to the maximum, a constant sound is heard and doesnt really drop too far in db really. I know its hard to tell because mac snapshot doesnt react fast enough, but in this picture, where the DARK bars are sitting, is the lowest they are going without actually dropping away like the normal snare hit does.

Freeze - This will freeze the diffused reverb when captured. This can get really annoying too as the sound will stay frozen until deselected. This has some creative uses in dance music. The cut, when on, makes it so if the reverb is activated again while frozen, it does not ADD more sound the the frozen reverb. If it is off, it will add on top of that reverb again and again as the reverb is activated.

FLAT - This is a really neat little parameter. It works in conjunction with your diffusion filter. If the FLAT is deselected, whatever frequency you have being changed in your filter...while frozen, will slowly lose energy in those frequency bands. If you could see a video of the spectrum, you could actually watch the high frequencies move slowly as they fade away. (cool effect) If it is on, those frequencies will remain the same.

Density and Scale control the diffusion just a little bit more. Sometimes when you play with these parameters, you dont notice much of a change. But, if you go to the SIZE knob, and make your room size really small, put your density up, and then move the SCALE knob...you will notice a big change. You can even automat the scale knob with a small room size for a nice flanger style effect to your reverb on a short hit. But when moving the scale, you can also change the diffusions pitch a little, so when using this in its creative form while making a track, be sure to check the pitch of the scale setting, especially if your reverb room size is small.

CHORUS - This is pretty straight up. Adds chorus to the diffusion...basic modulation when 2 sounds are played a little bit out of phase. You can also control the db level and frequency...same as a regular chorus x - y axis.

All of these are then controlled by the 3 knobs on the right hand size - REFLECT, DIFFUSE, DRY/WET.

Reflect is the reflecting level in db. You can make it louder, or softer.

Diffuse is the diffusion level in db. You can make it louder, or softer.

Dry / Wet is how much of the source signal and how much of the effect signal is being heard. To the left, no effect...only source signal. To the right, only effected sound, no source sound.

Well, that just about covers everything. Hope this helped. Make sure to shout what you know about reverb here, and make it echo!

Peace!

FroBot